Define Floor Plan Attributes of Doors/Windows
There are two ways to define the attributes (line type, pen, fill) of Doors/Windows on the Floor Plan:
1.Use the GDL attributes (line type, pen, fill) defined in Door/Window Settings. This method gives you a great many line/fill parameters, giving you greater control over the precise and detailed display of the opening and each of its components separately.
2.Use the 2D attributes set for the opening on the Floor Plan and Section panel of Door/Window Settings. This method involves a reduced number of parameters for simplicity.
Both approaches are detailed below.
Use Fills on Doors/Windows
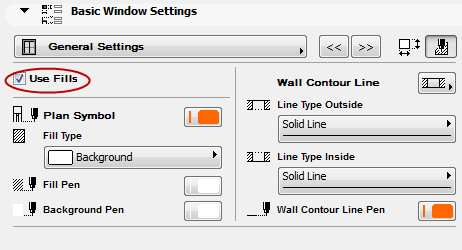
To apply any fills to the door/window, make sure you have enabled the Use Fills control
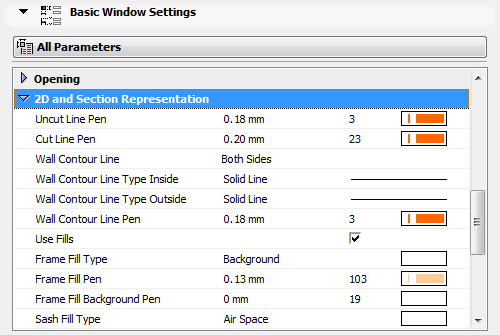
Use 2D Attributes from the Floor Plan and Section Panel
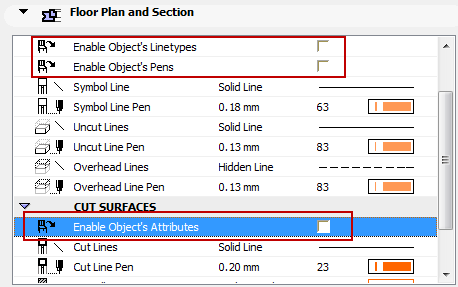
Set the attributes for cut, uncut and overhead lines and pens as needed on the Floor Plan and Section panel of Door/Window Settings (or the Info Box).
For these settings to take effect, make sure that the Object’s Attributes checkbox is disabled. Otherwise, the Door/Window will be displayed with its GDL Object attributes.
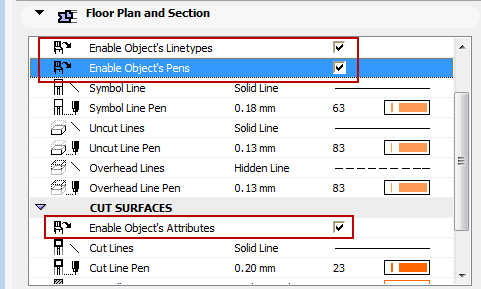
If you want to use the GDL attributes defined for the object:
Make sure that the Enable Object’s Linetypes (and/or Pens or Attributes) boxes are checked on the Floor Plan and Section panel.
This means that:
1.The attributes defined for these parameters on the Floor Plan and Section panel will have no effect; and
2.The GDL Object Attributes will be used.
GDL Object Attributes are defined for the Door/Window in Door/Window Settings, in:
•the Custom Settings graphical interface (the name of the panel varies depending on the type of Door/Window), or
The parameters are the same in both locations.
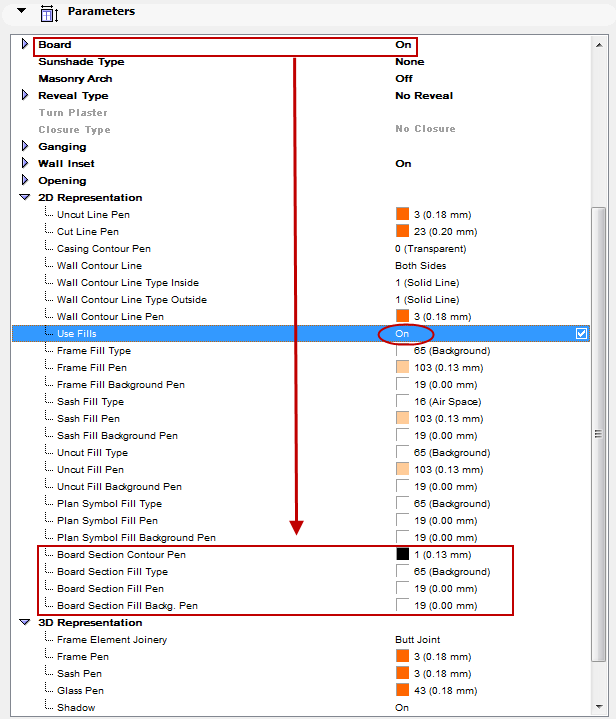
On the Parameters List:
Use the controls under 2D and Section Representation to set attributes for components of the Door or Window object.
Note: You must turn the Use Fills parameter On to display all the fill parameters. If Use Fills is off, the opening display will not use any fills on any of the door/window components. (In this case, the Fill controls will not be available on the Parameters panel.)
Note: Additional attribute parameters appear for every window/door component that is set to On (e.g. Board, Casing, Masonry Arch).
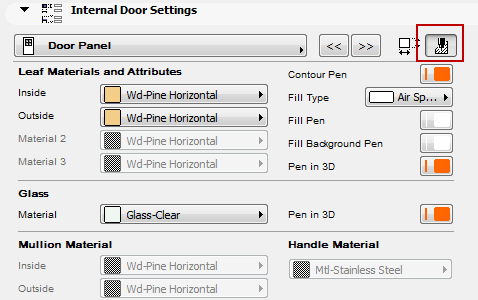
In the Graphical Interface:
Use the pages of the Graphical Interface to set lines/pens/fills for each component of the Window/Door.
•Depending on the components you have chosen for the Door/Window, use the respective Attributes sub-pages of the components (e.g. Board Attributes, Sill Attributes, Frame Attributes, Panel Attributes) to set the lines/pens/fills for each component.
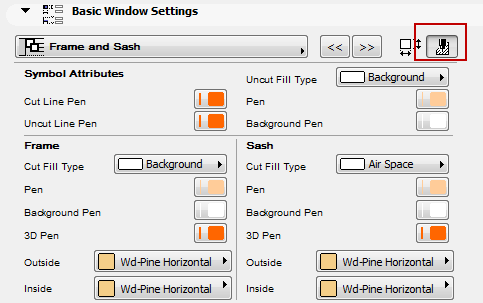
•On the General Settings page (Attributes sub-page), check the Use Fills box to enable all fill parameters on every Attributes sub-page. If Use Fills is off, the opening display will not use any fills on any of its components. (The Fill controls will be grayed on all of the Attributes sub-pages.)
See also Using the Graphical Interface.
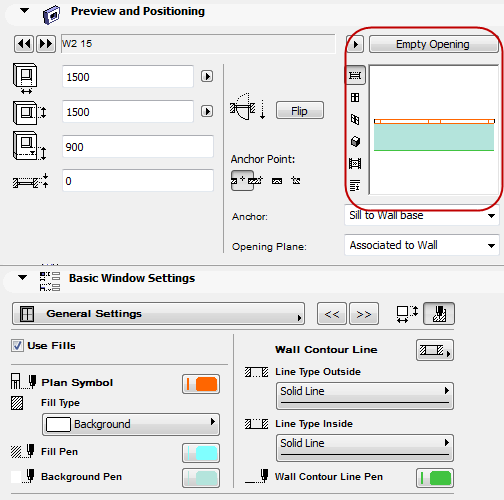
While setting the Attribute controls, it is worth displaying the Preview from Door/Window Settings to see how your definitions will affect the display.