Add Annotations to Schedule Previews
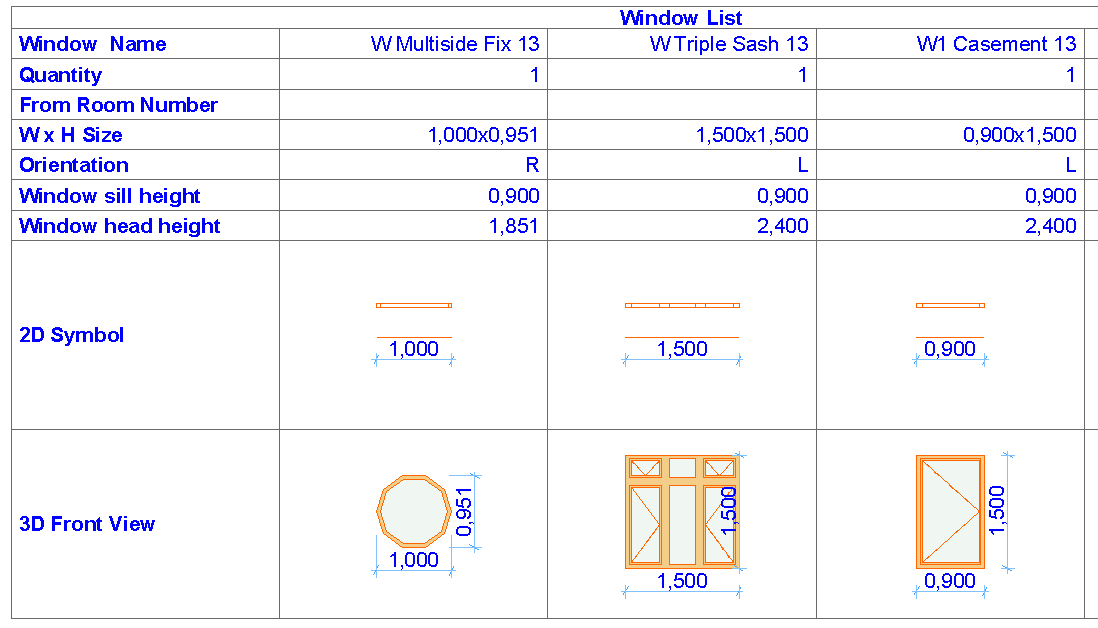
If your Interactive Schedule includes previews of objects, doors and windows, you can add dimensions to these preview pictures in the Schedule.
Note: To display previews using lines only (no shaded surfaces), make sure you click the appropriate “Override Fill” checkbox in the Override Fill Display panel of Model View Options (Document > Set Model View > Model View Options).
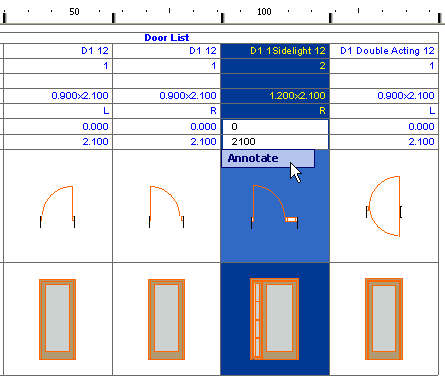
1.Double-click the cell of the preview which you wish to annotate, or
Select the cell, then click on Annotate.
2.The preview picture opens in a separate 2D window entitled Element Preview.
3.Use the available 2D tools to annotate the preview picture: dimensions, labels, text. You can also add annotations from available libraries, using the Object tool.
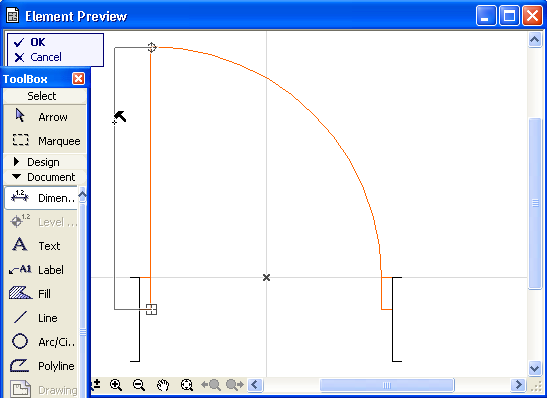
4.Click OK in the drawing window’s menu to close this window and apply the annotations to the selected preview; or click Cancel to close the window without applying any changes.

Dimensions in the Interactive Schedule preview cells can be associative: if you modify the object size in the project, its dimensions as shown in the Interactive Schedule will be modified accordingly.
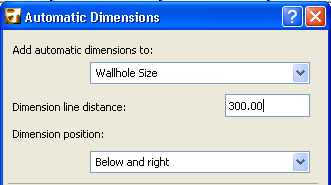
Automatic Dimensioning of Door/Window Previews
If the selected preview cell contains a Door or Window, the Schedule Options include the Add automatic dimensions option.
Check this box to add automatic door/window dimensions to the selected preview picture. Below the checkbox, click Dimension Settings to set dimensioning options for the preview picture, in the appearing Automatic Dimensions dialog box.