
Create Single Interior Elevation Viewpoint
Draw the IE limit line using the single line method to create a single IE viewpoint.
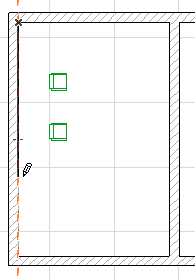
Note: In contrast to Sections/Elevations, when creating an Interior Elevation you start by defining the limit of the view (e.g. the wall you want to see), then click to define view line (the place from which you view the wall).
1.Click once to begin the limit line.
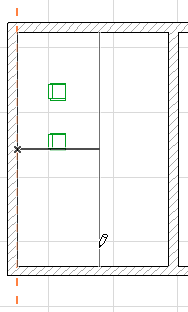
2.Click a second time to complete the line.
3.Move the cursor to the desired view position.
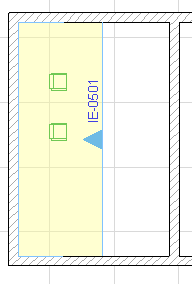
4.Click a third time to place the IE marker.
To define the Marker style and position, use the controls in the Marker Panel of Interior Elevation Settings.
See Interior Elevation Marker Panel.
5.A new IE viewpoint is created and listed in the Project Map. It is assigned its own IE Group, even if there is only one viewpoint in the Group.
Many other aspects of Interior Elevation viewpoints - status, display, marker reference, and updating - work the same as in Section viewpoints.
For more information, see the following topics:
Model Display in the Section Window