After building your model in ArchiCAD, you need to create good camera positions, apply shaders to your surfaces, place light objects, set rendering parameters and create a test rendering. From the test result, you can identify any needed adjustments to surfaces, lighting etc.
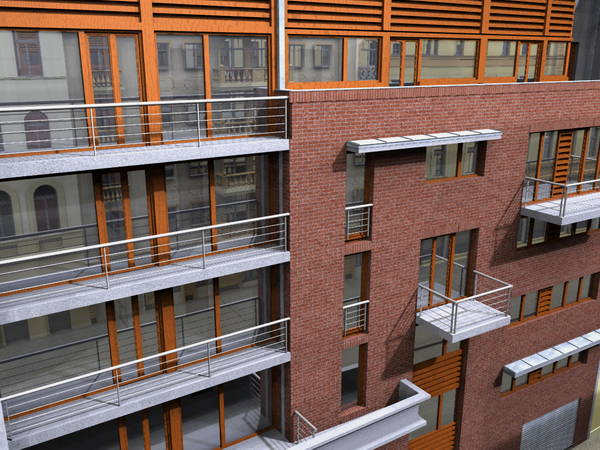
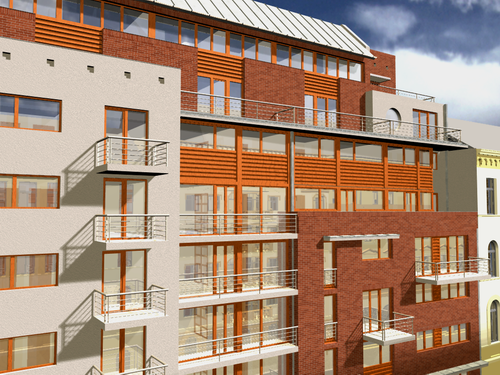
Let us start with the following exterior detail of a residential building rendered with ArchiCAD’s internal rendering engine.
Here we have some textures and shadows, but we would like reflections, better shadows coming from ambient and diffuse light sources and procedural shaders.
Let us start with the surfaces. We can select the surface of wooden frames and work on that.
In Options > Element Attributes > Surfaces, you can choose a shader in the Color category or load one from hundreds of predefined shaders located in the Archives. We used the Oak shader and modified it a bit.
For more information, see Surfaces.
It may be useful to create a Wall in your project and then assign your currently edited surface to it. Then you can create renderings of only this one Wall while modifying the surface shader, thereby saving rendering time in this phase.
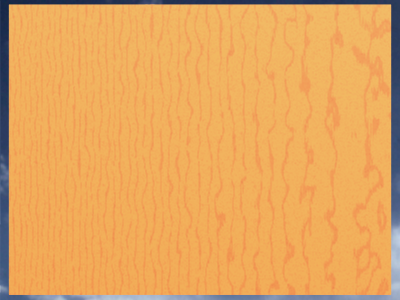
Let us say we have the following shader displayed on the side surface of our wall:
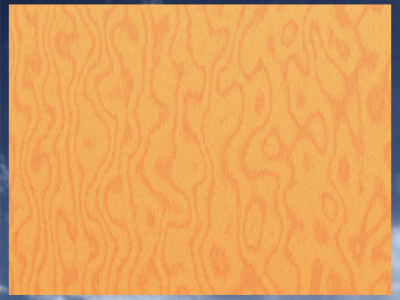
The above ‘Wood’ shader is a procedural shader. The surface created by the shader will be unique, calculated from a set of parameters which provide great variability and ensure that the surface will not show a tiled effect (a tiled effect means that, if the surface is large enough compared to the texture size, you can see where the pattern ends and then is repeated).
In the above wood shader the wood is too ‘curvy’, which we want to make more realistic. The Gnarl parameter defines this curviness. After reducing its value, the texture will look like this:
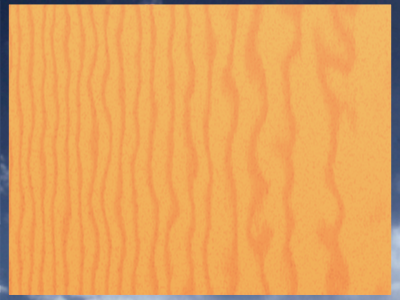
We can make it a bit denser by reducing the RingWidth parameter and also reduce its relative size by lowering the value of the Scale parameter.
When you are satisfied with the result you can go on to the next surface. Of course you may set other shaders as well, such as Reflectance or Transparency to produce a more sophisticated texture.
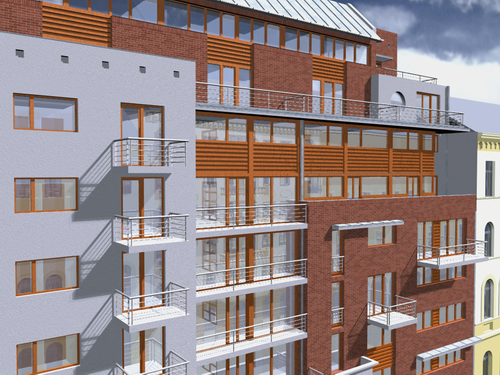
Next we can place light sources on the Floor Plan. You can simulate the Sun by either checking the Sun checkbox under LightWorks Effects in the PhotoRendering Settings dialog box or placing a SunObject lamp on the Floor Plan. These two light sources achieve different effects and have different sets of parameters. We chose the SunObject lamp for this example, as it has a much wider range of light intensity that can be influenced by its Light Intensity slider or its Number of Light Sources parameter. This produces better-lit surfaces and better shadows.
Ambient lighting coming from the environment can be turned on with the Ambient checkbox in the PhotoRendering Settings dialog box. Diffuse light effect coming from the sky can be achieved using the SkyObject lamp. Check the Lamps checkbox in the PhotoRendering Settings dialog box for the SunObject and SkyObject to have an effect on the rendering.
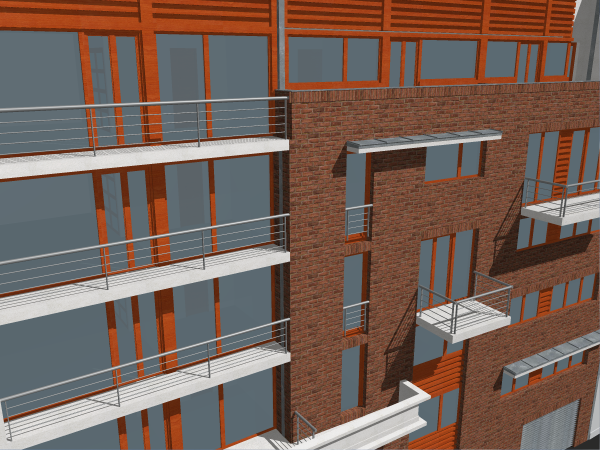
You may also enable Camera lighting and place additional individual lamps and light sources. In this example, a SkyObject and a SunObject lamp was placed, plus Ambient light was used for renderings.
There is great variability using these two lamps objects. Both can have different strengths of light, the color of their light may be defined, shadow quality and softness may be set. Both can cast shadows as well. In the illustration below, the color of the SkyObject lamp was set to light yellow (similar to the color of the Sun).
Then the color of the SkyObject lamp was set to light blue (similar to the color of the sky). Compare the two images to see the difference this one setting makes in the result.
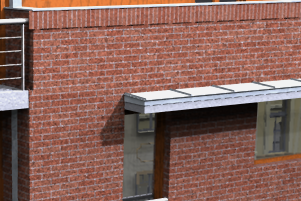
After the general scene is done, you can check where you want to improve your image. For example, you may not like the brick texture:
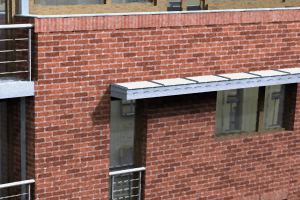
It could have a little more depth or roughness or bumpiness added to it. You can use the Rough Scale, Rough Amplitude and Fuzz parameters to make it more so.
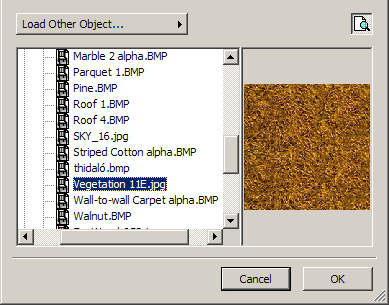
Alternately, you can use the Wrapped Bump Map shader of the Displacement shader group. With it you can select an image file which will become a map for defining the bumpiness of the surface just like alpha-channels in ArchiCAD textures. In our example, we used the image shown below as a bump map.
After applying this map, the Brick wall looks rougher, as if it really had those inequalities on its surface.
While trying to improve the image, you may also encounter the case where certain areas of your image are too dark (underexposed) or too light (overexposed). You can either change ambient and diffuse light (SkyObject lamp) settings to lower or higher strengths, or you can edit your surfaces, especially their Reflectance shader’s Ambient Factor and Diffuse Factor parameters. In the example below, the Diffuse Factor parameter is set to 1,00, meaning all light is reflected back from the surface as diffuse light. Surfaces can become overexposed this way.
In such a case, decrease the value of the Diffuse Factor parameter.
When you are finished with your adjustments, you can generate your final rendering with the LightWorks Rendering Engine.