The Mark-Up Palette opens when you choose the Document > Mark-Up Tools command. The palette contains the Entries that mark elements of your project with a color highlight for correcting mistakes or managing design suggestions.
For general information on this function, see Project Mark-Up.
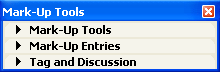
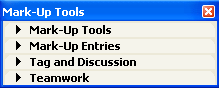
The palette includes three panels in single-user mode and a fourth one that only appears when you are working on a Teamwork Project: Mark-Up Tools, Mark-up Entries, Tag and Discussion and Teamwork.
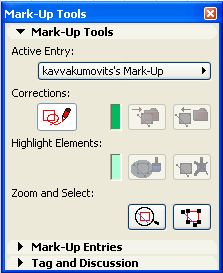
•Active Entry: you can choose which of the Entries defined on the Mark-Up Entries panel will be used to house your next Corrections and Highlights.
Note: Only Entries created on the current Story or drawing window (Section/Elevation/IE, 3D Document, Detail/Worksheet) can be activated.
•Corrections: Click this button to start or stop drawing Corrections. New elements you draw when this button is pushed will be added to the Active Mark-Up Entry. ArchiCAD will select the Freehand Spline tool, but you can choose any other tool to make Corrections.
Note: To add freehand redlining, use the Freehand Geometry Method of the Spline tool.
•Correction Color: Displays the Correction Color of the active Mark-Up Entry.
•Turn into Corrections: Click to convert selected construction elements into Corrections and insert them into the Active Mark-Up Entry.
•Remove Corrections: Click to remove selected Correction elements from Active Mark-Up Entry and revert to their original settings.
•Highlight Color: Displays the Highlight Color of the Active Mark-Up Entry.
•Highlight Elements: Click to Highlight selected plan elements and register them in the Active Mark-Up Entry. Highlighting is available whenever the palette is shown and an Entry is active, independently of the state of the Corrections button.
•Remove Highlight: Click to remove Highlight from the selected plan elements. This will revert the elements to their original settings.
The Zoom and Select area contains tools that allow you to work on all the elements of the Active Mark-Up Entry at the same time.
•If you click the Focus on Elements button:

ArchiCAD will fit all the elements that belong to the Active Entry into the current window.
•If you click the Select Elements button:

ArchiCAD will select all the elements that belong to the Active Entry (without fitting them in the window).
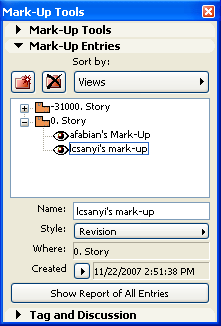
On the Mark-Up Entries panel, you can create new Entries, rename, delete, show/hide and sort existing ones, assign them to a Mark-Up Style and read information about them. Entries are listed in the middle of the panel. Modify the name or style of any selected entry in the fields below.
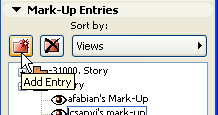
•Add Entry: Click to add a new Mark-Up Entry.
This brings up a dialog box:
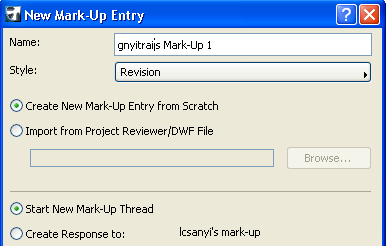
•If a Mark-Up Entry was selected in the Mark-Up Entries panel when you created a new one, the second set of radio buttons of this dialog box allows you to link the new Entry to the selected one by choosing Create Response to. Using this option, you can create hierarchical threads of Mark-Up Entries and sort Entries by thread.
•Instead of creating an entry from scratch, you can choose to import a DWF file created in Project Reviewer for redlining the published Project.
For more information, see Project Reviewer.
•When choosing Start New Mark Up Thread, linked Mark-Up Entries are listed in a hierarchical view. You can either create the link on creating the Entry as response to a selected one, or by dragging a selected Entry on top of another one in this view.
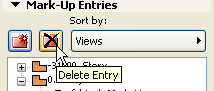
•Delete Entry: Click to delete the selected Mark-Up entries. Correction elements that belong to them will be also deleted. Highlighted elements in these Entries will revert to their original settings.
•Sort by: Choose a criterion for sorting your Mark-Up entries. You can sort Entries by Name, Date, Style, Thread and View (Story).
•Name: Rename the selected Mark-Up entry here.
•Style: Choose a Mark-Up Style to assign it to the selected Mark-Up entries. To customize Mark-Up styles, open the Mark-Up Styles dialog box from the Options menu.
•Where: Displays the location of the Selected Mark-Up entry.
•The Created/Modified field displays the date and time of creation of the selected Entry. You can change it with the pop-up arrow to display last Modification.
•Show Report of All Entries: Click to generate a simple report listing all the Mark-Up entries for the currently opened Project.
•You can hide Entries in the project by clicking the open Eye icon next to the Entry name. To make them visible again, click the closed Eye icon.
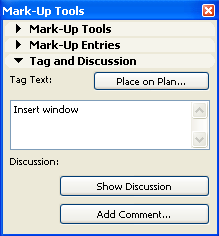
On the Tag and Discussion panel, you can add a Text Tag to the active Mark-Up Entry.
Fields in this panel are active if you have selected an entry from the Mark-Up Entries panel.
•Place on Plan: Click to display your remarks in a Tag text on the drawing. Use the Show On Plan checkbox afterwards to show or hide Tag text.
The style of the Tag Text is determined by the current default settings of the Text tool and can be edited as a simple Text block.
Once placed, the Place on Plan button is replaced by the Show on Plan. Use this to switch the visibility of the Tag on and off.
•Show Discussion: Click to see all comments in a printable window. This text will appear in the Mark-Up Discussion window together with all other comments added to the same Entry.
•Add Comment: Click to add a Comment to the discussion. Your comment will appear in the discussion window along with your system login or team member name.
Teamwork Panel
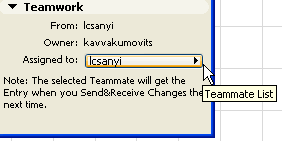
For information on using Mark-Up in Teamwork, see Teamwork and Project Mark-Up.