
A chained wall is a sequence of connected straight or curved wall elements with automatically coincident reference line endpoints.
With the Wall Tool selected, choose the Chained Wall method from the Info Box. (Pop out the small black arrow on the Straight Wall Method button.)
As soon as you start drawing the first Wall, a pet palette appears, offering you geometry options for drawing a straight or a curved segment.
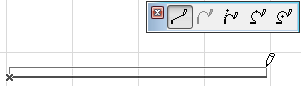
The options are:
•A straight wall segment
•A curved segment tangential to the previous one (cannot be used for the first wall segment)
•A curved segment tangential to a line you define before actually drawing the segment
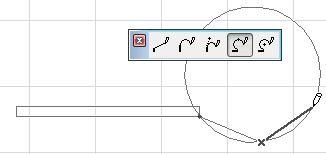
•A curved segment passing through two points
•A curved segment defined by its centerpoint, radius and length

Place the cursor on the option that suits you best and define the endpoint of the first segment using the methods described above for single Wall segments. This endpoint automatically becomes the starting point of the next Wall segment. When you want to finish drawing Wall chain segments, double-click the endpoint of the last segment.
Throughout the process, a ghost contour of the Wall segments is shown. The full Walls are only displayed when you are finished.
•Clicking the Cancel button in the context menu or the Delete key at any time during drafting will abort the process, and no elements will be created.
•Choosing Edit > Undo command will remove the entire new chain of Walls, not just the last segment.
•Hitting the Backspace key allows you to undo the previous segment and continue the creation of the Wall chain.
•If you change the Wall’s attributes in the Info Box during the creation process, all created Wall segments will have the modified attributes (reference line position, line type, etc.).
•If necessary, you can switch methods on the fly with the pet palette.
•If the Edit > Grouping > Autogroup function is switched on, the chained Wall segments will be created as part of a group.
For more information, see Group Elements.