Use the Column tool to create new columns in either the Floor Plan or the 3D Window.
Choose the desired column attributes and geometry from Column Settings, then click to place the column into the project.
After placement, you can still stretch a column’s height in the 3D window.
See Stretch Height.
There are three Geometry Methods (input methods) available in the Info Box for placing Columns.

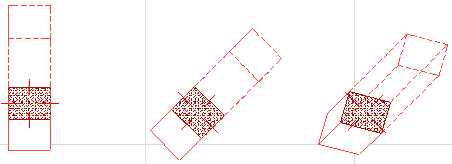
•Simple: Place the Column with one click. The Column axis will be projected vertically from the Floor Plan.
•Rotated: Your first click determines the position of the Column’s Anchor Point at its Base, the second will define its rotation angle around a vertical axis.
•Revolved placement method: If your column is complex and/or slanted, this input method provides a three-step placement process. First, click to place the column. Second, rotate it around its vertical axis and click. Third, revolve it around its own, slanted axis (i.e. set the rotation angle), and click to complete.
