
Gradient Fills are Drafting fills only, and thus are available only from the Fill Tool’s pop-up. (Drafting fills are drawn by hand, using the Fill Tool.)
The purpose of Gradient Fills is to enhance architectural graphics; they do not indicate any physical properties, and so they are available for 2D fills created with the Fill tool (Drafting fills) only. Gradient Fills cannot be applied to construction elements (i.e. they are not available as Cut Fills or Cover Fills).
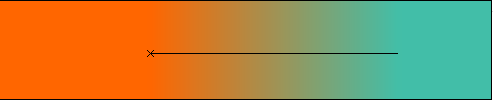
To get a linear gradient fill, choose two different pen colors (foreground and background) on the General Settings panel of Fill Settings.
When placing the Fill, you will see that the pattern is a mix of the two colors with a transition area between them.

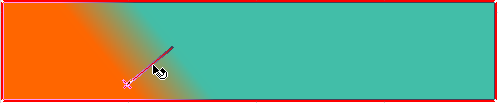
The location, angle and the size of the transition area can be modified with the fill handle provided that you enable Fill Handles (Drafting and Editing Aids) in View > On-Screen View Options.
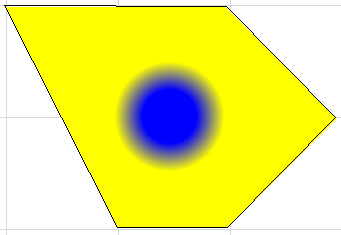
The other type of the gradient fill is radial, that is, of basically circular shape. In this case, the two pen colors (foreground and background) define respectively the inner (next to the core) and outer colors of the gradient fill.
With the fill handle, you can modify the origin of the gradient fill and the extent of both colors as well as that of the transition area.
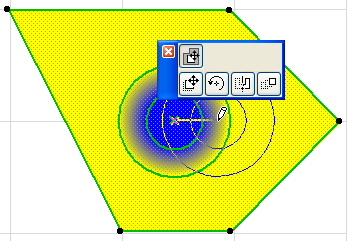
Note: When moving the fill handle, make sure you select the Move Sub-element icon on the pet palette.