
Share a Teamwork Project in ArchiCAD
The process of creating a new Teamwork Project is called “Share.” This involves opening a solo ArchiCAD Project file (.pln), then using the Share command to add it to the BIMcloud/BIM Server.
Other users with the requisite access will then be able to work on this shared project in Teamwork mode.
Follow these steps to share a Teamwork Project:
1.Open a solo ArchiCAD Project file (.pln).
2.Use the Share command (Teamwork > Project > Share or File > New > Share)
3.The Share Project dialog box appears.
Access the BIMcloud/BIM Server
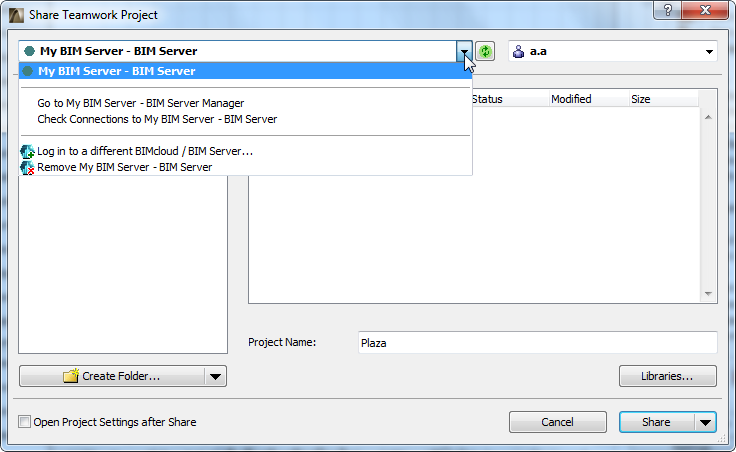
Click the drop-down list and select the BIMcloud/BIM Server you need. This list shows the addresses of all BIMclouds/BIM Servers to which you successfully logged in at least once. Click the Refresh button to refresh the status of the server and the content of the selected BIMcloud/BIM Server.
•If you no longer need to see an item on this list, remove it with the Remove command in the drop-down list.
•If you don’t see the BIMcloud/BIM Server you need, you can add it to the list by logging in, using Log in to a different BIMcloud/BIM Server.
BIMcloud/BIM Server Status: Online, Secure
The BIMcloud / BIM Server is accessed through a secure connection, the certificate was successfully validated.
BIMcloud/BIM Server Status: Online, Private Certificate
The BIMcloud / BIM Server is accessed through a secure connection, but its certificate is self signed and it is not possible to validate it.
BIMcloud/BIM Server Status: Online, Invalid Certificate
The BIMcloud/BIM Server you need may be shown as having an “Invalid Certificate.” This can occur if the BIMcloud/BIM Server address includes the prefix https://, which means that the internet connection must be certified as secure. If this certification is invalid for some reason, you see the “Invalid Certificate” notice.
You can still work through this connection, but it cannot be considered a secure connection from the standpoint of data security. Contact your IT administrator for advice.
BIMcloud/BIM Server Status: Offline
The BIMcloud/BIM Server you need may be shown as “Offline”.
•Try refreshing the server contents (click the Refresh icon).
•It is possible that your user name/password is incorrect or not yet entered. You will be prompted to “Identify yourself” with the correct login name/password.
Select a User
From the pop-up list at top right, select your name.
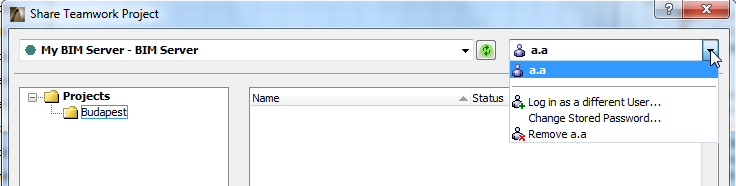
The names you see here are those which successfully logged on to the BIMcloud/BIM Server at least once.
•If you no longer need to see the selected user on this list, remove it with the Remove command in the drop-down list.
•If you don’t see the user you need, you can add it to the list by logging in, using Log in as a different User.
See Log in to BIMcloud/BIM Server.
Once you select a user, the stored password will be checked. If the password is expired, or if that user has been deleted from the BIMcloud/BIM Server, the user name is shown as Denied.
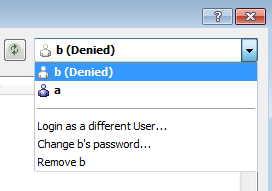
You can still select a user that is shown as Denied - and you can do one of the following:
•Delete the user from the list
•Change its stored password with the Change Stored Password command. (You may need to do this if your user name/password combination stems from an LDAP database in which your password has been changed.)
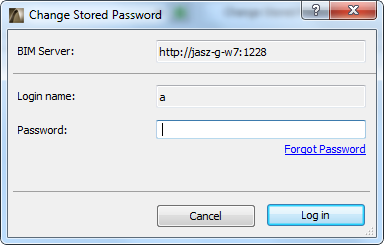
If the name you need is not in the list, click Log in as a different User. In the upcoming dialog box, enter a login name and password for identification.
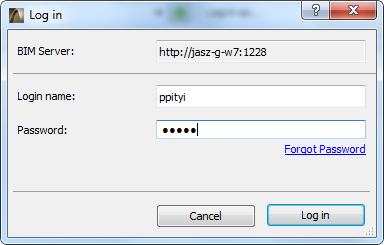
Note: Don’t forget that the user must first be added to the BIMcloud/BIM Server, using the BIMcloud/BIM Server Manager interface. Only then can the client join the Teamwork project from ArchiCAD, using this user name and password.
Select Project Folder
The Share Project dialog box lists the project folders and their projects to which you have at least view permissions.

From the tree on the left, choose a project folder in which to place the newly shared project.
Required permission:
•Simplified Management: Project or Server Administrator
•Detailed Management: Modify details and Modify folder content for the destination folder
Enter the desired Project Name.
Create New Folder
Click the Create Folder command to create a new one within any of the accessible folders.
Required permission:
•Simplified Management: Project or Server Administrator
•Detailed Management: Modify details and Modify folder content for the destination folder

The folder is created immediately; you can delete or otherwise manage it only through the browser-based BIMcloud/BIM Server Manager. (Click the Manage Folders link from the New Folder drop-down button to access the Projects page of the BIMcloud/BIM Server Manager.)

Host Server
The Host Server pop-up displays the default BIMcloud Server of the selected project folder.
You can access the pop-up and choose a different Host Server.
Required permission to access the pop-up:
•Simplified Management: Server Administrator
•Detailed Management: Modify details for the selected folder
Available BIMcloud Servers in the pop-up:
•Simplified Management: All BIMcloud Servers for a Server Administrator
•Detailed Management: Those for which you have Modify Hosted Data on BIMcloud Server permission.
Open Settings after Share: Check this box to navigate to the Projects page of the BIMcloud/BIM Server Manager after the Share is complete.
Click the Libraries button from the Share Teamwork Project dialog box to open the Libraries dialog box.
These options define what to do with the linked libraries of the solo project you are about to share.
Once a solo project is shared as a Teamwork project, its linked libraries are no longer available as such, so you must either replace them or upload them to the BIMcloud/BIM Server.
The current solo project’s Linked Libraries are shown in the left column.
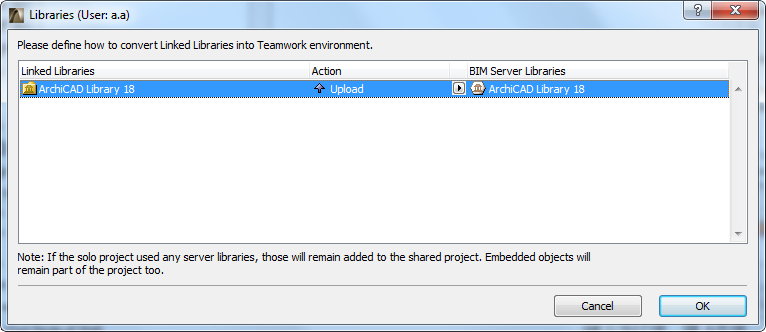
For each linked library you select in this list, choose one of three possible Actions, from the Action pop-up:
Link to: Replaces the selected linked library (in the left column) with the BIMcloud/BIM Server Library (in the right column).
Note: The libraries shown here are those to which you have View Item permission.
“Link to” is the default option if the BIMcloud/BIM Server contains a library with the same name as the selected linked library, but you can choose any other library: click the pop-up to choose among the libraries on the BIMcloud/BIM Server.
Upload: Uploads the linked library to the default Host Server shown here.
To upload a library to a different server (other than the default) on the BIM Server, click the pop-up from the appearing Choose BIM Server dialog box.
Required permission:
•Simplified Management: Server Administrator
•Detailed Management: Modify details for the Library root
Available BIMcloud Servers in the pop-up:
•Simplified Management: All BIMcloud Servers for a Server Administration
•Detailed Management: Those for which you have Modify Hosted Data on BIMcloud Server permission.
If a library of the same name already exists on the BIMcloud/BIM Server, you cannot upload it (regardless of the particular Host Server you put it on): any given library can exist only once on a given BIMcloud/BIM Server.
Don’t Use: Removes the selected linked library from the project you are sharing. This option may result in a Teamwork project with missing library parts; in this case, a warning dialog appears.
From the Libraries dialog box, click OK to return to the Share Teamwork Project dialog box.
Your library conversion choices will take effect after you click Share.
If you do not want to open the shared project right away, use the Share without Join option from the Share button’s pop-up.
Share
Click Share. The newly shared project will be opened now.