Mark-Up Tools
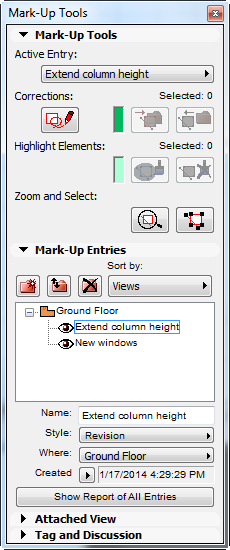
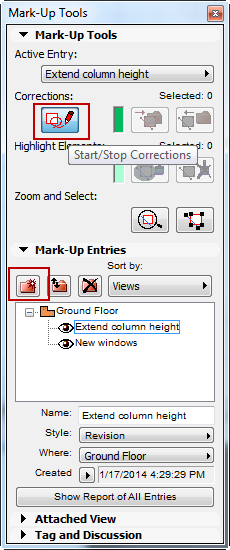
Open the Mark-Up Tools Palette (Document > Mark-Up Tools).
Note that it has four panels (plus a fifth, Teamwork panel, if you are in a Teamwork project)
See Teamwork and Project Mark-Up.

View Existing Mark-Up Entry
Double-click on a Mark-Up Entry to open it the appropriate ArchiCAD window. If a view has been attached, the corresponding model view will open, using the same camera position.
If the Floor Plan or 3D window is active, only Entries created on the current Story or in the 3D window are available in the Mark-Up Tools palette. If another window (Section/Elevation/IE, 3D Document, Detail/Worksheet) is active, only Mark-ups from those windows can be activated.
Add New Mark-Up Entry
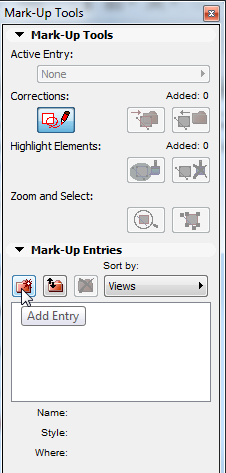
Start a new Mark-Up entry by doing one of the following:
•click the Add Entry icon in the Mark-Up Entries Panel; or
•click the Start Corrections icon in the Mark-Up Tools panel
The New Mark-Up Entry dialog box appears. Enter a Name for this entry and choose a Mark-Up Style (e.g. Revision.) This Mark-Up Style consists of a pair of colors (one for corrections and one for highlights). It is an attribute defined in the Mark-Up Styles dialog box.
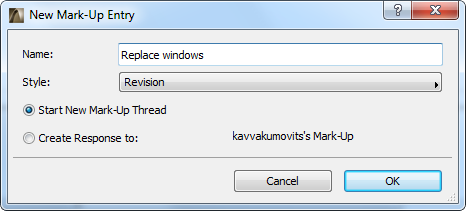
•If a Mark-Up Entry was selected in the Mark-Up Entries panel when you created a new one, the second set of radio buttons of this dialog box allows you to link the new Entry to the selected one by choosing Create Response to. Using this option, you can create hierarchical threads of Mark-Up Entries and sort Entries by thread.
Add Corrections and Highlights
Add your input to the model using the controls of the Mark-Up Tools Palette. Corrections and Highlights have different colors (defined in the Mark-Up Style attribute).
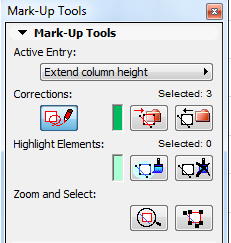
For example:
•Add new elements as corrections: Click Start Corrections, then use any tool to add elements to the current view. (An element added as a Correction is shown in the Corrections color.)
•Convert elements to corrections: After selecting an element, click the Turn into Corrections button. (Remove the Correction color from any selected element by clicking the Remove Corrections button.)
•Highlight elements: Select one or more elements, then click Highlight Elements. Remove a highlight from a selected element by clicking the Remove Highlight button.
•Zoom and Select to Mark-up Elements
•Focus on Elements: Fits all the elements that belong to the Active Entry into the current window.
•Select Elements: Selects all the elements that belong to the Active Entry.
Add Text Tag
On the Tag and Discussion panel: Type in your text, and click Place on Plan to display your remarks in a Tag text on the drawing. The style of the Tag Text is determined by the current default settings of the Text tool and can be edited as a simple Text block.
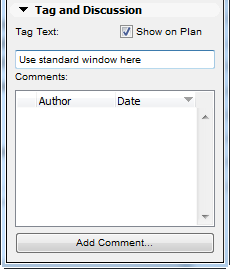
Once a tag is placed, use the Show on Plan button to switch its visibility on and off.
Attach View to Mark-Up Entry
In the Attached View panel, click the Capture button to add a snapshot of the current view to the Mark-up entry (one attached view per Entry). Attach any of the following view types: Floor Plan; Section/Elevation; 3D view; 3D Document; Worksheet/Detail; Layout; Publisher Set item.
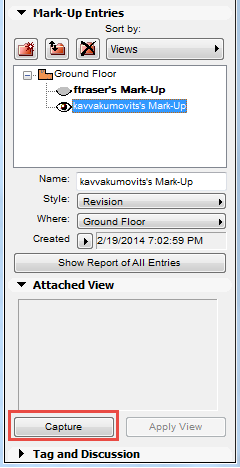
A view can also be attached to an imported Mark-Up Entry (in a BCF file); or you can export with your Mark-Up Entry, as a BCF file. (See Export and Import Mark-Up Entries.) The attached view is not merely a screenshot: it includes camera position and 3D cutting planes.
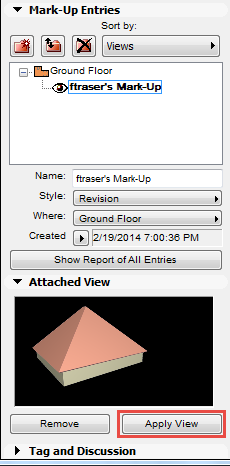
•Click Apply View to navigate to the corresponding model view, using the same camera position. (The same thing happens if you double-click the name of the Mark-Up entry.)
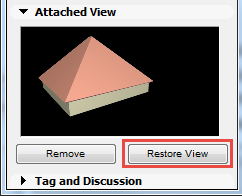
•After that, click Restore View to return to the previous provided that you have not navigated away from it in the window (via Pan, Zoom, or element editing)
•Double-click on the Attached View preview to open it in a Picture window
•Click Remove to delete the view and remove its snapshot from the Mark-up Entry
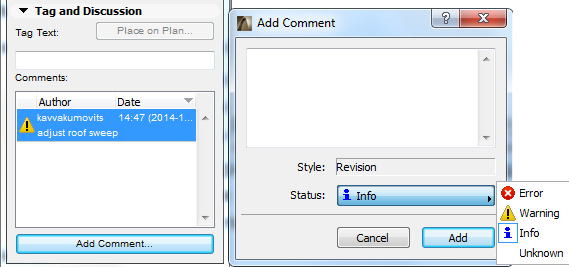
Click Add Comment to open a text window, then type your comment. The Comment style corresponds to the current Mark-Up Style. Comments are read-only.
Colleagues who open your marked-up view can view your comment and add their own: for each Mark-Up Entry, you will see all related comments, by author.
For information on using Mark-Up in Teamwork, see Teamwork and Project Mark-Up.
Export and Import Mark-Up Entries
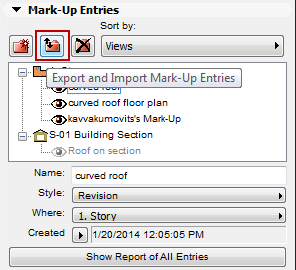
On the Mark-Up Entries panel, click this button to export or import a file containing Mark-Up information (for example, as BCF topics).
In the appearing dialog box, choose Export to File or Import from File.
Export Mark-Up Entry as BCFzip File: Exports the selected entry (or multiple selected entries) to consultants in BCFzip format. (Regardless of the number of selected Mark-Up Entries, they are all zipped into a single BCFzip file.)
The BCF supporter applications easily find the elements related to BCF comments in the IFC model based on their IFC IDs, which are stored in both the IFC models and the BCF files. For this reason, make sure you are using the correct IFC ID logic for the elements:
•Use External IFC ID where available: This box is checked by default. Use this ID logic if you are using the externally referenced model elements as reference elements only, and you will not export a new IFC model with these elements.
•Do not activate the "External IFC ID" checkbox if the externally referenced model elements are used as native elements of your project, and if you plan to include them in an IFC model export. In this case (with the box unchecked), the "ArchiCAD IFC ID" data will be exported for both BCF items and all IFC model items.
More information:
•“Reference elements only”: that is, you used the IFC model elements imported from other programs as reference only (e.g. to view their geometry or check their parameters); you did not merge them into the project.
•“Native elements”: you used the imported IFC model elements as active parts of your own project (e.g. you placed an imported, detailed structural frame part onto one of your own project layers). You will proceed to save the whole project as an IFC model. In this case, uncheck the box: ArchiCAD IFC ID data will be used with the export.
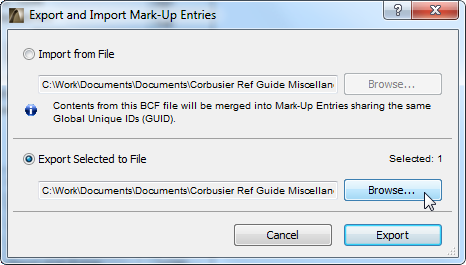
In BCF zip format, the entry includes the Attached view, comments, camera position and 3D Cutting Planes (if any). ArchiCAD keeps the elements' original IFC Global Unique ID, to keep track of element iterations through multiple exchanges of information.
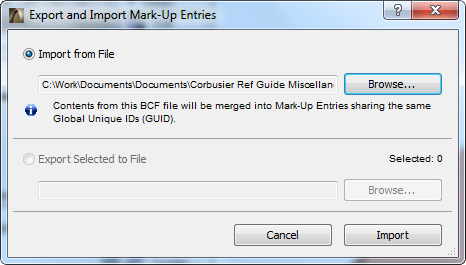
Import from File: Browse for a file in one of two formats:
•DWF format
For more information, see Project Reviewer.
•BCFzip format: Click Import. ArchiCAD incorporates the BCF data assigned to the model (screenshots, camera position, cutting plane, and status) into one or more Mark-Up Entries. Existing Mark-Up Entries are updated and the comments merged.
Note: When importing a BCF file, you don’t need to also re-import the IFC file that you created out of your ArchiCAD model. The elements in the BCF file will identify the ArchiCAD elements in their native environment, because the ArchiCAD elements already include a corresponding IFC GUID.
•When you double-click such a Mark-Up entry, the program selects and zooms in to the elements assigned to the BCF comment in the camera position of the Attached View (if it is available). Other elements will also be identified, if the model they belong to is also part of the host project (e.g. via Merge or Hotlink).
Hint: To see only the relevant elements after they are all selected automatically by the project, use the Show Selection/Marquee in 3D command.
Note: If the model does not contain the element having the referenced IFC GUID, then just the program displays just the model view of the Attached View.

•Delete: Click the icon to delete the selected Mark-Up entries. Correction elements that belong to them will be also deleted. Highlighted elements in these entries will revert to their original settings.
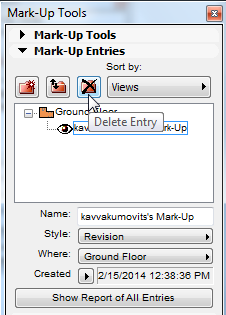
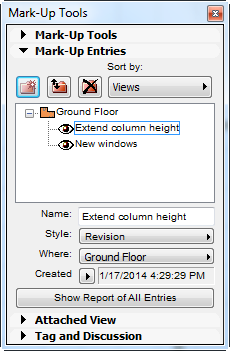
•Sort by: Choose a criterion for sorting your Mark-Up entries on this panel. You can sort Entries by Name, Date, Style, Thread, Last Comment by, and View (Story).
•Name: Rename the selected Mark-Up entry here.
•Style: Choose a Mark-Up Style to assign it to the selected Mark-Up entries.
•Where: Use this pop-up to redefine the story level of the Mark-up entry (Floor Plan or 3D views only). If, for example, you created it in the 3D window, you can specify its story here.
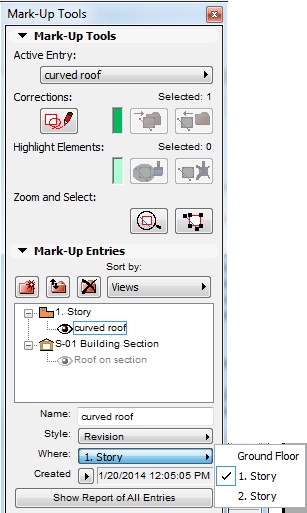
•The Created/Modified field displays the date and time of creation of the selected Entry. You can change it with the pop-up arrow to display last Modification.
•Show Report of All Entries: Click to generate a simple report listing all the Mark-Up entries for the currently opened Project.
•Show/Hide Mark-Up Entry: Use the eye button. If an Entry is hidden, the corrections/highlights will disappear as long as the Entry remains hidden.
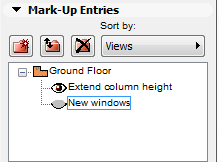
Show/Hide All Mark-Up Entries in Project
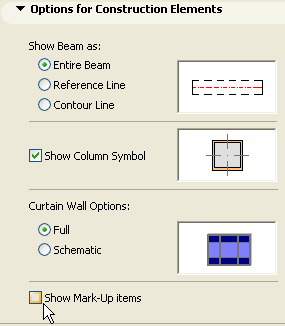
A project’s Mark-Up Entries are displayed by default. To hide them, uncheck the corresponding control in the Document > Set Model View > Model View Options dialog box.
