For general information, see Virtual Trace: Using References to Edit and Compare Model Views and Drawings.
To access this palette, choose Window > Palettes > Trace & Reference.
•Controls in the top section of this palette affect the Reference. These affect output as well as display, should you choose to print the Reference directly from the active window.
•Controls below affect the Active content for Visual Compare functions, which help you to contrast the Active with the Reference. These are on-screen-only options, not part of any view or layout, and are associated with the current viewpoint.
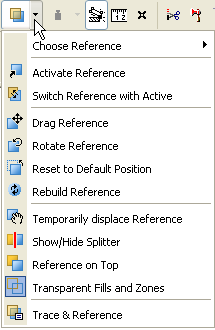
Note: At the top of this palette, the Choose Reference and Drag/Rotate/Reset/Switch Reference commands are the same as their counterparts in the list of Trace Reference commands.
Show/Hide Reference: Click this button to show or hide the Reference in the current window.
Choose Reference: Click this pop-up to access a list of recently used Reference items, plus the default Reference item. Click the item you wish to use as Reference.
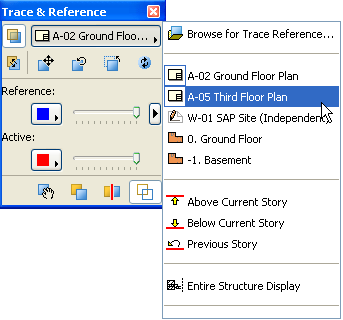
Note: Another way to choose a Reference is to right-click on an eligible Navigator item and use the Show as Trace Reference command.
Switch Reference with Active: Click this command to make the Reference into the Active, with the former Active content shown as the Reference.
For more information, see Switch Reference with Active: How to Access Elements within the Reference for Editing or Copying.

Drag Reference: Click this command to drag the Reference to another location.

Rotate Reference: Click this command to rotate the Reference.

Reset to Default Position: Click this command to reset the Reference to its original default position after you have moved it.

Rebuild Reference: Click this command to rebuild the Reference to reflect changes in the model.

Color: Choose a Color for the Reference and for the Active from the two Color pop-ups: either Original Colors, or another, uniform color. Recently chosen colors (up to 14 colors) are offered in this list as a quick way to assign a frequently used Reference color.
See Tip 1: Use Separate Colors for Active and Reference.
Intensity: Use the two sliders to adjust the intensity of the display of the Reference and the Active.
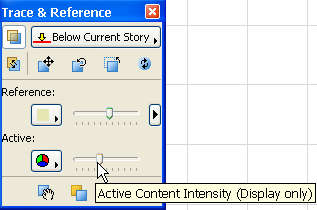
Slide it to the right to increase the intensity; slide it left to make the view “fade out.”
See Tip 4: Optimize Intensity of Reference vs. Active.
Temporarily Displace Reference: Click this command to activate the “Temporarily Displace Reference” function.

Click anywhere in the window, then move the “Hand” cursor to temporarily move the Reference to a new position on screen. Click again to return the Reference to its original position.
See Tip 6: Move the Reference Over Temporarily (Displace Reference).
Reference on Top: Click this icon to switch the display order of the two views.

See Tip 3: Reverse Display Order of Reference and Active.
Splitter: Click this command to show the Splitter function, which allows you to compare the Reference with the Active by creating a movable split line between the two views.

See Tip 5: Use the Splitter Bar to “Turn the Page”.
Make Fills and Zones Transparent: This control toggles the display of background fills and zone fills.
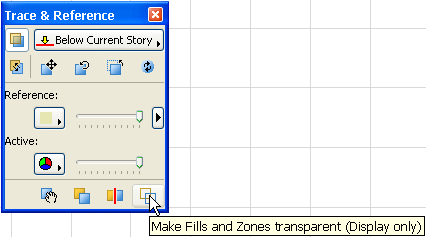
If this button is activated, then element fills will not be displayed. These include foreground fills, background fills that have a color, and zone fills.
See Tip 2: Make Fills and Zones Transparent.
This switch has only a temporary effect and does not affect the settings of the model elements.
Visible Elements: Click the arrow next to the Reference intensity slider in the Trace & Reference palette. This set of options is available only for the Reference.
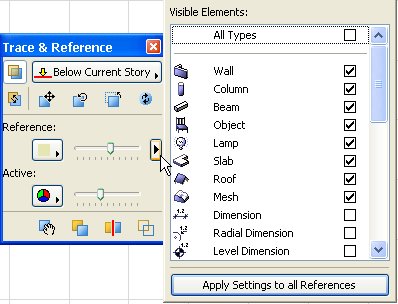
In this list, put a checkmark next to elements you wish to be displayed on the Reference.
Apply Settings to All References: If you click this button, changes you make to the current Reference’s Color/Visibility options will be applied to all References used in the project. Otherwise, these changes will apply only to the Reference of the current window.