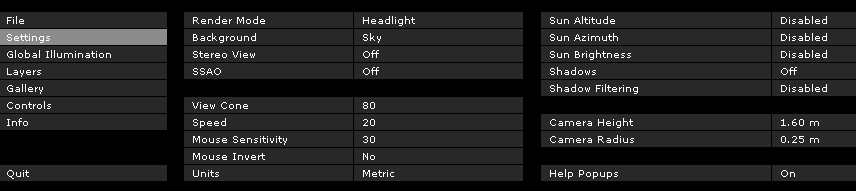
This section explains the commands of the BIMx menu, used when viewing a BIMx 3D Model in the BIMx Desktop application (or the free BIMx Desktop Viewer).
•After you have saved the ArchiCAD model to BIMx, you will view and navigate the BIMx model in the navigation window.
•To access the BIMx menu, press the ESC key.
•To return to the navigation window, press ESC again.
If You Are Using a Viewer (No ArchiCAD License Available)
The BIMx model can be viewed and navigated on a desktop or laptop computer using the free BIMx viewer application, downloadable from
http://www.graphisoft.com/downloads/bimx/bimx_desktop.html. In this case (if no ArchiCAD license is available), the following BIMx functions are NOT available:
•All functions that involve actively modifying the model or saving the file in any form (e.g. sharing it, recording a new camera path or adding a view to the gallery).
•Global Illumination initialization. (However, if the BIMx model has already been initialized, you can use the Global Illumination render mode.)
Choosing among Menu Options
1.Click and hold on the option you want to change.
2.The available choices will then pop up.
3.Move your cursor over the options.
4.When the cursor is on the desired option, let go of the cursor to enable that option.
Editing Numerical Settings
If the setting you are editing is a numerical value (such as navigation speed), you can change the value only by dragging the mouse left (to decrease the value) or right (to increase it.) You cannot enter the values directly.
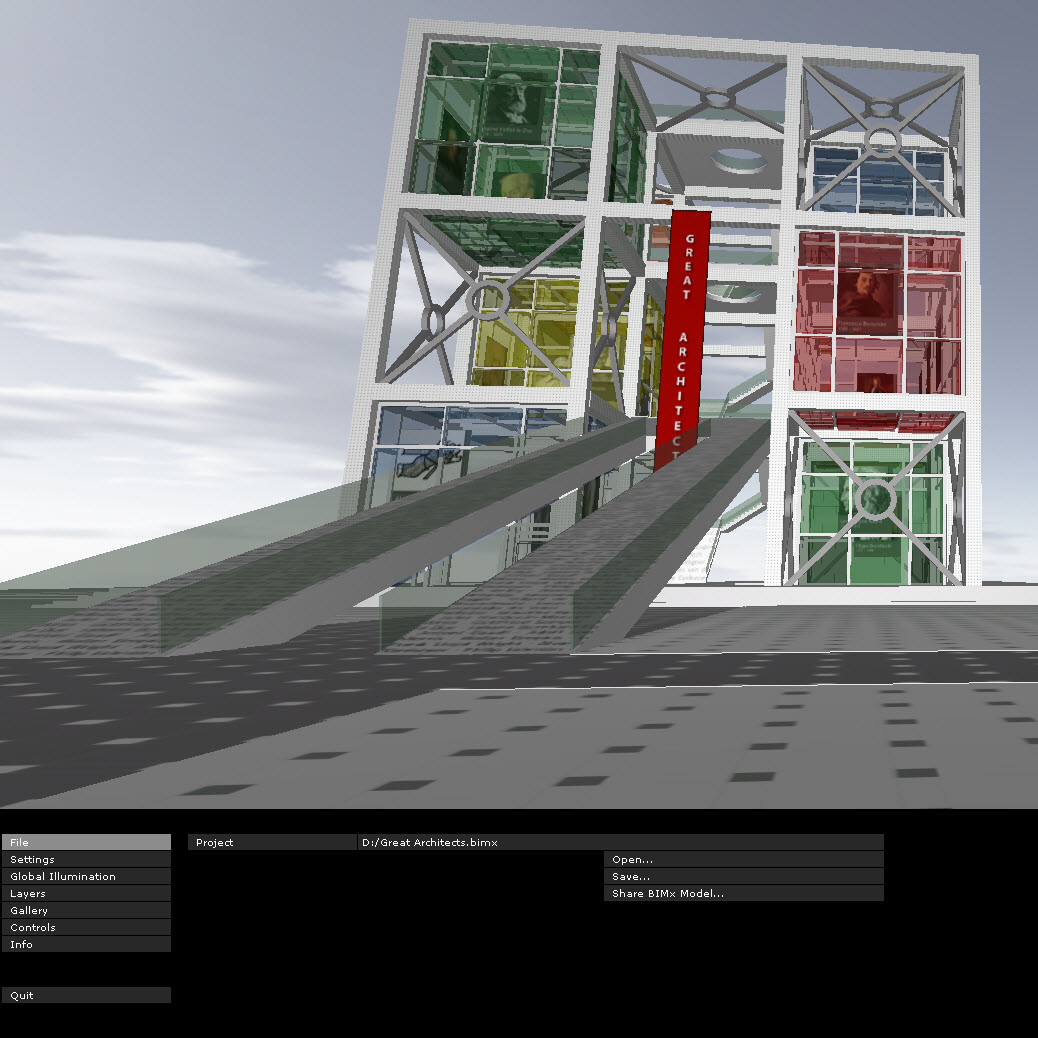
FILE Menu
The file menu includes the standard I/O functions of the program.
•The Open command opens a BIMx project for editing.
•The Save command saves the project in .bimx format. This format can be viewed in all types of BIMx viewers, including iPad, iPhone and iPod Touch, in addition to the Desktop Application.
•Share BIMx Model uploads the project to the BIMx Transfer Site (Cloud) at bimx.graphisoft.com.
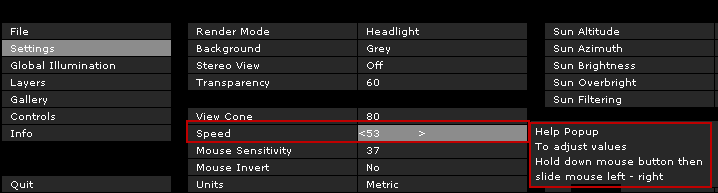
The Settings dialog stores all the parameters that are related to the BIMx model display and navigation control.
Render Mode
Choose a Render Mode to display the BIMx model.
•Headlight: View the scene as with a lamp on your head
•Global Illumination: Available if you have calculated Global Illumination. (See tips below.)
•Black and White: Available if you have calculated Global Illumination. (See tips below.)
•Pixel lighting with SSAO: Advanced rendering method to give greater depth to the scene
•Unlit: Shows materials without lighting
•Gouraud: Shows materials with simple lighting
•Metal: Same as Headlight, but no materials
•Hidden Line: No shading. Displays the edges of scene geometry.
Some of these methods may not be available, depending on the graphics card you are using.
Tips for Choosing a Render Mode
•The Global Illumination method gives you the most realistic view of the model. To access it, you must first initialize the Global Illumination engine. (Go to the Global Illumination menu and click Initialize.) This method may take some time, depending on the size of your model. For extra large models, it may be desirable to use Pixel Lighting with SSAO until your model is fully completed.
Note: The Black and White (Global Illumination) render option is also available after you have calculated Global Illumination.
•If you have rendered the model on your desktop using Global Illumination, the resulting BIMx model, when viewed on a mobile device, can also be shown with Global Illumination.
•Note that Global Illumination consumes additional memory, so the chance of failure also increases with the size of the model. To avoid this, you should split an extra large model into two or more parts and calculate global illumination for each part individually.
•Pixel Lighting with SSAO is an advanced technique, without the calculation time required by Global Illumination on large models. While not as sophisticated as Global Illumination, the effect is similar, without needing the precalculation process. This method is not yet available on mobile devices due to hardware limitations.
•Pixel Lighting with SSAO is only available if your graphics card supports the OpenGL 2.0 standard. Typically, older-model laptops cannot benefit from this feature.
•Headlight mode is a simpler rendering method than either Global Illumination or Pixel Lighting, but it is available on all devices (with the possible exception of extremely old computers).
•On very old-model computers (provided they meet the minimum system requirements), the Gouraud and Unlit render modes are guaranteed to be available.
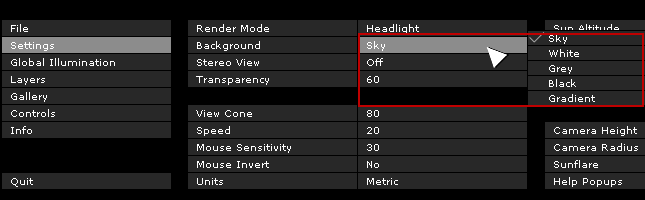
Background
BIMx offers the following background options:
•SKY (default BIMx Sky image)
•WHITE
•GREY
•BLACK
•GRADIENT
In case you’d like to use custom skybox images, you have to replace the six .bmp files included in the BIMx/Textures/Skybox folder.
Stereo View
BIMx can display the model in stereo view modes. The following methods are available:
•Left/Right
•RED/ CYAN
Note: You need special stereo view glasses to enjoy this BIMx feature.
•Quad Buffer: available only with NVIDIA drivers.
•OFF
Note: Stereo View options are not available if you are in Parallel view. (Click F8 to toggle Parallel view.)
View Cone
Value range: 10-120
Speed
Value range: 10-1000
This parameter defines the default speed of navigation. Higher numbers result in faster movement.
Note that you can temporary increase the navigation speed by holding down the ‘SHIFT button.
Mouse Sensitivity
Value range: 10-50
Mouse Invert
This option inverts the mouse navigation directions.
Units
The measured distances can be displayed in Metric or Imperial units
Additional Settings commands
The following parameters are available if you have turned on Sun Shadows (click F3). The parameter value limits are shown in brackets.
Sun Altitude (10-80)
Sun Azimuth (0-360)
Sun Brightness (-100 - +100)
Sun Overbright (-100 - +100)
Sun Filtering: Turn on to improve quality of sun shadows.
Camera Height (600-2000)
Camera Radius (150-400)
Sunflare
This option displays the sun flare if the camera looks towards the sun.
Help Popups
If this option is activated, a help popup window will appear over some of the Settings menu’s commands.
It also controls if the introduction help-popup is displayed at the center of the screen when opening a BIMx model.
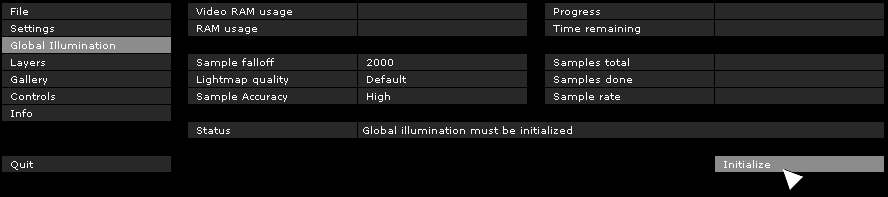
In order to be able to view the model in Global Illumination mode, you have to render the model first.
1.Choose INITIALIZE to prepare the model for Global Illumination view.
Note: This function not available on the BIMx Viewer application.
2.Choose either Light View or Light All.
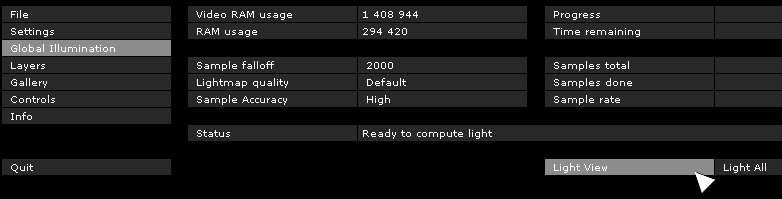
This option affects the length of the Global Illumination calculation process.
•LIGHT VIEW: Lights surfaces visible from the current camera viewpoint only.
•LIGHT ALL: Lights all surfaces.
Note: Initialization can be a lengthy process depending on the size of the model (number of triangles), the computer hardware (RAM, Video RAM, processor, Video Card type) and the Global Illumination options you choose. Initialization may fail if the model is too big, since any single point on the model needs to be handled separately in the computer memory. The more graphics memory you have, the larger model you can initialize.
Cancel the process by pressing ESC. You can resume the process later. Completely lit surfaces are saved into project files and .exe files. When resuming the process, the starting point may roll back a few percent from where you canceled.
Sample Falloff and Sample Accuracy
These options affect the length of the rendering process and the quality of the resulting images.
If your Sample Falloff is lower than 1000-2000, try setting Sample Accuracy to LOW. This will make shadow gradients less smooth and more pixelized, but will result in faster rendering.
Note: Changing sample falloff will invalidate any previously computed light.
LAYERS Menu
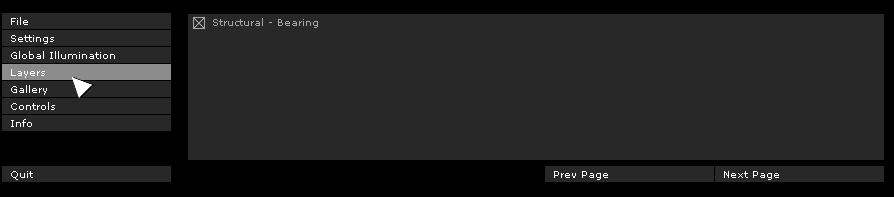
The BIMx project preserves the layers of the original ArchiCAD model. Use the BIMx Layers menu to control the visibility of the model layers, by checking the desired layer name boxes.
Note: Global illumination renders the current state of the model. Switching layer visibility hides and shows elements, so you’ll have to recalculate the global illumination to show the correct lighted model.
The Gallery menu includes the commands with which you can add pre-recorded walk-through clips and camera positions to your project.
See also If You Are Using a Viewer (No ArchiCAD License Available).
Adding Camera Angles (positions) to your Project
To add camera angles press F4
Note: This function not available on the BIMx Viewer application (if no ArchiCAD license is available).
Recording Walk-through Clips
•To enter clip record mode: Press SHIFT+R.
•To start/stop recording: Click left mouse button.
•To exit clip record mode: Press SHIFT+R.
You must be in pause mode when exiting clip mode or you will lose that clip.
Both perspective mode and orthographic mode (F8) can be recorded.
Editing the Gallery
To change the order of the clips in the Gallery, press MOVE LEFT / MOVE RIGHT.
Using the Gallery
Click on any or all of the following three commands to set playback preferences.
•PLAY ON START will playback the sequence of clips.
•PLAY ON IDLE will make playback start or continue “screensaver-style” - that is, after a certain amount of idle time.
•Clips will playback in sequence if SEQUENCER is enabled (click “Sequencer” to enable it), otherwise only the current clip will be played.
•LIMIT NAVIGATION TO GALLERY VIEWS: navigation of the resulting BIMx project will be limited to just the views and clips you save to the Gallery.
Gallery Shortcuts
•Click the image to jump into that position or to play that clip.
•Press P to playback the current clip.
•Press Shift+P to playback the sequence of clips from the top.
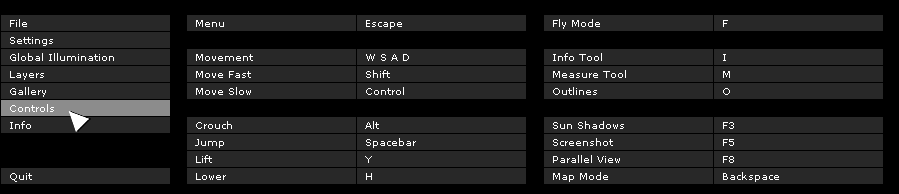
The CONTROLS menu displays the list of the basic navigation commands and their shortcuts for the international keyboard. Most of these functions are self-explanatory and commonly used in first-person shooter computer games (FPS).
|
Functions |
Keyboard Shortcut |
|
Menu |
ESCAPE |
|
Movement |
W, S, A, D and the Arrow keys |
|
Move Fast |
SHIFT |
|
Move Slow |
CMD or CTRL |
|
Crouch |
ALT |
|
Jump |
SPACE BAR |
|
Lift |
PAGE UP |
|
Lower |
PAGE DOWN |
|
Fly Mode |
F |
|
Info Tool |
I |
|
Measure Tool |
M |
|
Outlines |
O |
|
Sun Shadows |
F3 |
|
Screenshot |
F5 |
|
Parallel View |
F8 |
|
Map Mode |
BACKSPACE |
For additional navigation shortcuts, see BIMx Navigation Tools and Shortcuts.
INFO Menu
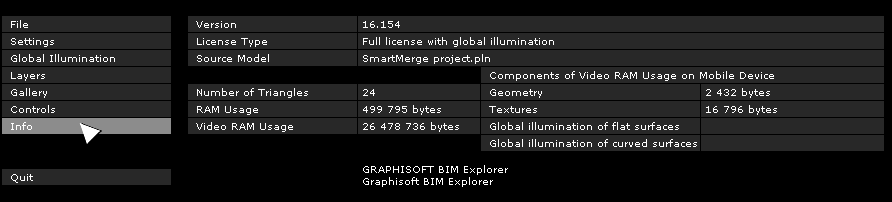
The Info Menu shows basic information about the active project and your BIMx license:
•Version: The version and build number of your BIMx application.
•License Type: Type of your BIMx license (full, educational). It also displays whether you are using the global illumination version of BIMx.
•Source Model: The name of the ArchiCAD file saved to BIMx.
•Number of Triangles: The models in BIMx are made of 3D triangles. The speed of the 3D navigation and the memory usage by the BIMx application are strongly affected by the number of triangles in the 3D model. Please note that this value is approximately two or three times that of the polygon count displayed in PolyCount add-on in ArchiCAD, due to the different geometry calculation algorithms used.
•RAM Usage: Displays the size of the RAM, in bytes, used by the project
•Video RAM Usage: Displays the size of the Video RAM, in bytes, used by the project
Components of Video RAM Usage on Mobile Devices
This data refers to the Video RAM memory required to view the model on the supported iOS mobile devices.
•Geometry: Based on the triangle count.
•Textures: The BIMx application for mobile devices automatically optimizes your textures to a certain degree, but if your BIMx model is too large to be run on your mobile device, you can try to reduce their size and complexity.
If you save your BIMx model using Global Illumination, additional video RAM memory is required to handle the following two texture components:
•Global Illumination of Flat Surfaces: the illumination texture applied to flat surfaces; and
•Global Illumination of Curved Surfaces: the illumination texture applied to curved surfaces
You will notice that curved surfaces are less memory-intensive than the flat surfaces.