
The Angle Dimension tool allows you to place angle values between line and/or linear element edge pairs. Angular dimensions are semi-automatic and fully associative.
For more information on this function, see Angle Dimensions.
Angle Dimension Type and Font Panel
Dimension Types:
•Click here to dimension the acute angle.

•Click here to dimension the obtuse angle.

For details on how angle dimensions are calculated, see Angle Dimensions.
Number Orientation:
•Click here to select horizontal dimension text placement method.

•Click here to select perpendicular dimension text placement method. The dimensioning value is always placed in a radial direction.

•Click here to select parallel dimension text placement method. Dimension text will be parallel to the tangent of the curve next to it.

Witness Line: Define the Witness Line type you want to use.
•Click this radio button to choose a Dimension without Witness Lines.

•Click this radio button to choose a Dimension with Witness Lines sized to the Arrowhead Marker height (the witness line length will automatically be fitted to the marker and thus implicitly to the appropriate text size).

•Click this radio button to choose a Dimension with Custom (extended) Witness Lines (set here: Dimension Marker and Witness Line Options Panel).

•Click this radio button to choose a Dimension with Dynamic Witness Lines which adhere to the element being dimensioned (set here: Dimension Marker and Witness Line Options Panel).

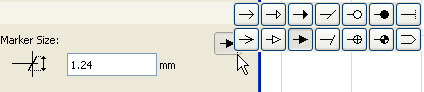
•Click here to display an Pointer Type selection palette for the Dimension.
Arrowhead Pen - Pencolor/Penweight of Dimension marker: Type a Pencolor/Penweight number (1-255) here for the Dimension marker.
Dimension line Pen: Type a Pencolor/Penweight number (1-255) here for the Dimension Line.
Text Font: Click this pop-up field to select a font for the Dimension Text.
Text Script: Click this pop-up field to select a font encoding for the Dimension Text.
Note: Dimension text does not support unicode characters.
Text Height: Enter a font size for the Dimension Text here.
Note: Fractional sizes are allowed, but may be rounded.
Text Format: If desired, check the Bold, Italic, or Underline boxes to format the dimension text accordingly.
Placement of Dimension Text:
•Click here to place the Dimension Text above the Dimension Line.

•Click here to interrupt the dimension line with the dimension text.

•Click here to place the Dimension Text below the Dimension Line.

Opaque: Check this box to set a background color for your dimension text block and activate the pencolor selection settings at right: open the pop-up menu to choose a color. The pen of this Fill may also be set to 0 (Transparent) or -1 (Window Background). Henceforth your text editor will also have this background color.
Frame: Check this box if you want the dimension text block frame to be visible. Checking the box activates the pencolor selection settings at right: open the pop-up palette to choose a color for the frame.
Angle Dimension Marker and Witness Lines Options
This panel is similar to those of the Linear Dimension tool and Angle Dimension tool.
For more information, see Dimension Marker and Witness Line Options Panel.