Request and Reserve Elements or Project Data
Use Request if the element you wish to reserve is currently owned by another user.
You must be on-line to Request.
The Request command is available from the following locations:
•in the Teamwork Palette
•in the context menu of selected Navigator items
•in the context menu of selected elements
•in the dialog box of project data (for example, Model View Options)
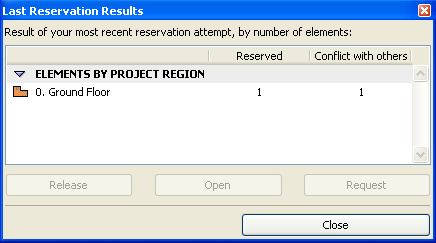
•from the Last Reservation Results dialog box.
See Reservation Results.
Clicking the Request button here means you request the “Conflict” items from their owners.

Click Request.
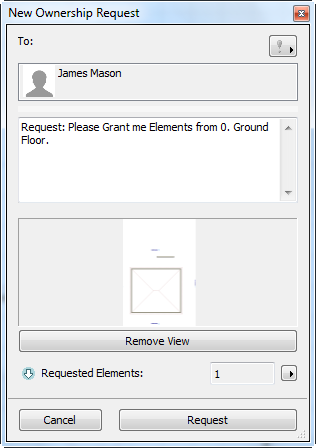
The Ownership Request dialog box appears, which includes:
•an automatically generated message about the requested items and their location
•an attached model view, which includes camera position, cutting planes and layer settings as applicable
•the number of requested elements. You can still change this set of elements before sending the message: reselect elements, then update the request message by clicking the popup next to the number of elements currently attached
•a preview of this attached view
If you don’t want to include this view, click Remove View.
You can add and modify the text as needed; then click Request.
See also Request Messages.
Whenever you send a Request message, it is filed in your Pending Requests list.
Concurrently, the Request message is delivered to the owner’s To Do list.
If the owner is not currently on-line, the Request will be delivered as soon as the user goes on-line.
If the owner releases the requested item independently of the Request message, the requesting user automatically receives the item.
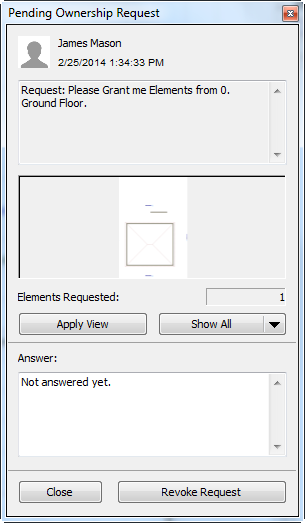
If you open one of your Pending Requests, you get a status report: how many of the requested items have been granted/denied and how many are still pending. You can opt to revoke a pending request: click Revoke Request.
The owner receives the message; the user can respond to the request via the Teamwork palette, by clicking the triangle to show relevant commands, or double-clicking it to open the request:
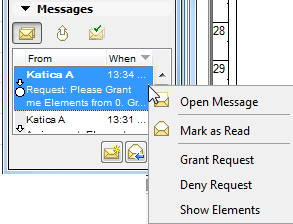
•Open Message: Same effect as double-clicking the item, or clicking on the fly-over message notice.
•Mark as Read: Unopened messages are listed in bold typeface. You can remove the bold typeface using the Mark as Read command. (Double-clicking the message to open it will also mark it as read.)
•Show Elements/Dialog: Zoom in to view the requested element(s) or to open the corresponding dialog box.
•Deny Request. Click this if you do not want to release the elements. The elements remain in your workspace.
•Grant Request: Click to approve the request. If you grant a Request, this means you have released the item, which is now instantly and automatically reserved by the user who sent the request.
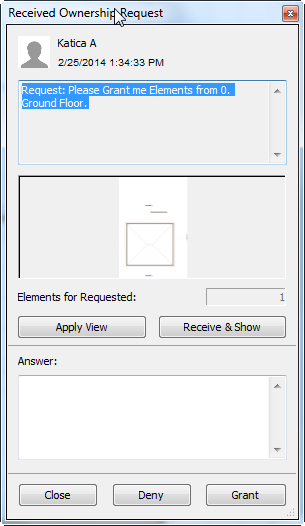
In the Received Ownership Request message:
•Apply View: Click this to open the attached view (if any) of the requested element(s). (This command only appears if a view is attached by the sender.)
•Restore View: This button appears if you have clicked Apply View (see above). Restore View will return you to the previous model view.
•Show Elements: This command zooms in to and selects the requested elements.
Once the owner grants or denies a Request, the associated request message is automatically moved to the user’s Completed list.
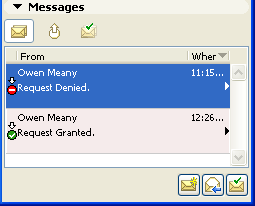
At the same time, the user who issued the Request receives the response in their own To-Do list: (the message is concurrently removed from their Pending list).
