Use the Publisher to Create a BIMx Hyper-Model
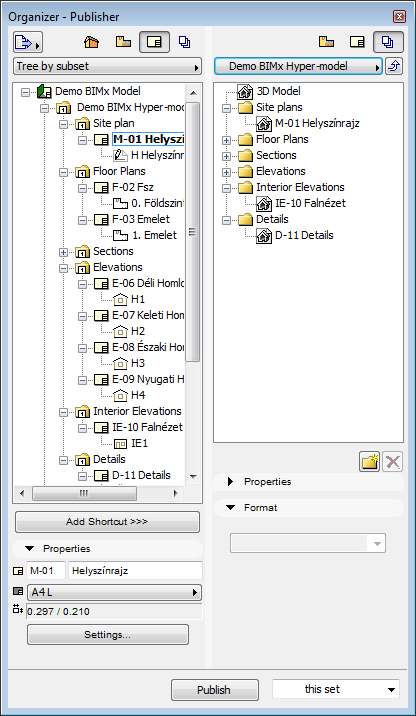
Use the Organizer mode of the Publisher to create the desired Publisher Set: assemble the combination of Layouts and the 3D view(s) you wish to include in the Hyper-model.
Note that you can optimize 3D view content to fit your particular publishing needs - for example, using Partial Structure Display, Layer Combinations or Marquee to limit the view(s) as needed.
Generate Global Illumination for 3D View
Optionally, you can choose Global Illumination rendering for your 3D view in the BIMx Hyper-model. To do this, select the 3D view from the list of Publisher Set items in the Publisher. Click Options to access the BIMx Export Options dialog box, with the option to generate Global Illumination.
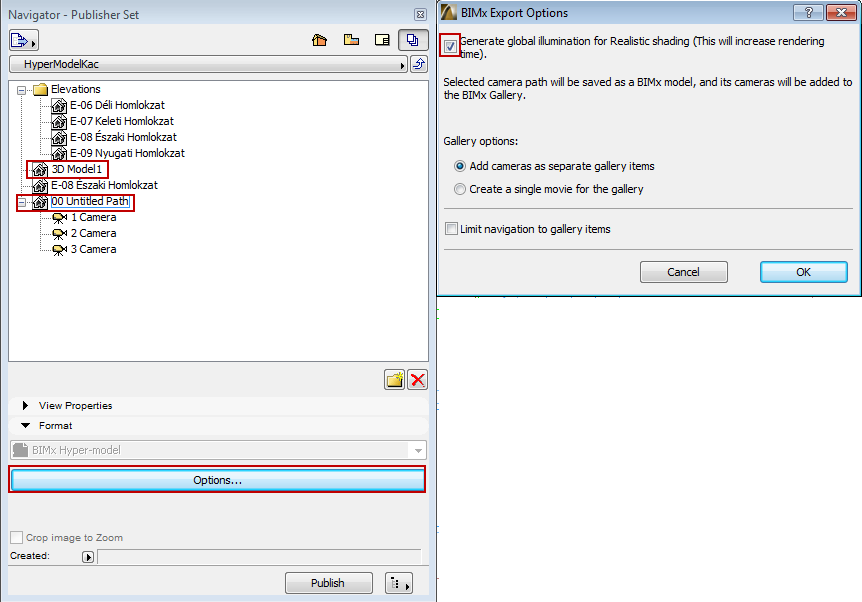
Global Illumination provides a highly realistic view, but increases rendering time. Note that Global Illumination consumes additional memory, so the chance of failure also increases with the size of the model.
Gallery Options for Camera Path
If the Publisher Set contains a camera path (as in the above screenshot), BIMx Export Options includes Gallery options.
See BIMx Export Options.
In the Publishing Properties dialog box, choose how you would like to publish the Hyper-model: either Upload BIMx Hyper-model or Save.
•Upload BIMx Hyper-model will upload the file to the BIMx Model Transfer Site at bimx.graphisoft.com. (You must register before using this site.) The process is the same as when sharing from the BIMx Desktop Viewer.
See the description at Share BIMx 3D Model.
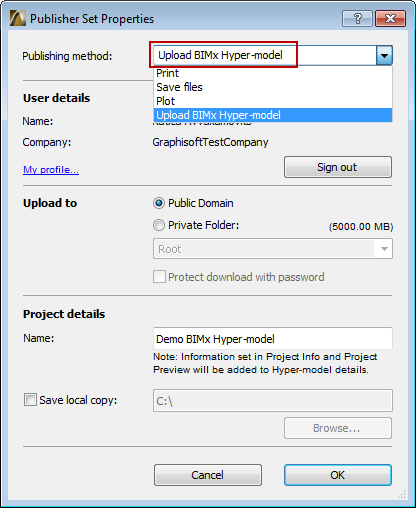
•Choose whether to upload to the Public Domain, or to a Private Folder. If you choose Private Folder, you can optionally password-protect the file.
See BIMx License Options.
•Optionally, rename the Hyper-model file.
Note: The Hyper-model will include the ARCHICAD Project Info and Project Preview data.
•Optionally, check Save local copy and enter a destination file path. This will save a local copy of the Hyper-model in addition to uploading it to the BIMx Model Transfer site.
•Save will save the Hyper-model to the selected destination path.
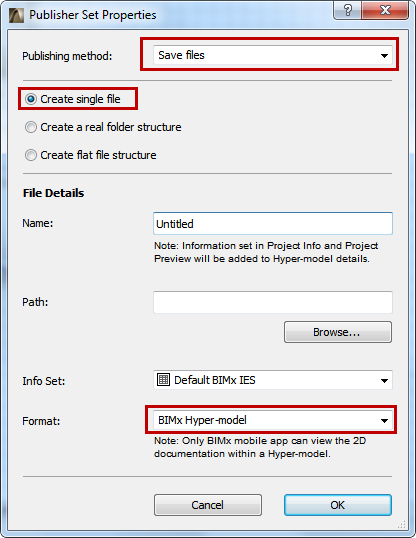
•You must choose the Create single file option to be able to access the BIMx Hyper-model format.
•Use the Info Set pop-up to control which model element information should be available to viewers of the BIMx model on a mobile device:
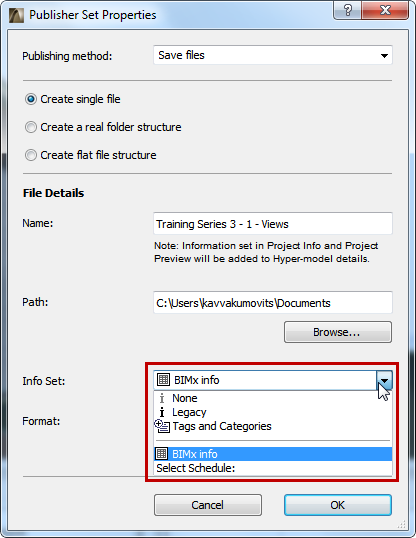
-The BIMx info option uses data defined in an Interactive Element Schedule of this name. This schedule is provided in the factory-default ARCHICAD template (for the International market), but you are free to modify the schedule scheme as needed, or to choose a different schedule.
-The Tags and Categories option uses the data defined for each element in the Tags and Categories panel of its Element Settings dialog box.
-The Legacy option provides the same basic element data as in previous BIMx versions.
-Choose None if you don’t want the recipient to view any element information (e.g., if the recipient will just be viewing the model geometry as a whole, and doesn’t need any details on the various component elements).
•Enter a destination file path.
•Choose BIMx Hyper-model as the file format.
The Publish Process
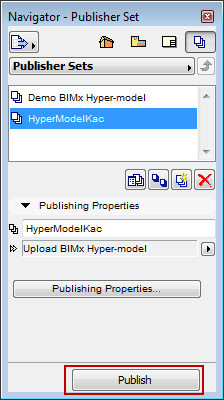
In the Publisher, select your Publisher Set and click Publish.
The Publisher process dialog box appears:
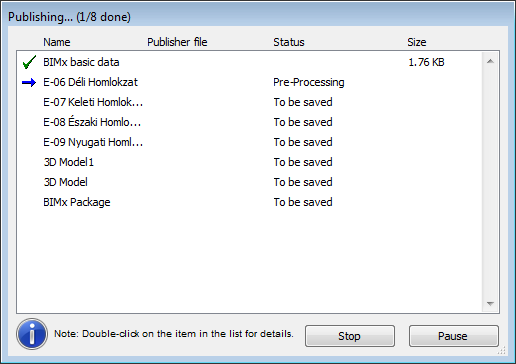
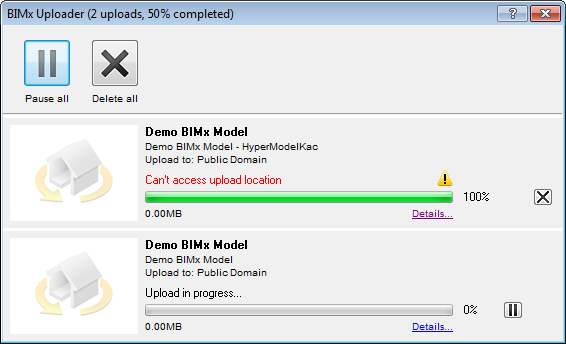
If you are uploading the BIMx Hyper-model to the BIMx Model Transfer site, the BIMx Uploader will also appear to track the status of the upload. Use this dialog box to stop the upload or re-start the process as needed.
Note: You can cancel Global Illumination calculation, without interrupting the overall Publishing process. To cancel, select the 3D view in the Publisher dialog box. The small red X will cancel the Global Illumination calculation, but the 3D view will still be saved to the Hyper-model - without Global Illumination.
If the process encounters any problems, you are notified of the problem. Click Details to see more information.