
The Sampling settings here only affect the GI sampling: How many samples should be sent and where in order to gather light from the environment? Samples are sent out hemispherically from the shading point (also called the “primary sampler”).
The first setting - Samples - is the most important; the others are designed for fine-tuning (except for the radiosity maps, if used).
Stochastic Samples
Method: Two methods of defining sample count are used:
•An automatic determination controlled by one of the quality settings (Low, Medium, High, Accuracy)
•A fixed number of samples defined by the Sample Count setting
•Selecting Custom Sample Count lets you manually define the Sample Count value
•Selecting Custom Accuracy lets you manually define the Accuracy value
Accuracy: Use this setting to define an optimized sample count. The optimal count depends on the Project (and in IR GI Mode, on the other Irradiance Cache settings as well) and of course the defined Accuracy value.
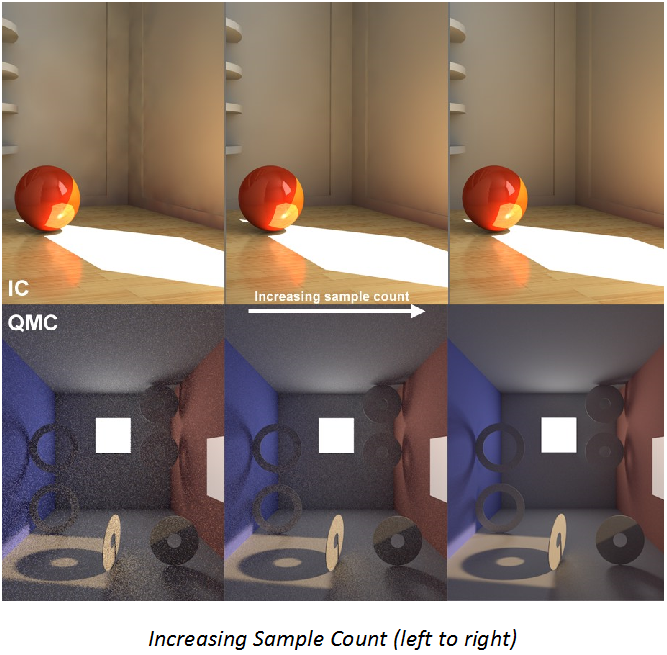
Sample Count: This setting defines the fixed number of samples to be used. A higher value produces a correspondingly better render quality (for QMC this can be seen in the graininess; for IR the number of spots is reduced).
This rendering Sample Count will also be used by the Discrete Area and Discrete Sky Sampling if they do not have a custom count defined (see below).
Discrete Area Sampling
Check Use Area Sampling to enable this method.
In order for this sampling type to work, the GI Area Light option must be enabled in the Surface’s Illumination channel.
See Illumination.
This sampling method sends additional samples to (polygon) Area lights. This will emphasize them disproportionately, which will have a major effect on the quality of the GI.
Note that even if you disable this option, the Area lights will NOT be omitted from the GI calculation. These lights will merely receive no special attention and will be hit randomly by the hemispheric sampling (with a correspondingly grainy result).
Force Per-Pixel: This option is only advantageous in IR GI mode. Normally every light will be taken into consideration for the cache when an Irradiance Cache is created. However, this does not work if you have very small, bright Area lights. The result will be spotty images. If you enable the Force Per-Pixel option, the calculation of the Area lights will be split from the cache and calculated separately (as the QMC GI mode does by default) for each potential pixel (object surfaces but no backgrounds or skies, for example).
Custom Count/Sample Count
Use these fields to define a custom sample count. If Custom Count is disabled, the same number of samples will be used as defined in Stochastic Sampling.
Discrete Sky Sampling
Check Use Sky Sampling to enable this method.
This sampling mode takes into account the sky in particular (e.g., the Physical Sky or a HDRI Sky).
A sky map will be calculated internally during rendering, which will then concentrate the additionally created samples primarily on the brightest regions during rendering. This means that HDRI textures with enough contrast can cast shadows with locally very bright regions.
If this option is disabled, the sky will NOT be omitted from the GI calculation. The sky will merely receive no special attention and will be hit randomly by the hemispherical sampling (the extremely bright sun will produce a grainy image).
Force Per-Pixel: A Sky object with an HDRI texture applied to it is located behind the window.
This option only bears advantages for the IR GI mode. When an Irradiance Cache is created, the sky will normally be sampled and taken into consideration for the cache. For bright regions (sun) or those with smaller surfaces, this method has limits and will result in spotty renderings.
If you enable Force Per-Pixel, the calculation of the light emitted by the sky will be split from the cache and calculated separately for each pixel that comes into question (object surfaces but no backgrounds, skies, etc.), which is how the QMC GI mode works by default.
Custom Count/Sample Count
Use these fields to define a custom sample count. If Custom Count is disabled, the same number of samples will be used as defined in Stochastic Sampling.
Check Use Radiosity Maps to enable this method.
Radiosity Maps are an optional method of GI calculation which makes it possible to create precise QMC renderings with reduced render times (but rendering can also be made faster in IR mode).
Simply put, illumination (light sources, Area lights, sky) on polygons is calculated internally as special textures (Radiosity Maps) during rendering, prior to the actual GI calculation. These Radiosity Maps are then used during the actual GI calculation for faster rendering. This method has several advantages and disadvantages:
Advantages:
•GI calculation is faster
•Radiosity Maps can be saved and re-used.
Disadvantages:
•The actual diffuse depth (number of diffused light reflections) is 1 (2 in the case of Area lights and/or skies), which darkens the rendering. To some degree, this can be offset by increasing the Gamma value.
•More memory is required
•Special objects such as perfect spheres are not supported.
•When using simplified geometry (e.g., single-polygon walls without thickness), light can seep through. This can be prevented by modeling more realistically, i.e., giving walls a thickness.
Tips:
•Radiosity Maps can be made visible (set the Mode control to “Shading”).
•Radiosity Maps should have a light dispersion that is as homogeneous as possible.
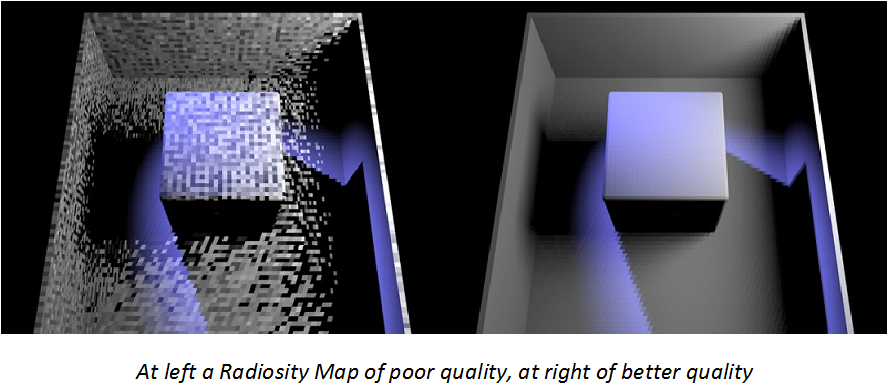
Map Density
Use this setting to define the Radiosity Map resolution. The higher the value, the smaller the Texels will be (the small squares for which a uniform color/brightness is ascertained) and the higher the quality of the Radiosity Map will be (with correspondingly longer render times and increased memory requirements).
You can make Texels visible without complicated calculations by setting the Mode to Texels and rendering the Project.
If the Texels are too large and light seeps through, reducing the size of the Texels can help alleviate this problem.
This setting can be understood as a type of antialiasing for Texels. A value of 2 will divide a square Texel into quarters and a color will be calculated for each quarter and averaged for that Texel. A value of 3 will divide the Texel into 9 equal parts and so on. Higher values will result in better quality and correspondingly longer render times and greater memory usage.
Mode
•Normal: This is the normal render mode in which no Texels will be shown. This mode should be used for final renderings.
•Shading: This mode is the most comprehensive because it simultaneously shows the Texel dispersion and shaded Texels (considering the light, color and shadows, etc.).
•Shading Front/Shading Back
Use these settings to display the shading on the front or back sides of polygons.
•Texels: Displays the Texels in a grayscale pattern, independent of any illumination.
Area Sampling: If this option is enabled, GI Area lights will also be included in the calculation of Radiosity Maps (and only for these!) and samples added (defined by the Sample Count setting). This option should always be enabled.
Sky Sampling: If this option is enabled, the sky will also be included in the calculation of Radiosity Maps (Sky and Physical Sky) and samples added (defined by the Sample Count setting). This option should always be enabled.