The Magic Wand saves you work by finding and tracing a linear or polygon shape from among existing elements, and then generating a new element based on the polygon. The Magic Wand lets you create special shapes that are not available for that particular tool type or would be tedious to construct segment by segment. Since it creates polygonal shapes by nature, the Magic Wand will ignore geometry method settings (such as Rotated Rectangle) for the current tool.
When creating curved Walls and polygon-type elements based on Arcs, Circles and Splines, the approximation is defined in Magic Wand Settings.
The Magic Wand works in both the 2D and 3D Windows and recognizes the following element types: Wall, Beam, Slab, Roof, Curtain Wall, Morph, Fill, Mesh, Line, Arc, Polyline, and Spline. (In Section/Elevation/IE and 3D Document windows, the Magic Wand recognizes only 2D drawing-type elements). The Magic Wand recognizes elements that are locked, displayed from remote stories or a Trace Reference, reserved by others or outside your workspace.
Related Topics:
How to Create an Element with the Magic Wand
Using the Magic Wand to Add/Subtract Polygon Shapes
How to Create an Element with the Magic Wand
1.From the Toolbox, select the type of the new element you want to create.
2.Activate the Magic Wand by doing one of the following:
•Press the Spacebar
•Click the Magic Wand icon in the Control Box
Note: The Control Box is not visible by default. It is available at Window > Palettes.
•Choose Design > Outline Polygon with Magic Wand
The Magic Wand has three different shapes for identifying:
•nodes

•edges

•empty space and surfaces

3.Click with the Magic Wand active. It will automatically find and trace a polygon shape.
•If you click on an edge or node, the Magic Wand creates a polygon by tracing that element and/or finding an element chain: it runs along that edge and traces the element chains whose endpoints fall within that edge.
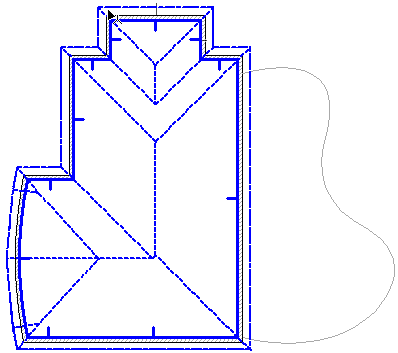
For example, activate the Roof tool (Multi-plane method) and click with the Magic Wand on the edge of the Wall to instantly create a Roof that matches the Wall polygon.

•If you click in empty space or on a surface, the Magic Wand searches for and traces the closed geometric area formed by the nearest elements (whether chained together or merely intersecting), and generates the resulting polygon.
For example, activate the Fill tool, then click with the Magic Wand inside the empty area denoted by the curved line, to create a Fill of that shape.
•You can refine the Magic Wand function by selecting one or more elements. In this case, the Magic Wand will only take the selected elements into account when searching for chained elements or a bounded area.
4.The new elements are generated.
•The new elements are not linked to the originals and can be manipulated independently.
•If the original shapes are superfluous, you can delete them.
•If Offset or Multi-Offset has been activated, you can complete the offset function after the Magic Wand has created the new polygon.
•If you are creating a single Roof, you must first draw a pivot line and define the pitch before creating the polygon with the Magic Wand.
•If you are creating a Fill with a custom origin, you will first generate the polygon with the Magic Wand, then draw the fill orientation vector.
All of the characteristics of the new elements are determined by the current default settings of the corresponding tool. You should always check that these are correct either before or after using the Magic Wand, especially if the elements are intended to have a specific relationship to each other, such as a roof resting on a Wall.
In 3D, the Magic Wand feature works as in the Floor Plan, but instead of using only the top view of the elements, each element is considered the way it lies in space. When searching for the contours of the new element, ARCHICAD will only look at the elements that are actually intersected by the clicked plane. The clicked plane is always the horizontal plane through the clicked surface point or through the User Origin (e.g., when clicking inside polygon walls or beams into space).
Using the Magic Wand to Add/Subtract Polygon Shapes
Use the Magic Wand to add or subtract the shape of an existing polygon (of the same or a different element type).
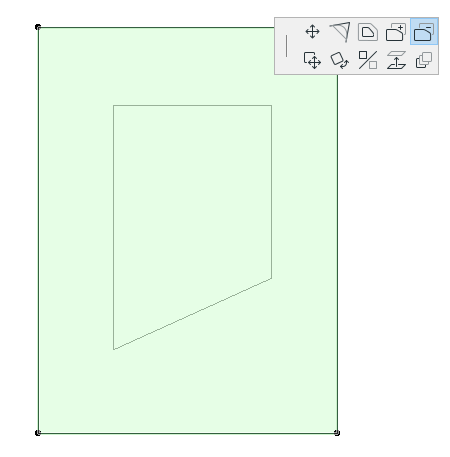
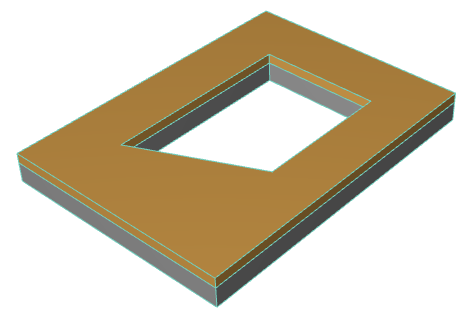
1.Select the polygon from which you wish to subtract another shape. In this example we want to subtract a polygon from a slab.
2.Choose the “Subtract from Polygon” icon in the pet palette.
3.Move the cursor onto the polygon that you want to subtract and activate the Magic Wand (press the spacebar).
4.Click to complete.


For more information, see Magic Wand Settings.