Add Additional Curtain Wall Boundary
A single Curtain Wall can include several Boundaries. The advantage is that you can create several separate shapes or sections within a single Curtain Wall, yet use an identical Scheme for all of them.
In our example, we wish to place a Curtain Wall on the south facade of this building: a single Curtain Wall, using uniform Scheme Settings, but in two separate parts.
1.Draw a straight Curtain Wall on one of the surfaces using the usual methods.
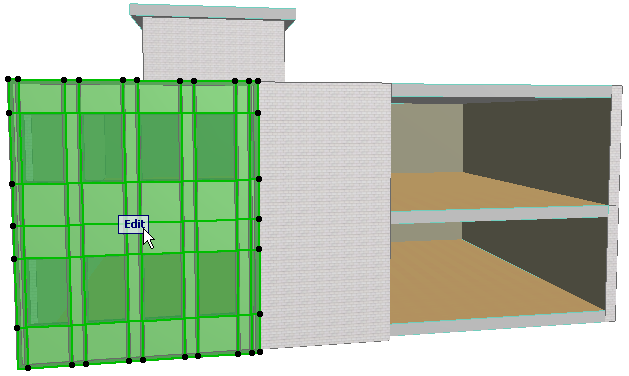
2.Select the Curtain Wall and go into Edit mode. Make sure that the Environment display option is switched On.
3.Select the Scheme tool and the Boundary Input method.

Now click on the desired Curtain Wall segment in which you wish to draw. (This is relevant for Chained Curtain Walls, which have multiple segments. In our example, there is only one Curtain Wall segment, but you must click anyway.)
4.Now start drawing a new Boundary. You are drawing on the Base Surface of the currently edited Curtain Wall.
Note: Because the Base Surface of any Curtain Wall can be infinite in one or more directions, you always have “space” to draw any number of new Boundaries while still working on the same single original Curtain Wall.
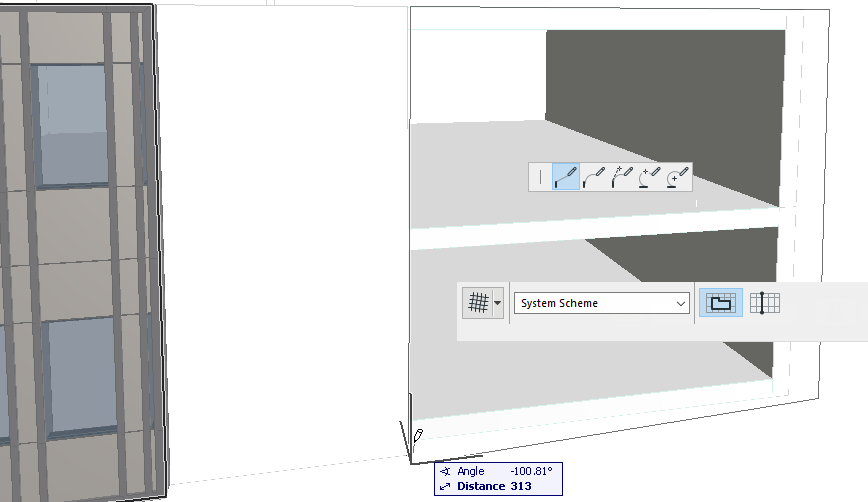
5.Complete the new Boundary.
6.View the result, with the Scheme displayed. Note that the Scheme has been extended to accommodate the new Boundary.
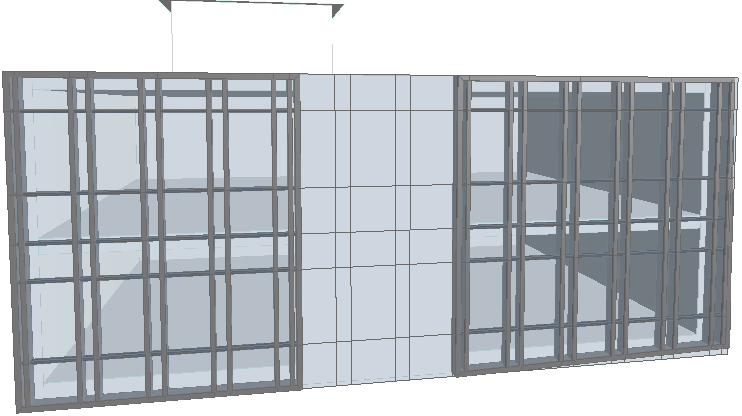
7.Try editing a selected Grid line, or edit the Panel pattern. Note that both “parts” of the Curtain Wall are handled in sync, because they are built upon a single Base Surface and a single Scheme.