Morph Texture Mapping and Alignment
If your Morph uses a surface that includes a texture, you can control how that texture is displayed on the Morph surfaces.
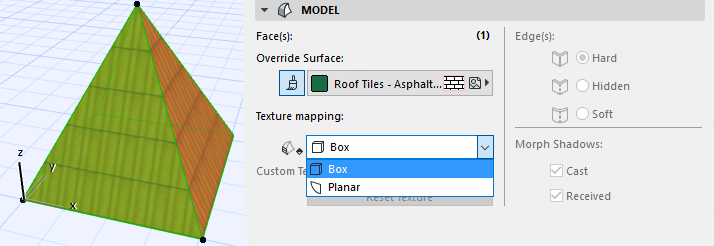
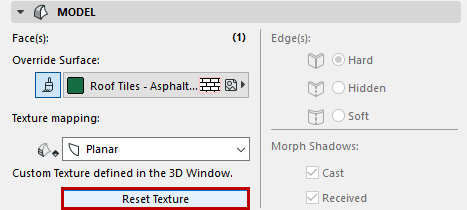
The Texture Mapping definition (either Box or Planar) is shown in the Model Panel of Morph Selection Settings.
Box Mapping: this is the default, and the only option available if you have selected an entire Morph (see Box Mapping below).
Planar: This option can only be chosen if your selection includes one or more faces. The “Planar” definition means that you can vary the plane from which the texture is projected onto the selected face, as well as set an individual texture alignment and origin for the face.
Box Mapping
For a Morph selected as a whole, and for default Morphs, the texture mapping is always “Box.”
“Box” means the pattern is projected onto the Morph from six planes (as from a box). Any given plane gets its texture from the direction of the closest of the six planes.
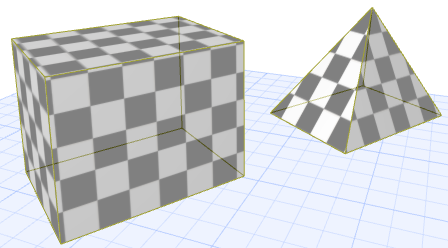
The origin of the texture is at Project Zero.
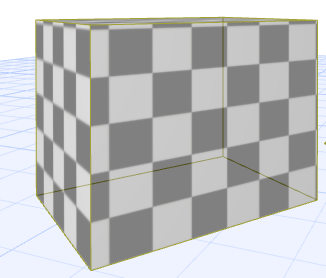
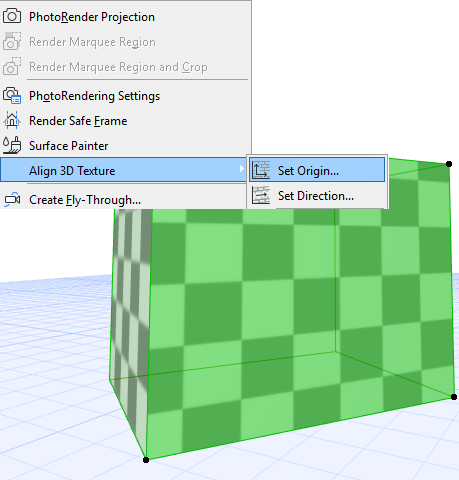
Set Origin of Box Mapping
1.Select one or more Morphs.
2.Use Document > Creative Imaging > Align 3D Texture > Set Origin.
3.Click at the point (e.g. a corner) where you want the texture pattern to originate.
4.The origin is set. (If you selected multiple Morphs, the texture origin is in effect for all selected Morphs.)
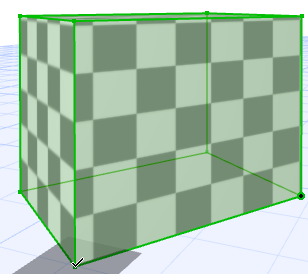

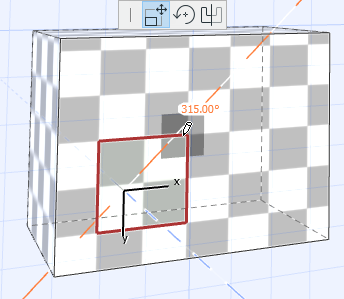
Set Direction of Box Mapping Texture
1.Select one or more Morphs.
2.Use Document > Creative Imaging > Align 3D Texture > Set Direction.
3.In the appearing dialog box, enter a rotation angle or draw a vector to reset its direction.
For Box Mapping, “reset” means that the texture origin returns to Project Zero.
1.Select one or more Morphs.
2.Do one of the following:
•Use Document > Creative Imaging > Align 3D Texture > Reset.
•Click Reset Texture in Morph Selection Settings (Model Panel), or click the Reset button alongside Custom Texture in the Info Box.
3.The texture origin is reset.
Planar Mapping
This option can is available only if your selection includes one or more Morph faces. The “Planar” definition means that you can vary:
•the plane from which the texture is projected onto the selected face
•the texture origin separately for any face
•the texture alignment separately for any face
Set Texture Projection by Plane
1.Select one or more Morph faces.
2.Choose Document > Creative Imaging > Align 3D Texture. (The Texture Mapping control in Morph Selection Settings automatically changes to “Planar.”)
3.Choose one of the following commands: Set Origin/Set Direction.
4.An editing square appears on the Morph face, representing a unit of the texture pattern.
5.Vary the editing plane to vary the texture projection.
Set Origin or Alignment by Plane
1.Select one or more Morph faces.
2.Choose Document > Creative Imaging > Align 3D Texture. (The Texture Mapping control in Morph Selection Settings automatically changes to “Planar.”)
3.Choose one of the following commands: Set Origin/Set Direction.
4.An editing square appears on the Morph face, representing a unit of the texture pattern.
5.Click anywhere on the square. A pet palette appears with the “Move” and “Rotate” options.
6.Do one of the following:
•Drag the square and click to place. The clicked point represents the origin of the texture pattern on that face.
•Choose the Move icon to drag the texture and realign its origin (same effect as above).
•Choose the Rotate icon to rotate the texture direction on that face.
7.Click anywhere outside the square with the hammer cursor to complete the operation.