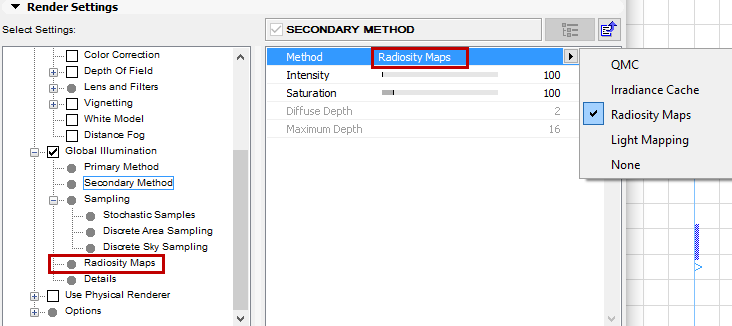
When using the Secondary Method, Radiosity Maps are a quick and easy to use function that is particularly well-suited for preview renderings.
Simply put, illumination (light sources, Area lights, sky) on polygons is calculated internally as special textures (Radiosity Maps) during rendering, prior to the actual GI calculation. These Radiosity Maps are then used during the actual GI calculation for faster rendering. This method has several advantages and disadvantages:
Advantages:
•GI calculation is faster
•Radiosity Maps can be saved and re-used.
Disadvantages:
•The actual diffuse depth (number of diffused light reflections) is 1 (2 in the case of Area lights and/or skies), which darkens the rendering. To some degree, this can be offset by increasing the Gamma value.
•More memory is required
•When using simplified geometry (e.g., single-polygon walls without thickness), light can seep through. This can be prevented by modeling more realistically, i.e., giving walls a thickness.
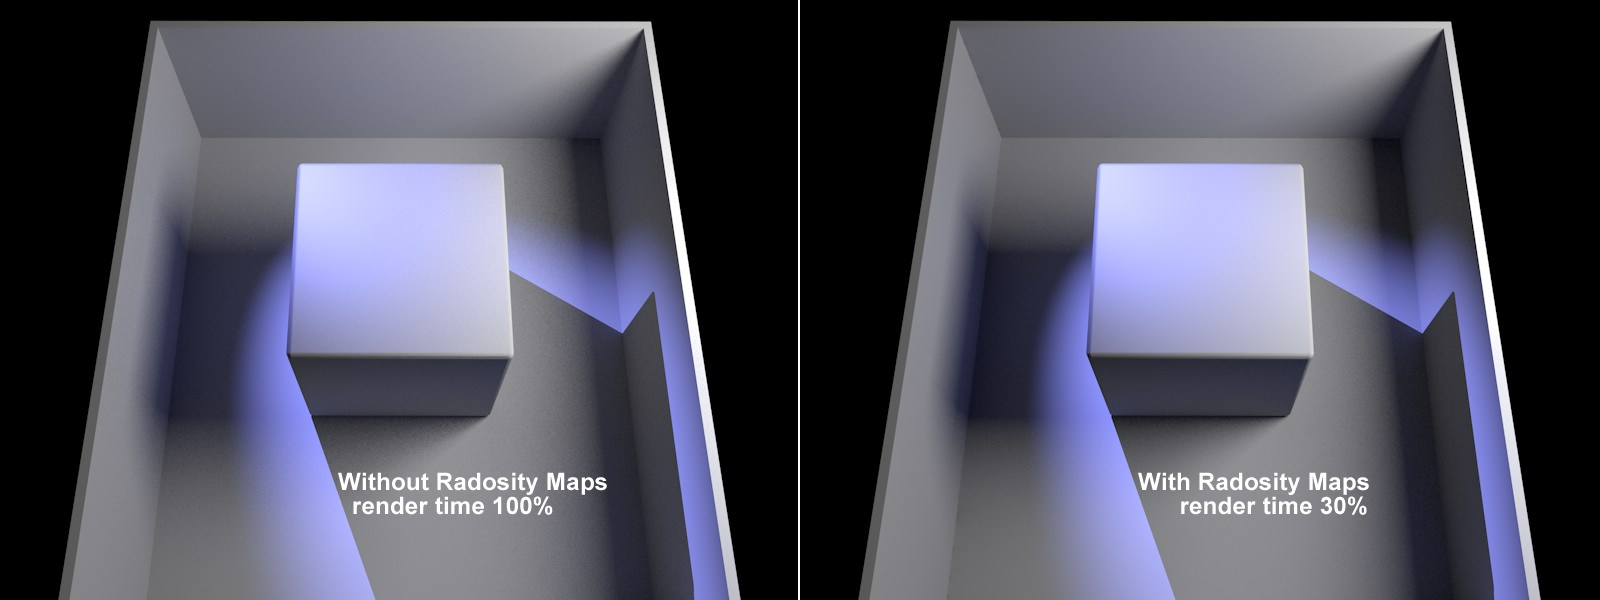
In the example above, the render time was greatly reduced while achieving a similar result.
The use of Radiosity Maps darkens (reduces diffuse depth) the corners and shadows somewhat.
Tips:
•Radiosity Maps can be made visible (set the Mode control to “Shading”).
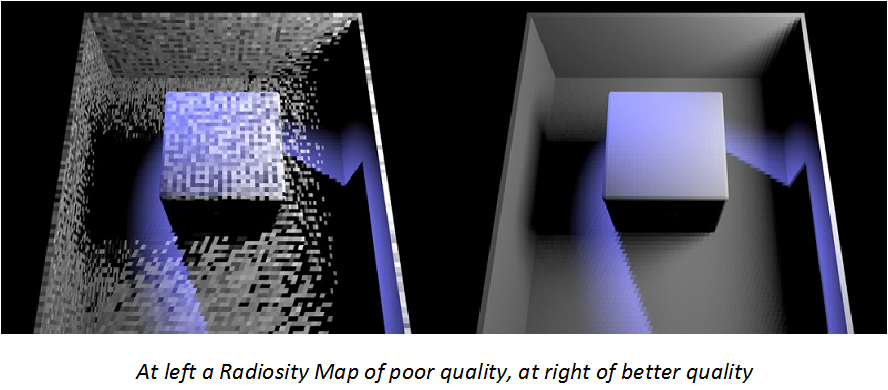
•Radiosity Maps should have a light dispersion that is as homogeneous as possible.
Map Density
Use this setting to define the Radiosity Map resolution. The higher the value, the smaller the Texels will be (the small squares for which a uniform color/brightness is ascertained) and the higher the quality of the Radiosity Map will be (with correspondingly longer render times and increased memory requirements).
You can make Texels visible without complicated calculations by setting the Mode to Texels and rendering the Project.
If the Texels are too large and light seeps through, reducing the size of the Texels can help alleviate this problem.