(Options > Work Environment > Dialog Boxes and Palettes)
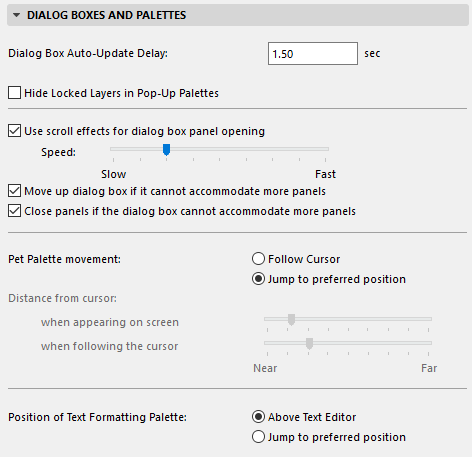
This screen contains options related to the display of dialog boxes and palettes.

Dialog Box Auto-Update Delay: Enter a value in seconds for the auto-update delay time for edit text dialog boxes. (This is the amount of time it takes for the program to “validate” your typed entry as the desired value; you do not have to click “Enter”.)
Hide Locked Layers in Pop-up Palettes: This option means that locked layers will not be shown in any of the layer pop-up palettes.
Use Scroll Effects for Dialog Box Panel Opening (Windows Only): By default, to prevent crowding of dialogs when opening new panels, previously opened panels will close automatically, and the dialog box will move upwards on the screen. If you check this box it means that dialog box panels will “roll open” (at the speed you set with the slider) instead of “snapping open,” which is the effect you get if you uncheck the box.
Move up dialog box if it cannot accommodate more panels: Many dialog boxes have five or more panels that might not all fit on the screen if they were opened all at once. This option will move the whole dialog box up to make room for newly opened panels.
Close panels if the dialog box cannot accommodate more panels: This option will close one or more open panels to make room for newly opened panels.
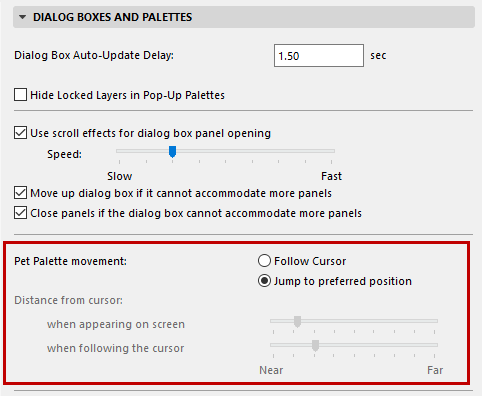
To define the type of pet palette movement you prefer, open Options > Work Environment > Dialog Boxes and Palettes.
Choose a radio button to determine whether and how your pet palettes will move around on the screen as you work.

•Follow Cursor: This means that the pet palette will follow your cursor around the screen as you complete your editing operation. (This way the editing icons on the pet palette are available right next to your cursor instead of at a far corner of the screen.)
•Jump to Preferred Position: This means that when you bring up a pet palette and release the mouse button, the pet palette jumps to one position and stays there as you complete the editing operation. If you want the pet palette to “stay” someplace else, drag and drop the palette to your preferred position. All subsequent pet palettes will appear at that preferred position. You can still move the pet palette at any time during your editing operation.
Distance from Cursor
Use the two slider controls to set the palette’s following distance from the cursor.
•The first slider sets the palette’s initial distance from the cursor when it first appears on screen.
•The second slider sets a minimum “following distance”: the palette will not follow the cursor until the cursor is at that predefined distance from the palette. (This is useful if you want to prevent the palette from covering up the very area that you want to edit.)
The operations that can be performed by using the pet palette are detailed in Editing Elements.
Position of Text Formatting Palette
•Above Text Editor: Check this to locate the Text Formatting Palette above the Text Editor.
•Jump to preferred position: Check this to have the Text formatting Palette jump to a preferred position. This means that when you bring up a the Text Formatting palette and release the mouse button, the pet palette jumps to one position and stays there as you complete the editing operation. If you want the palette to “stay” someplace else, drag and drop the palette to your preferred position. All subsequent Text Formatting palettes will appear at that preferred position. You can still move the palette at any time during your editing operation.
For more information on this palette, see Text Block Formatting Panel.
Keep ARCHICAD Palettes visible even when another application is in front (Available for Mac only): Check this box if you want to view any open ARCHICAD palettes while another application is in front on your screen.
This is a Teamwork-specific option. In Teamwork projects, this option will display the photo of joined-in users on the Teamwork Palette, and on the Users list when sending a message.