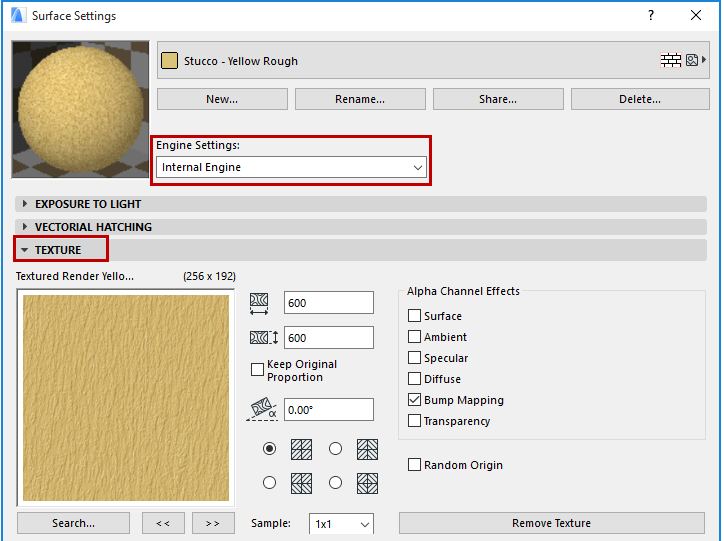
Surface Texture Panel (Internal Engine)
(Options > Element Attributes > Surfaces)
The controls in this panel will affect PhotoRenderings created by the Vectorial 3D Engine and 3D views generated by the Open GL 3D engine.

Choosing and Editing a Texture
On the Texture panel, you can link a Texture to any standard or custom Surface.
If the selected Surface already has a Texture linked to it, the texture’s file name and preview picture are displayed, along with the image size in pixels.
To assign a Texture to a Surface:
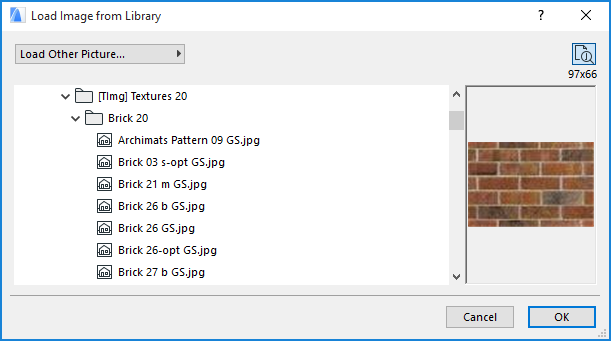
•Click the Search button to open the Load Image from Library dialog box and find the needed texture map.
See also Texture Naming Conventions.
•Click OK to assign the texture.
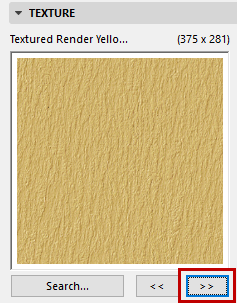
•Another way to choose a texture is to click the Previous/Next arrow buttons below the preview window. ARCHICAD will load the previous/next texture file from the loaded libraries.
Note: Only files in the project libraries are available for selection. If you save your Project as an Archive, all associated Textures can be saved with the Plan by checking the Include Linked Textures checkbox. If a linked texture is missing from the Active Library, its name will appear in the Missing Library Items list.
Click Remove Texture to unlink the Texture from the Surface.
In the middle of the dialog box, a number of controls allow you to define the texture display.
•The first two edit fields define the vertical/horizontal size of the texture as applied to 3D surfaces. For example, if the image shows two bricks, set its size to match the physical size of the bricks.
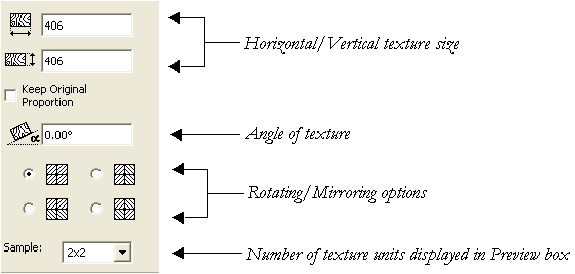
•Check the Keep Original Proportion checkbox if you want to keep the proportions of the original texture file for all elements.
•Define the angle at which the texture is applied to elements.
•Use the four rotating and mirroring radio buttons to arrange the texture sequence.
Note: For good results, you need textures prepared for seamless tiling. These are images that can be placed in a matrix with no apparent line at connecting edges.
•Activate the Random Origin checkbox to use a random starting point for applying the texture. This option is useful if there are several identical elements in the model that should differ in appearance.
Use the Sample pop-up list to adjust the number of texture units displayed in the Preview box - this helps you get a better idea of what the texture will look like.
At the right side of the Surface Settings dialog box (Texture Panel), options are provided for Alpha Channel control.
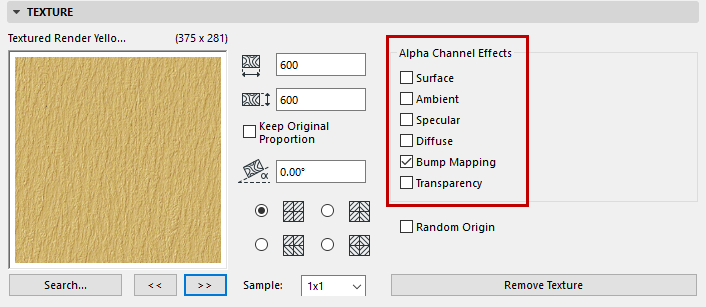
In 32-bit color images, the Alpha Channel is an extra channel (in addition to RGB components) that can be edited in image editing applications such as Adobe Photoshop. ARCHICAD allows you to take advantage of the information placed in the Alpha Channel in several ways:
•for masking elements in PhotoRenderings.
•for transparency or bump mapping.
•to model certain surface properties of the texture.
Surface: If the alpha value is white, then you get the color of the texture, while if it is black, then the surface’s original color will be valid in the given pixel of the given surface. If the value is a shade of gray, then the two colors will be mixed and the result will appear in the PhotoRendering.
Ambient: The same as above, but applied to the Ambient color instead of the Surface color.
Specular: Controls to what extent the Specular effect is taken into account. If the alpha value is white, the Specular effect is entirely taken into account at the given pixel. If the alpha value is black, the Specular effect is entirely disregarded at the given pixel. Here again, intermediate values are allowed.
Diffuse: Controls the effect of diffuse light the same way as with Specular light.
Bump Mapping: Controls the surface normal at the given pixel, allowing for a convex effect on the surface. White values represent bumps, while black values represent holes.
Transparency: If the value is white, then the color of the texture is visible; if it is black, the texture will be perfectly transparent at the given pixel. Intermediate values are allowed.