Set Custom Slab Edge Angle and Edge Surface
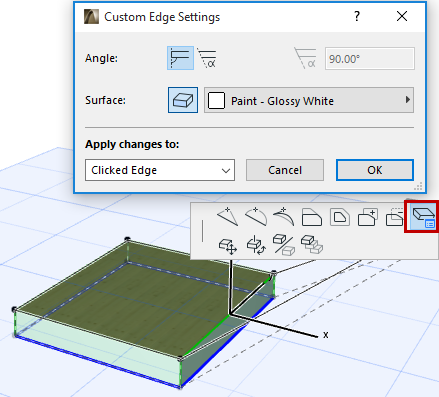
To customize a slab edge angle, and to apply a custom surface to the edge(s) of a slab and/or its holes, select the slab (or just its hole) and click on an edge with the Mercedes cursor to bring up a pet palette. Select the Custom Edge settings icon to open the dialog box.
![]()
Customize Slab Edge Angle
Angle: Choose an angle (Vertical or Custom) for the slab edge. If you choose Custom, enter the desired angle value in the field at right.
If you apply an edge angle here that is different from the default edge angle (set in Slab Settings), the Geometry and Positioning Panel of Slab Settings will indicate that a custom edge angle has been applied.
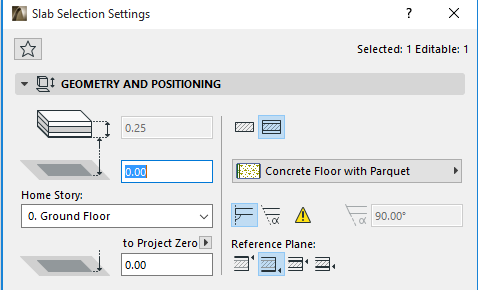
If you later change the Edge angle setting in Slab Settings while the dialog box is still open, the yellow patch (indicating “custom edge”) gets a red shadow. This means that the Slab’s edge angle is going to change: do you want to apply this change to the custom-angle edges too? If so, check the box at the bottom of Slab Settings (Apply changes to custom planes/edges too). If you do not check the box, your custom edge angles remain the way you set them.
Custom Slab Edge Surface
Note: By default, the Surface material applied to a Slab edge derives from the Building Material assigned to the Slab. You can override all edge surfaces of the Slab, using the control in the Model Panel of Roof Settings. The Custom Edge Settings offers a further way to customize the surface of any one or more Slab Edges.
Surface: Click the Surface override button, then choose a custom surface for the slab edge(s).
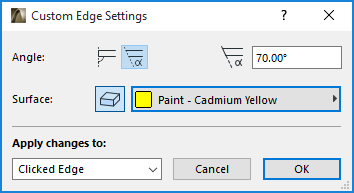
If you apply a surface here to any edge that is different from the edge surface defined in the Model Panel of Slab Settings (or Building Material), the Model Panel will indicate (with a yellow patch) that a custom edge surface has been applied.
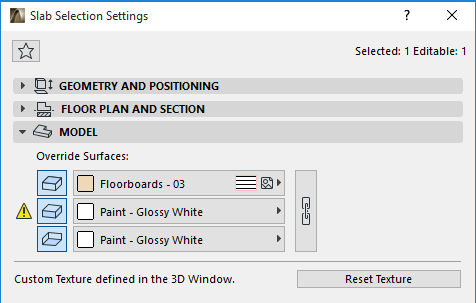
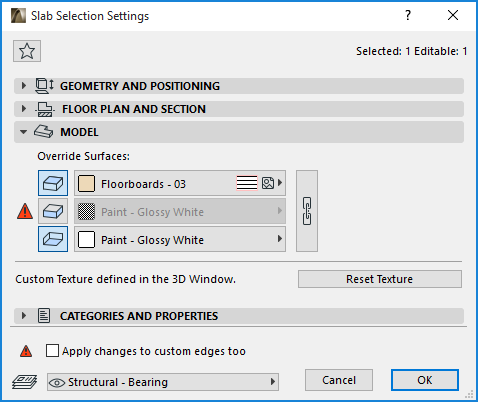
If you override the Slab edge surface in Slab Settings while the dialog box is still open, the yellow patch (indicating “custom edge”) gets a red shadow: this means that the Slab’s general edge setting is going to change: do you want to apply this override to all edges, including the custom edge(s) too?
If so, check the box at the bottom of Slab Settings (Apply changes to custom planes/edges too). If you do not check the box, your custom edge surfaces remain the way you set them.
Apply Changes
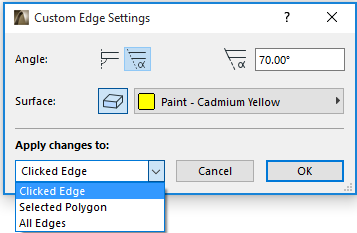
•Clicked Edge will apply the options you choose below (angle, surface) only to the edge you clicked when bringing up the pet palette.
•Selected Polygon will apply the chosen options to the edges of the slab only or the edges of the hole only, depending on which one is selected.
See Selecting Slab Hole below.
•All Edges will apply the chosen options to all edges of the slab as well as all edges of its holes. (If the selected slab has no holes, then Selected Polygon and All Edges have the same effect.)
To customize the Slab Hole edge or angle, you must select the hole, rather than the entire slab.
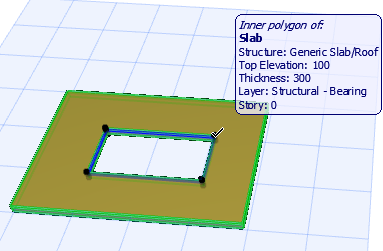
To ensure that you have selected the hole, make sure the Info Tag says “Inner polygon of” the selected Slab:
To apply the customized values to the hole only, then choose Selected Polygon from the Apply On pop-up.
