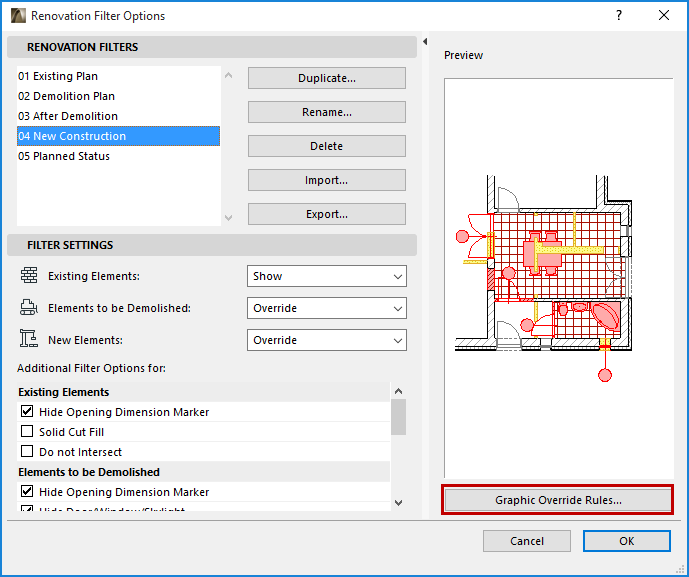
Use this dialog box (Document > Renovation > Renovation Filter Options) to define which elements (by Renovation Status) should be shown, hidden, or overridden in a Renovation Filter.
You can change the settings of existing filters, or create new Renovation Filters.
Renovation Filter Options are stored with the project.
See also Examples of Renovation Filters.

Open Renovation Filter Options Dialog Box
Do one of the following:
•Click the Reno Filter Options icon from the Quick Options Tab

•Go to Document > Renovation > Renovation Filter Options
•Click Renovation Filter Options from the pop-up in the Renovation Palette.

Choose a Filter to Edit
Use the pop-up at the top of Renovation Filter Options to choose the Filter you want to view or edit.

•Duplicate: Click this button to create a new Renovation Filter by duplicating the selected filter under a new name and editing its properties.
•Rename: Click this button to rename the currently selected Renovation Filter.
•Delete: Click this button to remove the selected Renovation Filter from the project.
•Import: Click Import to add a saved Renovation Filter (.xml file) to your project.
•Export: Click Export to save the selected Renovation Filter (.xml file) to an external location. It can then be imported to another ARCHICAD project.
Define Show/Hide/Override By Renovation Status
For the selected Renovation Filter, define which elements, depending on their Renovation Status, should be shown, hidden, or overridden whenever this Renovation Filter is in effect.
For each Renovation Status, choose either Show, Hide, or Override.

•Show: Elements of this Status will be shown using the fills/colors/line types as set in their Settings dialog box.
•Hide: Elements of this Status will not be shown at all.
•Override: Elements of this Status will be shown, using the Override Style defined in the Graphic Override Rules dialog box.
Note: To open this dialog box, click the button at the bottom of Renovation Filter Options, or use Document > Graphic Overrides > Graphic Override Rules.
For more information, see Graphic Overrides By Renovation Status.

Add Additional Overrides to the Renovation Filter
Additional Override options are available for “Existing” elements, for “To be Demolished” elements, and for Annotation Elements.
These extra options help you meet local standards or make your Renovation views easier to interpret.
Check the box of any of the Additional Overrides you wish to add to your Renovation Filter definitions:
For “Existing” Elements:
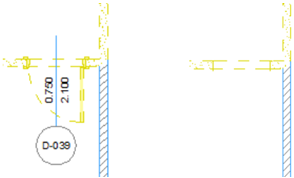
•Hide Opening Dimension Marker (if you don’t need to see dimensions of openings already in place)

•Solid Cut Fill (if you don’t need to see the structure of walls already in place)

•Do not Intersect (use this to ensure that intersections among New or Demolished walls do not interfere with existing wall intersections)

For “To Be Demolished” Elements:
•Hide Opening Dimension Marker (if you don’t need to see dimensions of openings that will soon no longer exist)

•Hide Door/Window/Skylight (if you don’t need to see openings that will soon no longer exist, especially if they are part of walls to be demolished anyway)

•Hide Zone (if you don’t want to see information for zones that will be eliminated)

•Hide Objects (since most furnishings will not really be demolished; and they don’t need to be visible on the Demolition Plan)

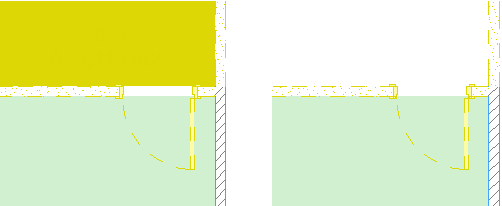
•Solid Cut Fill (if you don’t need to see the structure of walls that will be demolished)
•Transparent Fill (to indicate the place of a demolished element with just lines, no fill)
•Do not Intersect (to ensure that intersections among New or Demolished walls do not interfere with existing wall intersections)

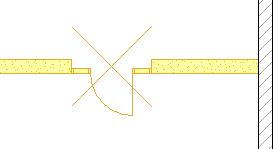
•Mark Openings with “X” Symbol: Place an X on Doors and Windows to be demolished.

For Annotation Elements:
•Do not Override Dimensions/Texts/Labels
•Do not Override Drafting Fills/Lines
Use these checkboxes to exclude Annotation Elements - Dimensions, Texts and Labels, and/or Drafting Fills and Lines - from the filter settings.
For example, this way you can make sure your labels and texts continue to be shown normally (as in the image on the right), even on a Demolition Plan:

