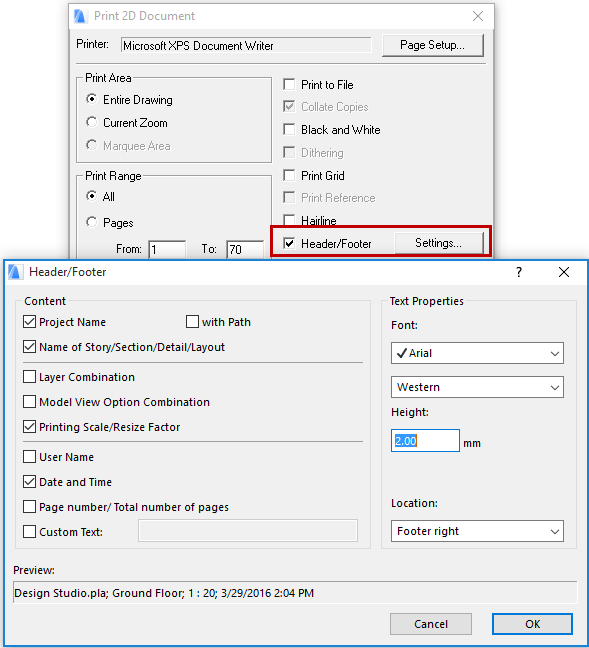
Use the Settings button in Print 2D Document, Print 3D or Print Layout dialog boxes to open this dialog box. (Check the “Header/Footer” box first, to enable the Settings button.)

Content: In this section, check the items you would like to include in your header or footer. The available options are:
•Project name, optionally With Path
•Name of Story/Section/Detail/Layout
•Layer Combination (not available for Layouts)
•Model View Option Combination (not available for Layouts)
•Printing Scale (for 2D model windows)/Resize Factor (for Layouts)
•User Name
•Date and Time
•Page number/number of pages
•Custom Text. If you check this box, enter custom text in the field to the right.
Text Properties: Use the controls in this section to set the properties of text items in the header/footer, including Font Type, coding and font height3+.
Location: Use this pop-up field to choose between either a header (top of page) or a footer (bottom of page), and to set its horizontal location (left, center or right of the page.)
Preview: This field shows you the contents of your header or footer.
A symbolic preview of your header or footer is also viewable in the Print dialog.
When using a header or footer, please note:
•If you are working on a shared Teamwork Project, the User Name field changes to Team Member name.
•A header or footer can only be a single line.
•You cannot change the order of the fields.