General Considerations When Using Detailed Settings
The following are general considerations related to some of the Detailed parameters of CineRender Settings.
Physical vs. Standard Renderer
Optimize Rendering Time with “General Options”
Physical vs. Standard Renderer
By default, CineRender uses a rendering mode called “Standard”, which will give good results for most users.
The alternative is the Physical Renderer, which simulates the working of a physical camera and has corresponding parameters (e.g. shutter speed).
To activate Physical Renderer, check the Use Physical Renderer box in the Detailed Settings view of CineRender Settings.

(The box is unchecked by default, which means the Standard renderer is used.)
Some considerations when choosing a Renderer mode (Standard vs. Physical):
•If you have a standard-sized building without blurry reflections: Use Standard render mode
•If you have a large, detailed model including a variety of surfaces with complex parameters, and/or many blurry reflections: Physical render mode will decrease rendering times for these operations
•When rendering bitmap objects, use the Physical renderer
Characteristics of the Physical Renderer
•Tends to create a grainy image, if the settings are not optimized
•Correctly depicts the following photographic effects:
◦Rendered depth of field with corresponding blur effects
◦Vignetting (darkening towards the image edge)
◦Chromatic Aberration (color seams at edges)
•When rendering multiple, combined blur effects (blurry reflections/blurry transparency) the Physical Renderer is faster than the Standard renderer.
•Easier to set up: the Physical renderer does not use Min/Max Samples and Accuracy values in light and Surface Settings
•Does not use Antialiasing
•includes different RayTracing Engines to choose from: Physical (legacy), Embree (Turboboost), and Embree.
•Includes different rendering algorithms to choose from: Fixed/Adaptive and Progressive mode. Using the progressive mode, one can get a grainy but still realistic image immediately after pressing the render button (and after GI, if used), and thus the rendered image becomes progressively less grainy as rendering time passes. (See Progressive Rendering Mode.)
•Depth of Field works like a camera setting (F-stop). (In contrast, Depth of Field in the Standard renderer is a post effect.) This makes the Physical renderer preferable if:
◦you are using Textures with alpha effects and want to combine these with Depth of Field
◦your model contains many transparent surfaces (this can look artificial if rendered as a post effect, as in the Standard renderer).
Drawbacks of the Physical Renderer
•The realistic simulation of physical effects requires more calculation power and more time. It does, however, offer several more settings (which offer great potential for optimization).
•Physical rendering does not work in conjunction with Specular lights or cylindrical lens; grass is rendered much more slowly.
Optimize Rendering Time with “General Options”

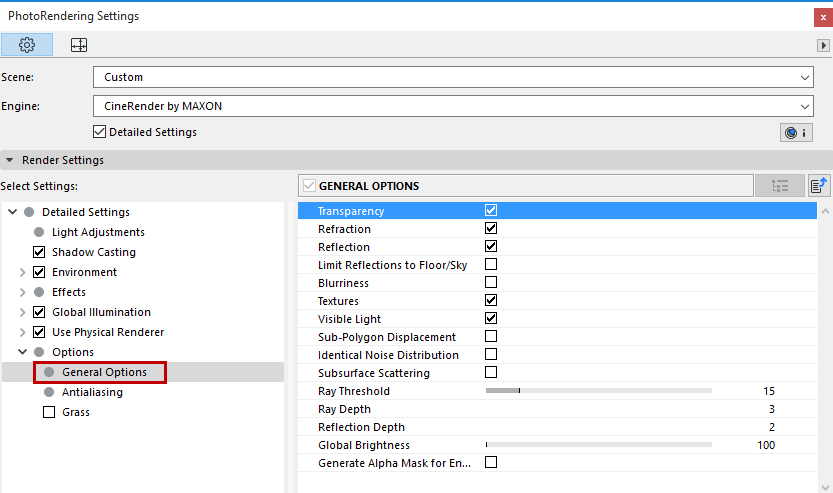
This list of options affect the rendering as a whole: if you uncheck an option here, it is disabled for the whole rendering model, regardless of what else you have set elsewhere. It is worth considering which of these can be turned off so as to minimize render time. For example, you can turn off all blurriness with a single click.
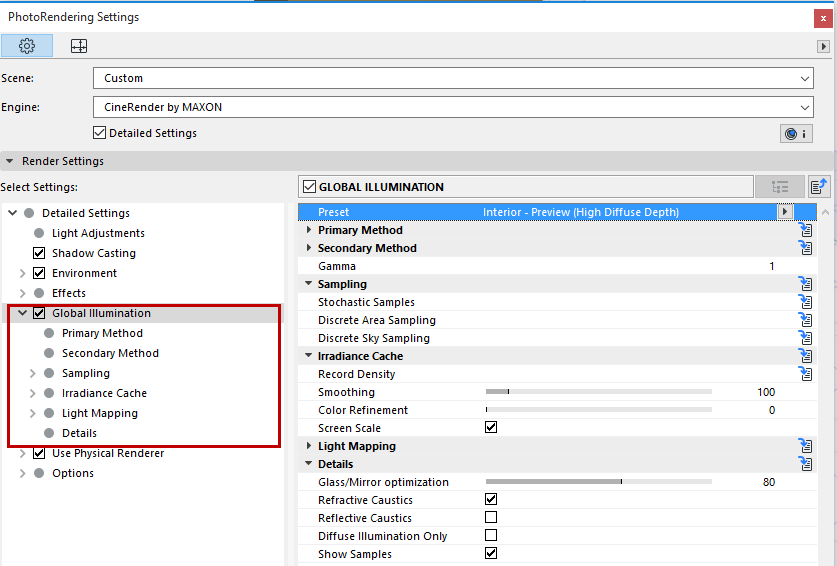
Global Illumination (GI) is a sophisticated method for achieving realistic lighting effects in your model. The algorithm simulates the effects of not just direct light sources, but indirect light effects - that is, inter-reflections caused by light rays bouncing off surfaces.
With CineRender, you can achieve very high-quality renderings using Global Illumination. However, it can greatly increase render time. Two methods can be used in conjunction: Primary and Secondary methods.
See Primary and Secondary Method (CineRender Global Illumination).

Of the many GI-related parameters, the Diffuse Depth value can make a significant difference in rendering quality. It defines the number of times light reflects in a scene, i.e. how often a “ray of light” is reflected from surfaces.
•The minimum Diffuse Depth value of 1 results in only a direct illumination via flat, light-emitting elements. This will be sufficient for most external scenes, with Physical Sky or HDRI Sky providing a significant light source.
•A Diffuse Depth value of 2 is required to achieve an indirect illumination. A minimum value of 2 will be required for interior scenes.
Watch the Video:
Rendering an Interior Scene
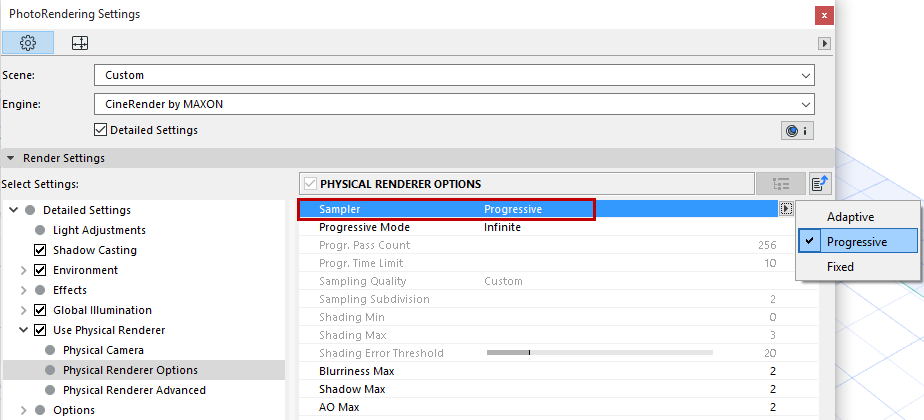
If you are using the Physical renderer, its three sampling settings include the Progressive option: after you start the rendering process, you get immediate basic feedback.Then, as time passes, the image is gradually fine-tuned.

This option, in turn, has three ways to set a limit on the render process:
•Infinite: The rendering continues indefinitely until you press Stop.
•Time Limit: The rendering process will stop after a defined time interval.
•Pass count: The rendering process will stop after a specified number of passes.
With Progressive Rendering, the rendering image goes through several progressive passes, while the image becomes visibly less grainy. By using the Infinite option, you may click to stop rendering after a certain time when you feel your image is already fine enough.
In fact, it takes far less than infinity to achieve a desirable result. After a certain number of render passes, it will be almost impossible to see any further changes, since the image is so finely rendered.