Use the Options > Work Environment > Menus dialog box to customize the contents and arrangement of all of the menus that exist in ARCHICAD. Any command or menu can be placed into or removed from any menu; the order of the commands within any menu is entirely customizable.
Exception: Context menus are not customizable.
Use the splitter bar as needed to change the width of the fields in this dialog box.
Customize Menus Panel
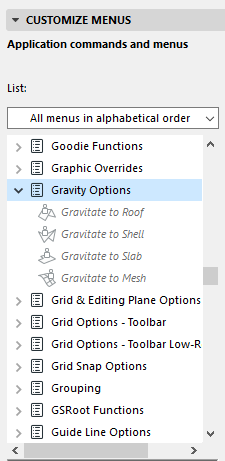
The left side of the dialog box (Application commands and menus) lists all of ARCHICAD’s commands and menus. You can display this list in one of five formats: Current menu structure; All commands by theme; All commands in alphabetical order; All menus in alphabetical order; All New commands in alphabetical order. The last item in the list is a Separator bar.
Note: If you are in one of the two All commands formats, you can access them (i.e. click and drag them to the right) only if you have chosen a particular menu (as opposed to the menubar) in the “Build or edit the menu” list on the right.
It is worth examining the All menus in alphabetical order list. You will see that this list includes not only the usual menus you put in a menubar, such as File or Edit; it also includes thematic menus such as Gravity Options with their own set of commands. These menus can be placed either on the menubar, or as sub-menus of any other menu, or into a toolbar.

The right side (Build or edit this menu) shows the current set-up of the main menubar, or the menu you are currently constructing or editing.
Note: The menu you are editing will be displayed only for windows of the currently active window type (either Text or Non-Text).
For more information, see Window Types (Text or Non-Text).
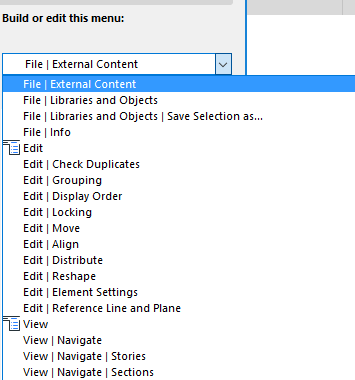
The pop-up under Build or edit this menu provides a list of menus only (no commands), together with the menu path (for example File > External Content).

Choose a menu to build or edit from this pop-up list. A menu appears in this list as many times as it is used in the interface; menus not yet inserted in your Work Environment are grouped together at the bottom of this pop-up list.
Menu Options: Choose among the following menu management options for the selected menu: New menu, Rename, Delete or Duplicate menu. (The New menu will create a submenu within the selected menu.)
Note: If the Menubar is selected, this control changes to Menubar Options, with New the only available command. This command will create a new menu and add it to the ARCHICAD menubar.
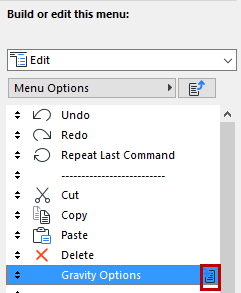
List window: The right-hand list window displays the content of the selected menu. Remember, the menu contents can include commands (dragged in from the “All commands” lists at left) or menus (dragged in from the “All menus” list at left). A menu within a menu is indicated by an icon:
![]()
Click on it (or double-click the name) to open that menu and edit its contents.

To move up one level in the menu hierarchy in the right-hand list window, click the “Up one level” icon:
![]()
In this right-hand list window, you can rearrange the menus in the main ARCHICAD menubar, add or remove commands or menus to or from any of the menus, using the Add selected and Remove buttons; or change their order by dragging the up-down arrows. The separator bars, an aid in grouping items inside a menu, can likewise be moved with the up/down arrows anyplace you like. (To insert a new separator bar, drag it from its location at the bottom of the left-hand list.)
Further Options Panel
Alternating menu items: This checkbox is available after you have selected a menu or command in the right-hand column.
Checking this box means that the selected item (for example, New & Reset) will alternate with the item above it (New). (The item set as alternating will be indented underneath its pair.) Only one of the two alternating items will be visible at any given time in the menu.
Important: For items to alternate, their shortcuts must correspond as follows: the shortcuts are the same except that one item’s shortcut has an additional modifier. For example: The shortcut for New is Ctrl+N; the shortcut for New & Reset is Ctrl+Alt+N.
To alternate between them, press the unique modifier key (in this case, Alt).