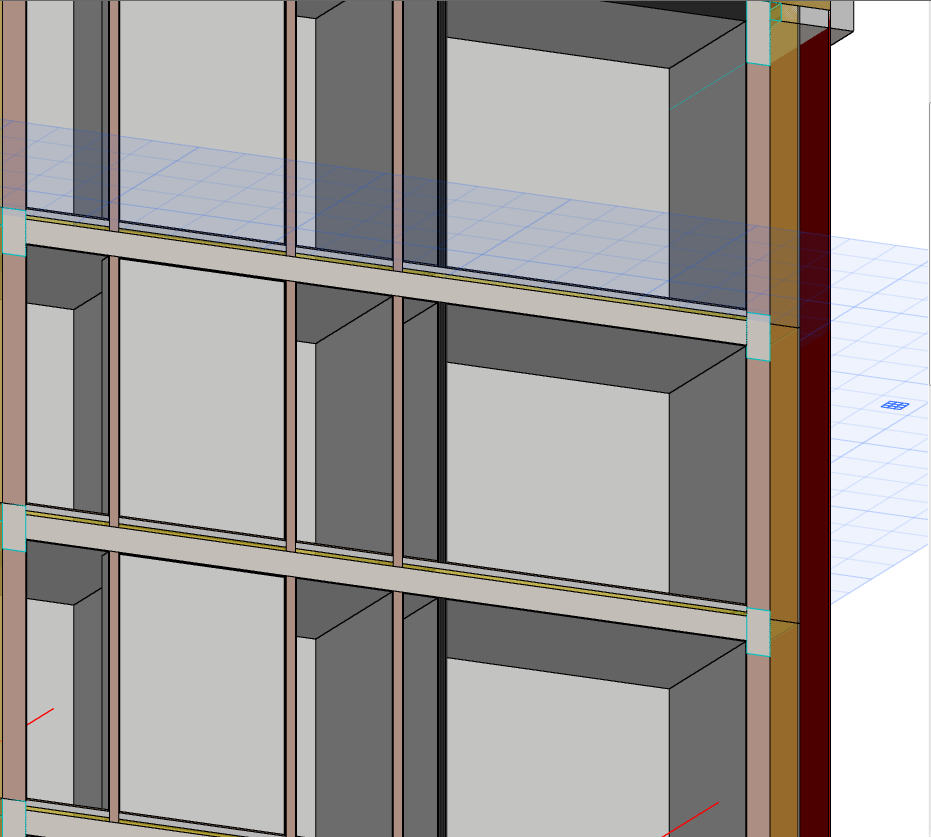
Use this function (Edit > Reshape > Adjust Elements to Slabs) to easily adjust elements (Walls, Columns, or horizontal Beams) to specific levels of one or more Slabs that are located above and/or below them.
1.Select the element(s) (Walls, Columns or horizontal Beams) to be adjusted.
Note: If there is more than one Slab above or below the selected element(s), then you should also select the particular Slab that you want to adjust to. Otherwise, the closest Slab will be automatically considered the target.
2.Use the Edit > Reshape > Adjust Elements to Slabs command.
3.In the appearing dialog box, define whether you want to adjust the selected elements to the Slab that is above or below the element(s), or both. Again, if you select Slab(s), then the adjustment will target the selected Slab(s) only.

4.From the drop-down menus, choose the level of the Slab (top or bottom, or - for composites - Core Top or Core Bottom) to which to adjust the element(s).

5.Click OK.
Note: If a Door/Window is linked to the bottom of a Wall, the Adjust Elements to Slabs command will automatically recalculate the offset to retain the opening’s position.
Note: The same workflow is available by using the Edit > Reshape > Adjust command. In that case, you must select the elements to be adjusted, then click on the targeted Slab. (The cursor indicates that you are clicking a Slab, as illustrated below.) The Adjust Elements to Slabs dialog box appears, and the workflow continues as described above. (Elements are adjusted to the clicked Slab only.)

Adjust Elements to Slabs: Example
In this project, there are problems in the junctions of Walls to Slabs: the internal Walls only extend to the top of the carpeting, while the external (profile) Walls have gaps.
The Adjust Elements to Slabs command can help.
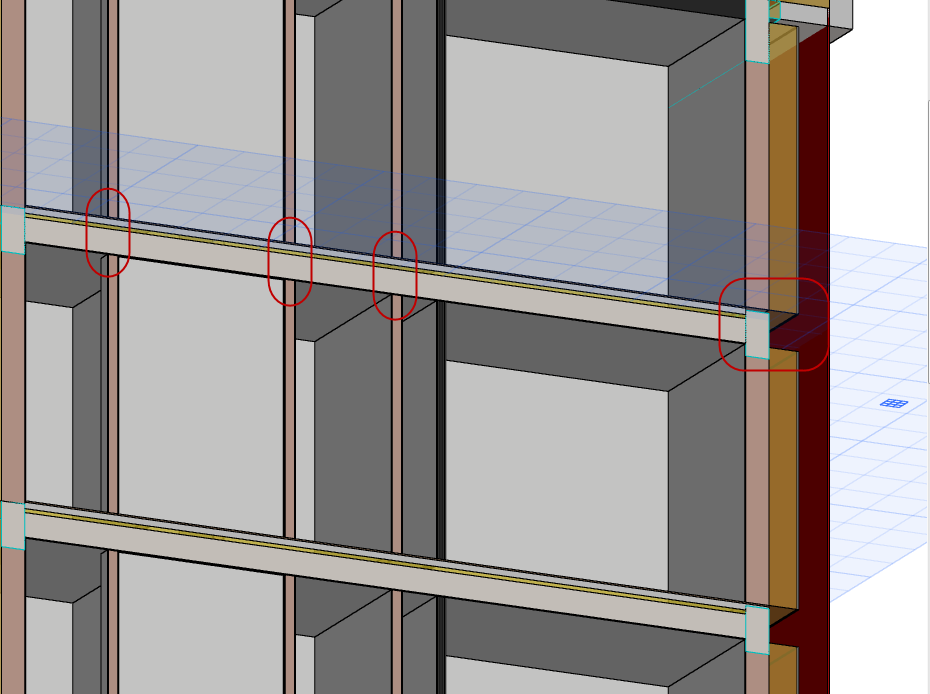
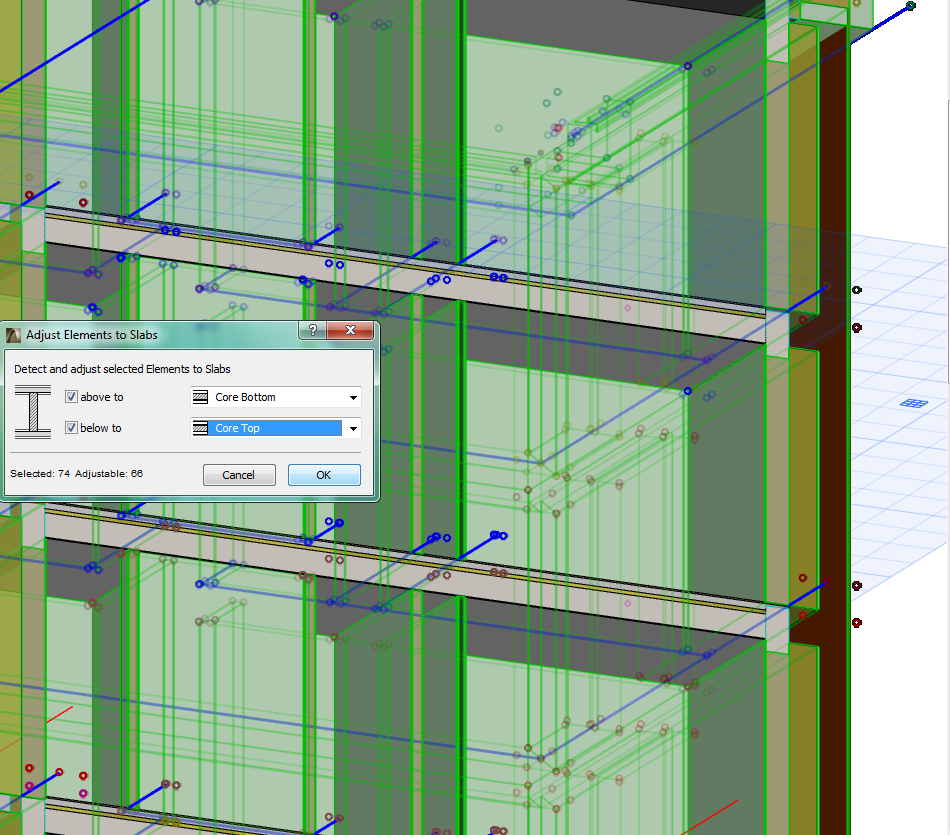
1.Select all Walls.
2.Use the Adjust Elements to Slabs command and set the options to “Core Bottom” and “Core Top”. This way, the Walls on top of the Slabs will be extended to reach to the Slab core.
3.As a result, the internal dividing Walls are now correctly joined to the Slabs.
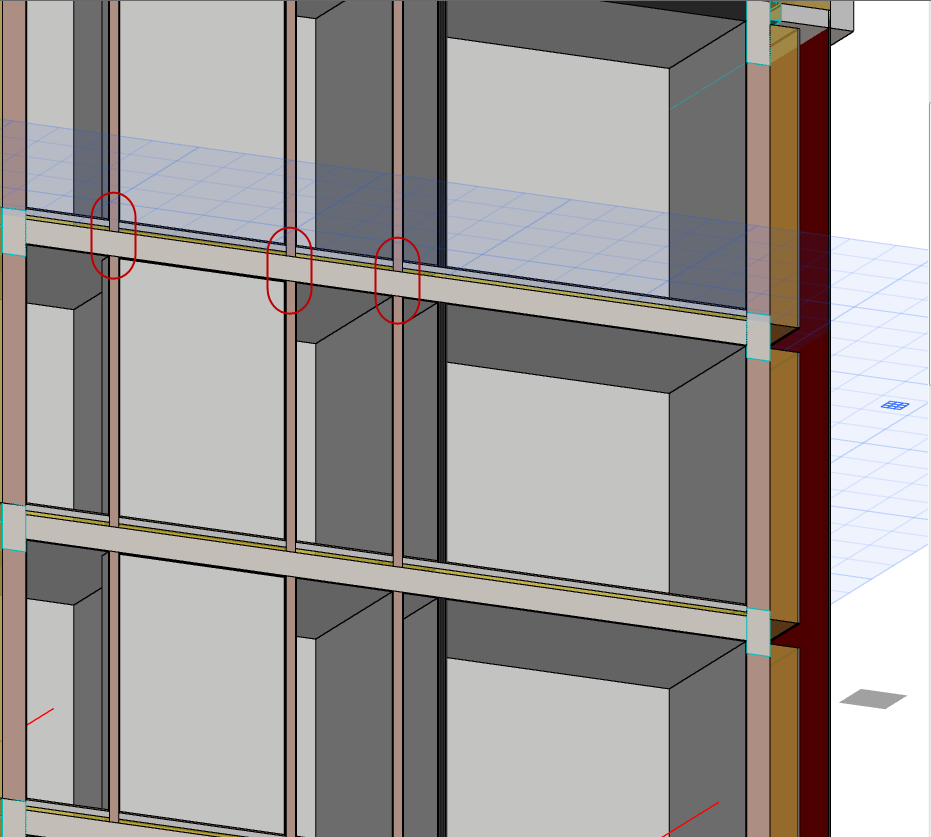
The external, profiled Walls are still a problem: each needs to meet the Wall above it without stopping at the bottom of the Slab core.
4.Use Find and Select to select the external Walls only.
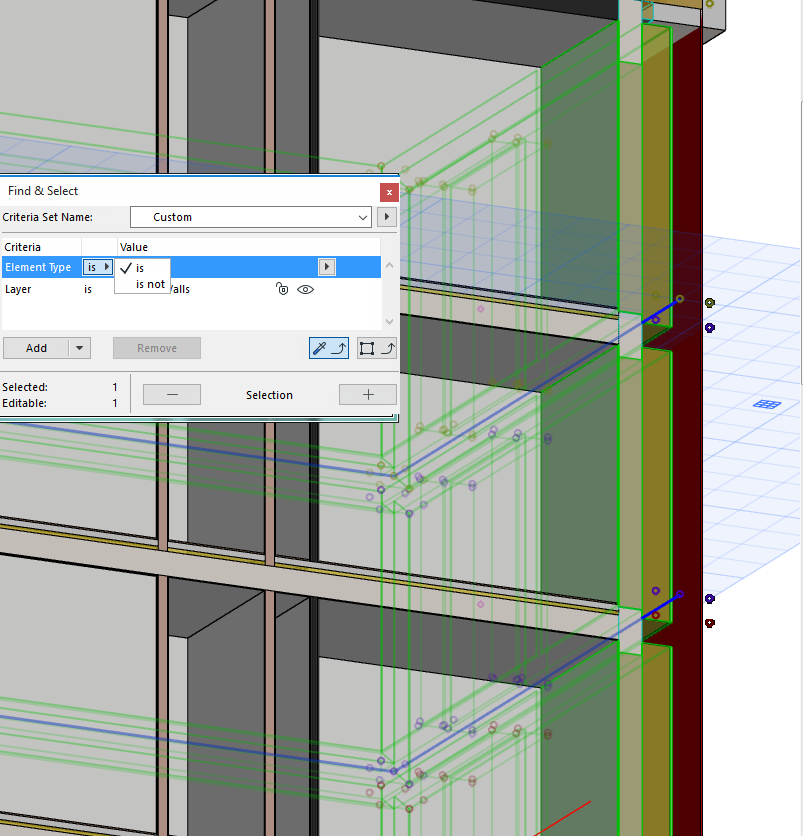
5.Again, use Adjust Elements to Slabs, but this time, all of the selected Walls should extend all the way up to the Slab core top, to eliminate the gaps.

6.Now the external Walls are correctly joined, too.
