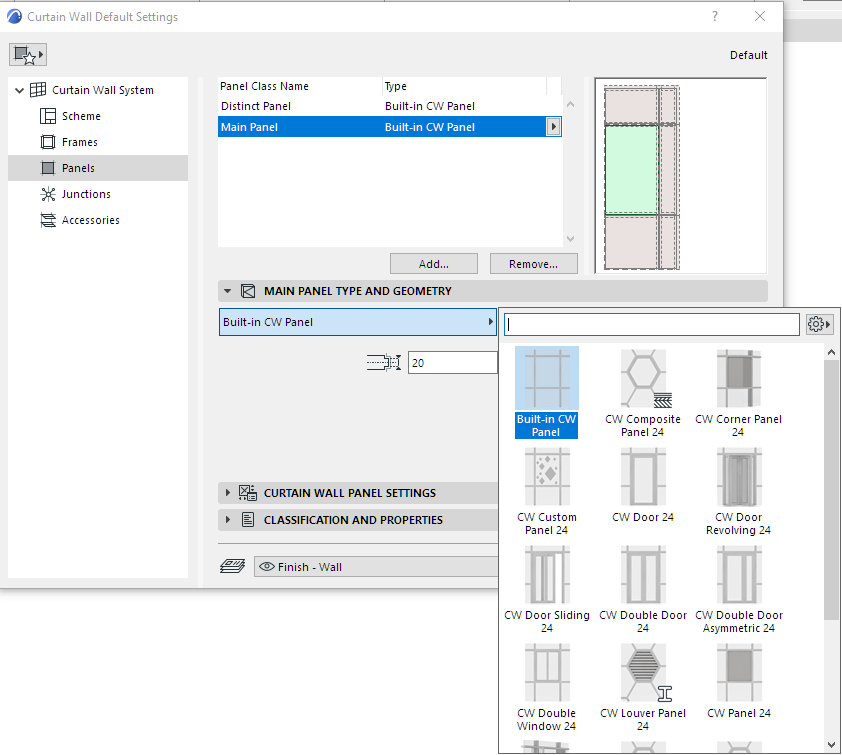
The Panels page of Curtain Wall Settings contain the settings for each Panel Class.
Panel Tool Settings (in Edit mode) contains nearly identical controls.
The top of the dialog lists the available Panel classes, by name and type.
Panel Classes are user defined (or provided by default - e.g. Main, Distinct). New Panel classes can be added or removed.
The selected class is highlighted in the preview window. The preview window also indicates the Panel’s color.

You can add or delete Panel classes - see below.

1.Click the Add button. In the appearing dialog:


•New: Creates a new Panel class based on the default (e.g. Built-in)
•Duplicate: Duplicates the currently selected Panel Class under a new name
•Favorite: Click the popup to choose a Panel Favorite. The new Panel class will use the Favorite settings.
Rename Panel Class
Double-click the Class in the list, and rename as needed.
Copy-Paste Panel Settings Between Classes
In Panel Settings, right-click the name of any panel to copy its settings.
Right-click any other panel to insert the copied settings for that panel.

Add Panel Class based on a Customized Panel
Another way to create a new Panel Class is to customize a single Panel in Edit Mode, then save its settings as a new Panel Class.
1.Select the Curtain Wall and enter Curtain Wall Edit mode.
2.Select a Panel to customize it. Its class is now “Custom.”
3.From the Panel Class popup in the Settings dialog or Info Box, click Add Panel Class from Custom...

4.Use the upcoming dialog to name the new Panel class.
1.Select one or more Panel Classes to remove.

2.Click Remove.
3.In the appearing dialog:

•From the popup, choose how to convert the Panels in the class that is being removed:
–Deleted Panel
–Convert to Another Panel Class: Choose an existing Panel Class.
Select Panel Type and Geometry
For the Panel Class selected in the list at the top of the dialog: choose a Type from the pop-up list, in the Panel Type and Geometry panel.
Then set its geometric parameters as applicable.

•Some Panels are designed to behave like doors and windows.
See Place Door- or Window-Type Panel in Curtain Wall.
See also Create Custom Components for Doors, Windows, Curtain Wall, Stair, Railing.
Available settings in the panel below depend on the chosen Panel type.

For the chosen Panel type, you can set various parameters, as usual for GDL-type components.
Note that you can override the Model View Options settings for its 2D and 3D Detail Levels, as applicable.
