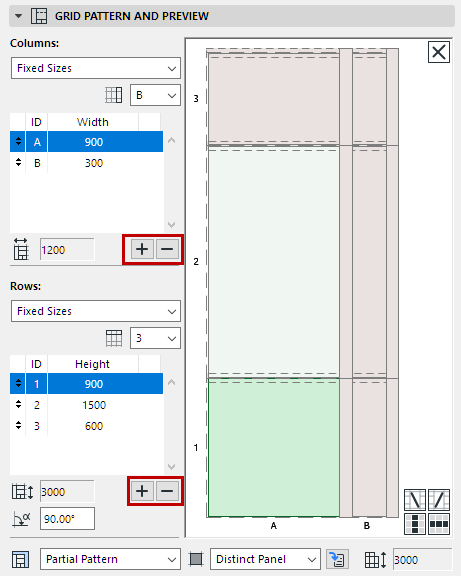
This is a page of Curtain Wall Settings. Use these controls to define the pattern of the Curtain Wall Scheme Grid, by columns and rows. You can also set the class of any or all Frames and Panels here.
This section reviews the controls of the Scheme Settings page. For details and examples of Grid Pattern setup, see Set up Grid Pattern in Scheme Settings.

Topics in this Section:
View/Edit Pattern in Preview Window
Select Frame or Panel in Preview Window
View/Edit Pattern in Preview Window
The preview window displays one unit of the Curtain Wall pattern, consisting of Frames and Panels. The pattern shown here will be repeated horizontally and vertically within the Curtain Wall boundary, when it is placed in the project.
See details and examples at Set up Grid Pattern in Scheme Settings.
The Grid pattern’s precise starting point, and the logic by which it should be repeated, are defined in the Pattern Origin panel of this Scheme Settings dialog.
Select Frame or Panel in Preview Window
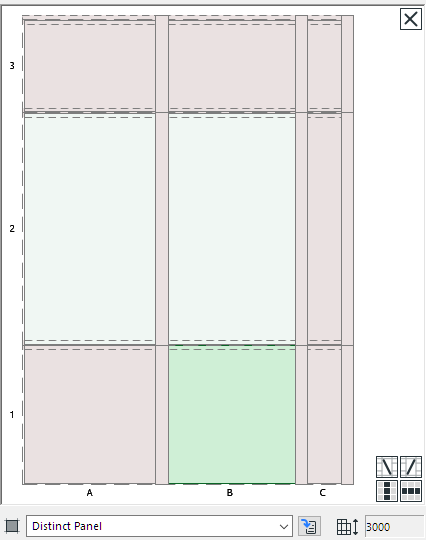
Click on any Frame or Panel in the Preview: the clicked item is highlighted and a tag displays the item’s class (e.g. Distinct Panel).
For a selected Panel, its position by Column and Row is also highlighted at left.
Here, the selected Panel is in the Distinct Class. The Panel is located in Column A, Row 3.

•Use shift-click to multi-select items in the Preview (i.e. when modifying a Frame or Panel class). In this case, the first-selected item is highlighted at left.
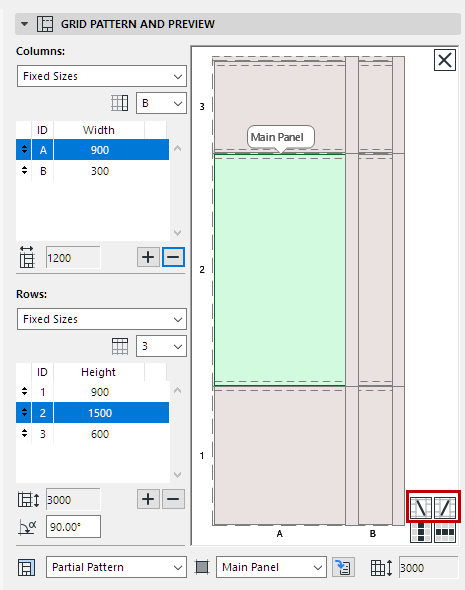
•Use the shortcut multi-select buttons at bottom right to select all the Frames or Panels in the same column (vertically) and/or the same row (horizontally) as the selected one:


Shortcuts: Multi-Select Panels and Frames
Use the pop-up below the Preview to change the selected Panel’s or Frame’s class, if needed.

Panel and Frame Classes are defined on the corresponding pages (Frames/Panels) of Curtain Wall Settings (where you can also define new classes as needed.)
To access these pages from here, click the “Go to Settings” button.
Enter values for the width and height of selected Panel(s). Notice how the Preview image changes accordingly.
To create a new Column or Row of Panels, or to delete a selected one, click the Plus/Minus sign.
The new Column/Row duplicates the currently selected one, and is inserted in front of it.


Rotation
Enter a Rotation value for the Rows of panels, relative to the Columns.


Note: Rotation angle will not be reflected in the Preview window.
These values indicate the width and height of the Scheme Grid pattern. The placed Curtain Wall, depending on its final width and height, will repeat this Scheme pattern as many times as needed, and based on the logic defined in the Pattern Origin panel.
See details and examples at Set up Grid Pattern in Scheme Settings.
1.In the Scheme Preview, click on a Panel.
2.Click a Crossing Frame icon to add it.
Limitation: One diagonal frame per pattern cell.


In the upper corner of the Preview window, click the X button to clear all Frames and Panels. This results in a Curtain Wall with an empty Boundary.
