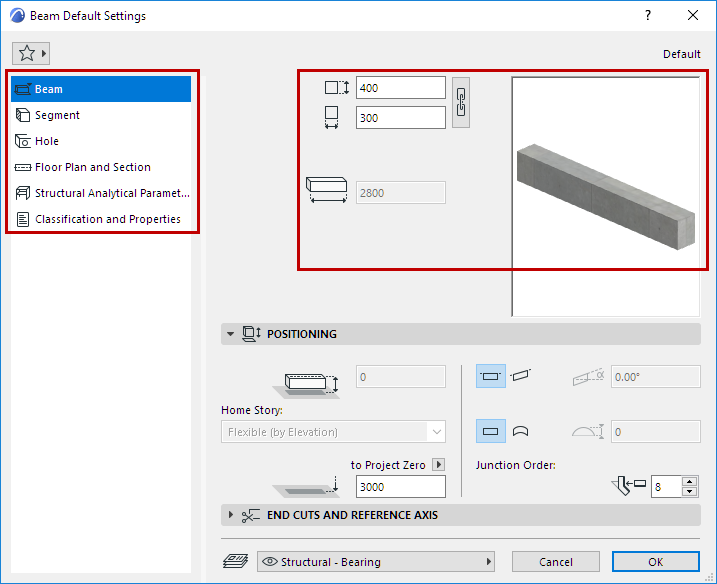
Beam Tool Settings: Preview and Positioning
The Beam Settings dialog box is divided into five pages.
The Preview section remains visible on all pages, and reflects your settings modifications. For a multi-segmented Beam, the Preview section includes its Structure settings.
Navigate among the pages using the tree structure on the left:

For a simple (single-segment) Beam, enter its geometry values:
Beam Width/Height
•Use the chain icon to constrain them to the same value
Beam Length
•Default (segment) length

Offset to Home Story
Offset the Beam’s reference axis from the Home Story.
Home Story
See Home Story.
Reference Line Elevation [to Reference level]
Calculates the current elevation of the Beam’s reference axis, as measured from the Reference level (by default, this Reference level is Project Zero).
For slanted Beams, this elevation is measured from the starting point of the Beam’s reference axis.
Click the pop-up arrow to change the Reference level, if needed.
Notes:
–Reference levels are defined at Options > Project Preferences > Reference Levels.
–This is a calculated value, not a link. If you change the Reference level, the Beam will not change its position.
For general information on levels, see Reference Levels Preferences.
Horizontal or Slanted
Beam geometry in the Z-direction.
•For a vertically curved Beam, enter its Arc/Chord height.
Junction Order
A higher Junction Order number takes priority over the lower.
Junction Order is relevant
•when two Beams meet whose Building Materials have the same priority
•when 3 or more Beams meet in a junction: Junction Order determines which two Beams are joined first