Story Level Lines indicate the vertical location of stories in Sections, Elevations and Interior Elevations. Their values are defined at Design > Story Settings.
See Story Settings Dialog Box.
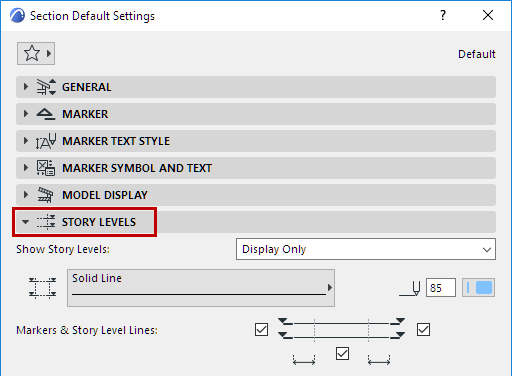
Story Levels can be set to appear in Section/Elevation/IE views. In this case, each story level line included in the Section/Elevation/IE range will appear in the window.
You can place associative dimensions onto Story Level Lines.
The story line markers are library parts. The Story Marker parameters and position can be edited in Section/Elevation/IE Settings dialog boxes.
For more information, see Story Levels Panel.
Show/Hide Story Level Lines in Section/Elevation/IE
For each individual Section/Elevation/Interior Elevation, you can hide, show and/or output Story Level Lines and their markers.
To set these options, open the Section/Elevation/IE Settings Dialog box, go to the Story Levels panel, and use the “Show Story Levels” pop-up.

See Story Levels Panel.
Show/Hide Story Level Lines Throughout the Project
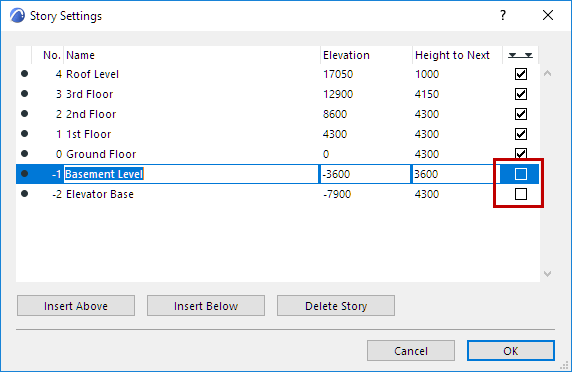
For any story, it is possible to turn off level line display throughout the project (in every Section/Elevation/IE view).
Go to Design > Story Settings, and for any selected story, uncheck the “Story Level Line” box. This story’s level line will henceforth not appear in any model window in the project.
Any associative dimensions of the Story Level Line will be deleted.
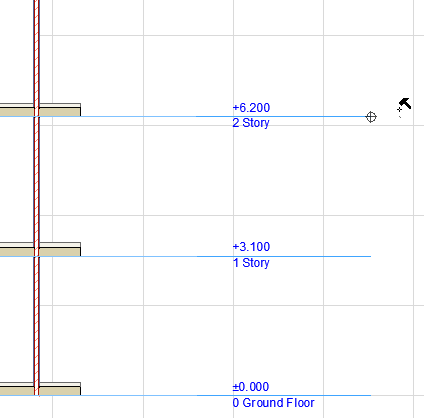
You can place associative Dimensions on Story Level Lines.
For example, use the Elevation type of the Linear Dimension tool.

•Dimension a Single Story Level Line
Click on a Story Level Line endpoint, then double-click to place the dimensions.
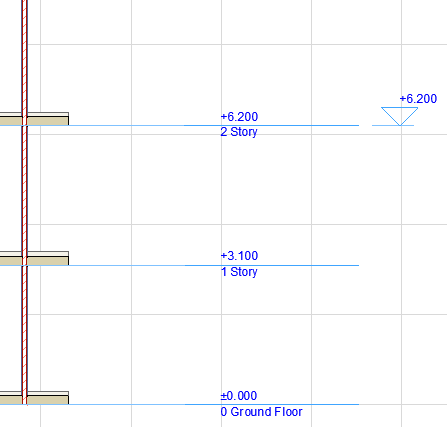
•Dimension All Story Level Lines
Click on the Story Level Line itself, then double-click to place the dimensions.
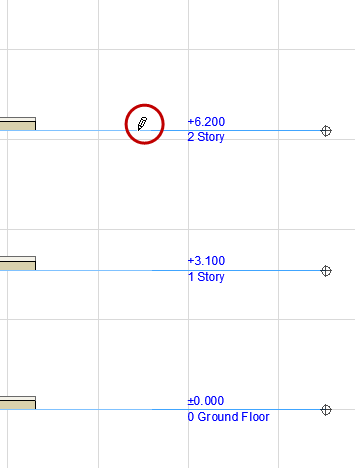
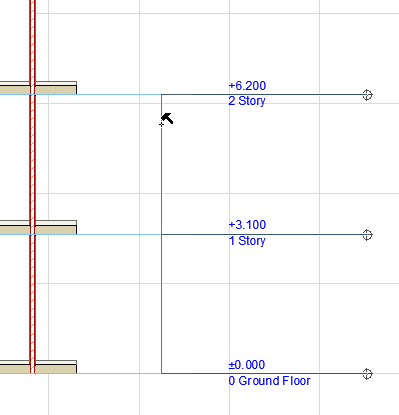
Display of Story Level Dimensions
If you turn off Story Level display (in Section/Elevation Settings), the Dimensions remain in place.
Update of Story Level Dimensions
If you delete a Story, its Story Level Dimension is also deleted. The rest of the Story Level dimensions are updated automatically.
If you modify a Story height, the rest of the Story Level dimensions are updated automatically.
However, If you insert a new Story, you must place its Story Level dimension manually.
Edit Story Levels
You can edit the elevation of any given story or set of stories using Story Editing Mode:
1.Choose the Design > Edit Story Levels command, or the same command from the context menu that appears by right-clicking inside the Section window.
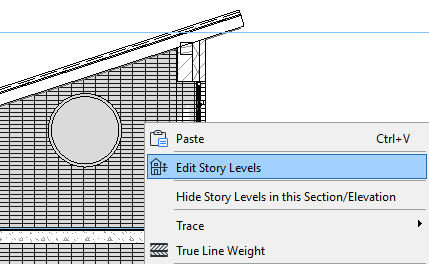
2.The Story Editing Mode palette appears. As long as the palette remains open on screen, you are in Story Editing mode and can move the story level lines.
3.Choose a mode from this palette by clicking one of the four buttons:

•Adjust only the selected story
•Adjust the selected story and all stories below
•Adjust the selected story and all stories above
•Adjust all stories
4.Move the cursor onto the Story Level Line you wish to move. The cursor will assume the Mercedes shape. Click and drag the story level line to edit its elevation.
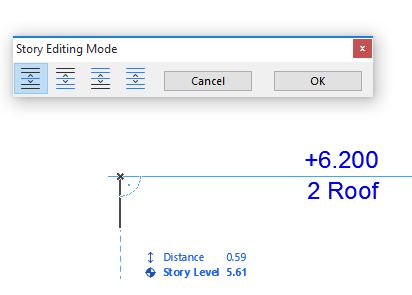
5.Click OK to apply changes and exit Story Editing Mode. Associative elevation markers will be updated too.
The elements that are on the given stories will retain their elevation respective to their Home Story, as you will see when the view is updated after you click OK.