Fills (DXF/DWG Translation Setup)
ARCHICAD fill patterns can be saved as solid fills. You can also export fill backgrounds as additional polygons (as this feature is not supported by AutoCAD).
In this popup menu you can choose a method how ARCHICAD fills will be exported to AutoCAD.
•Export all Fills “as is”: This option will recreate ARCHICAD fills in AutoCAD.
•Export all Fills as “SOLID”: This option will convert all fill patterns to solid fills.
•Export all Symbol Fills as “SOLID”: This option will convert all symbol fill patterns to solid fills.
Export Fill Backgrounds as Additional Solid Hatches: ARCHICAD fill patterns have a separate background fill; AutoCAD fills, in contrast, are all transparent between the pattern lines. If you want the exported file to look like the original ARCHICAD fill, check this option.
Note: Export Fills as “SOLID” disables this option.
The results of this choice:
•Background Fill, Non-Transparent Background: When an background fill with a non-transparent color is exported, it will be exported as a solid fill whose color is that of the background (plus the border if it exists).
•Background Fill, Transparent Background: no fill will be exported (only the border if it exists).
•Foreground Fill: Exported as-is; background has no effect.
•Vectorial Fill, Non-Transparent Background: a foreground fill with the background color is exported first; then, a pattern fill with the foreground color is exported as a Hatch entity (and the border if it exists). If the Hatch lines reach a certain level of density, then it becomes a solid.
•Vectorial Fill, Transparent Background: Only the pattern fill with the foreground color is exported (and of course the border if necessary).
•Symbol fill: Has no AutoCAD equivalent; the symbol pattern is generated into a Block. If it has a background in ARCHICAD, this background will become a Hatch in AutoCAD.
•Gradient: Exported as solid.
•Image: Exported as solid.
Explode gradient fills: Gradient fills in your project will be exploded into separate components. If your Gradient fill had a transparent background, it will also be a separate component.
Use the Fill Conversion Table: Check this box to convert Fills to hatches using the Fill Conversion table. Click on the Fill-Hatch Conversion table to define correspondences.
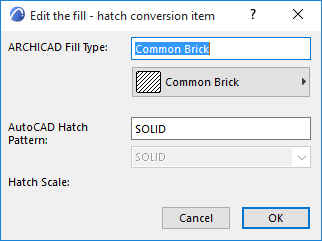
Click New to define each new correspondence in the Edit Fill-Hatch Conversion dialog box.

This requires that you have selected an AutoCAD template file in the Save Options page of the DXF-DWG Translation Dialog Box, and the template file includes at least one placed instance of the desired hatch.
Choose from among the available hatch patterns using the drop-down menu below AutoCAD Hatch Pattern.
Enter a Hatch Scale in which to display the converted fill.