Composite Structures Dialog Box
Open this dialog box from Options > Element Attributes > Composites.
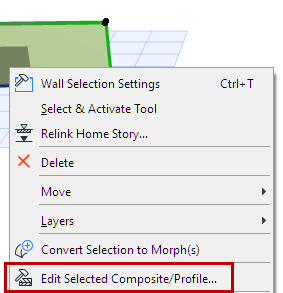
You can also edit a selected composite by accessing its settings from its context menu:

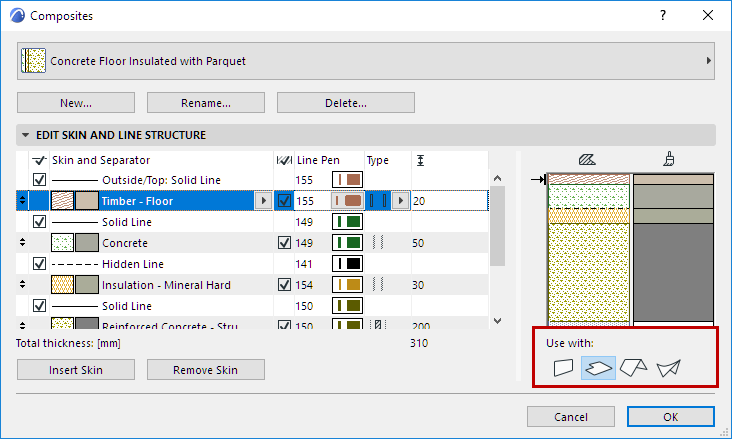
Use these controls to edit the components of Composite Structures used with Walls, Slabs, Roofs and Shells.
For general information, see also Composite Structures.
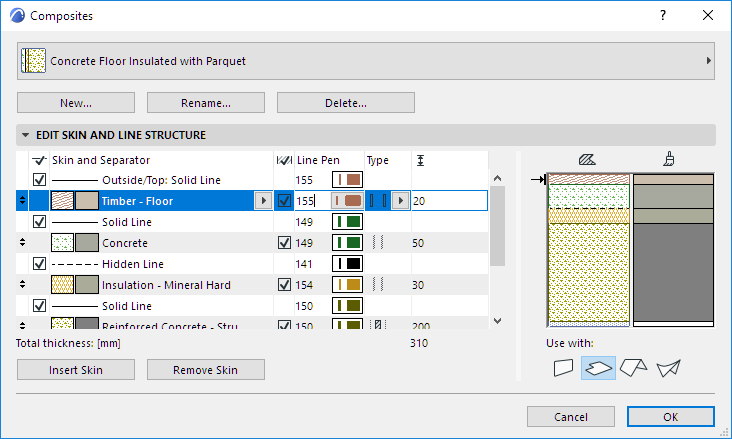
Choose a predefined Composite Structure from the pop-up list at the top of the dialog box. Either edit its properties directly, or choose one of the following commands:
•New: Click this button to create a new composite structure (based on a single default skin), or duplicate and rename a current one.
•Rename: Click this button to rename the currently selected composite structure.
•Delete: See Delete and Replace Attributes in a Model.
Composites Edit Skin and Line Structure Panel
This panel lists the components (skins and contour/separator lines) of the composite structure. Its graphic representation (both cut and surface appearances) is shown in the Preview on the right.
From the list, select the name of the item (skin, outside/inside contour line, or separator line) you wish to edit.
When you select an item, an arrow appears next to the corresponding section of the Preview; or click in the Preview to select the corresponding item in the list.
The first listed skin is considered
•“Outside” when used with Walls
•“Top” for Roof and Slab
•“Reference Side” for Shells.
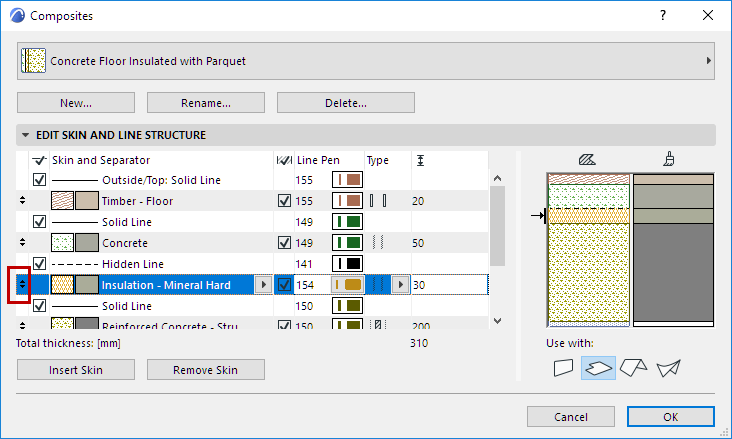
Change the order of skins by dragging them. The separator lines are not moved.
Edit a Skin
A skin consists of a Building Material, plus skin end lines.
Building Material: Click the pop-up to choose a different Building Material.
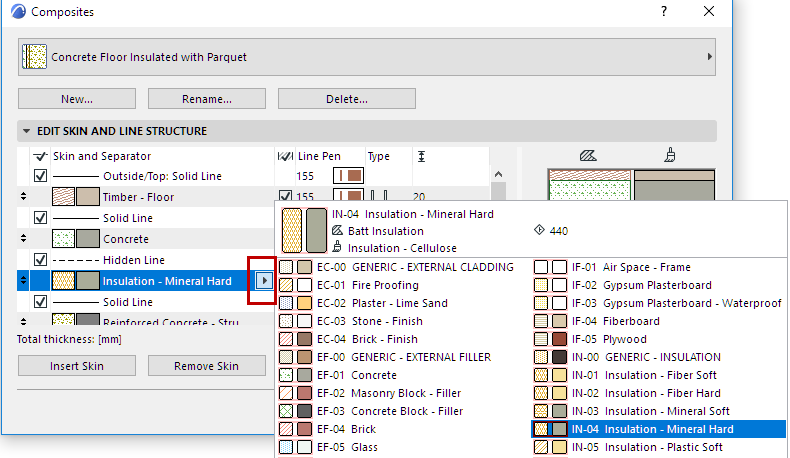
Skin End Lines: Check this box to display the end lines of the selected skin in the composite element. Use the pop-up to choose the pen of the two Skin End Lines of the selected skin.
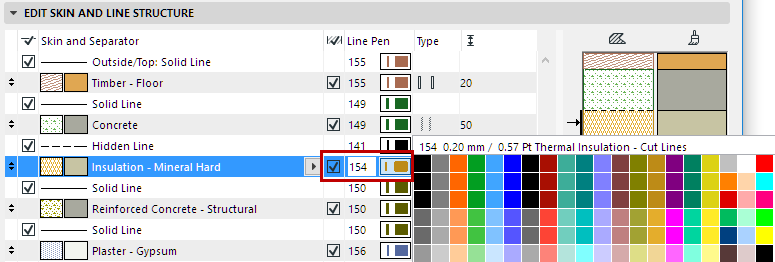
If the box is unchecked, the skin’s end lines will be hidden, and the related controls will be grayed out.
Type: Click this pop-up to define the selected skin as either Core, Finish or Other. This definition will affect the Partial Structure Display of the composite element.
See also Partial Structure Display.
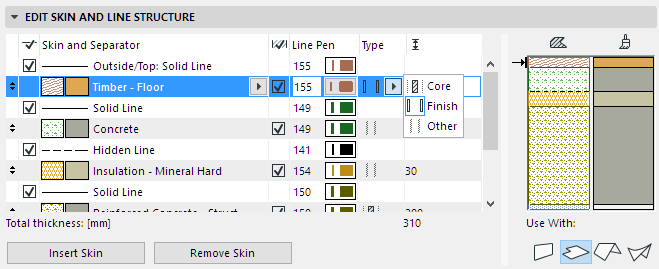
•You can define multiple skins as “Core,” but these skins must be adjacent to each other.
•You can define multiple adjacent skins as Finish, but they must include one or both of the outermost skins.
•If you change a skin type from “Core” to “Finish”, then every skin between the changed skin and the closest face will also change to a finish. (If there are an equal number of skins on both sides of the changed skin, then every skin between the changed skin and the inside face will also change to a finish.)
Skin Thickness: Enter a value for the thickness of the selected skin.
Total thickness: The total thickness of the composite structure is shown below.
Edit a Contour or Separator Line
Select a contour (outside/inside) or separator line in the dialog box.
To choose a different line type, click the pop-up.
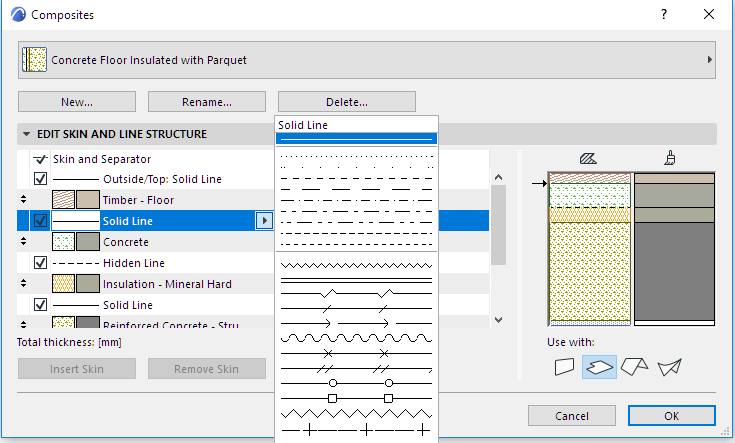
Show Line: Check this box to display this contour or separator line in the composite element. Use the pop-up to choose the pen of the selected line.

If the box is unchecked, the selected line will be hidden, and the related controls will be grayed out.
Insert Skin
With an existing skin selected in the dialog box list, click this button to insert a new skin above it, with a separator line on each side. A new skin is created of the same type as the skin you selected.
Note: A composite structure can have up to 48 skins.
Remove Skin
Click this button to delete the selected skin. The separator line above it will also be removed.
Use With
Click one or more icons - Wall, Slab, Roof and/or Shell - to indicate which of these elements should list the current Composite Structure among its structural choices.
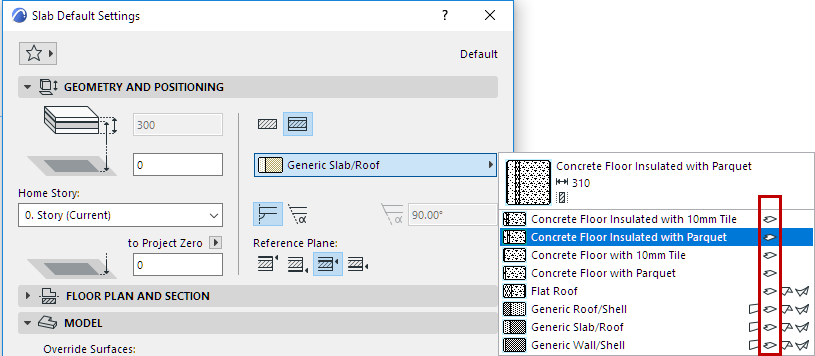
•This Composite Structure will appear in the composite pop-up of the corresponding element settings dialog boxes (Wall, Slab, Roof and/or Shell Settings). For example, in Slab Settings:
