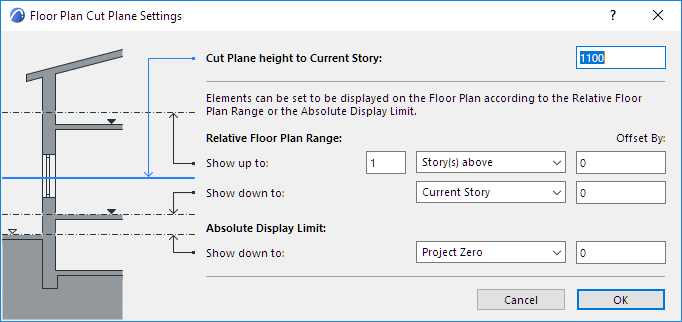
Floor Plan Cut Plane Settings Dialog Box
Use Document > Floor Plan Cut Plane to open the Floor Plan Cut Plane Settings dialog box.

Cut Plane height to Current Story
Enter the height at which elements will be cut for display on the Floor Plan.
The other options in this dialog box - Relative Floor Plan Range and Absolute Display Limit - will be applied only to construction elements whose “Show Projection” setting (in the Settings dialog box) is set to use one of these two definitions. These definitions set a limit on how much of the element is to be displayed, relative to the current story.
Relative Floor Plan Range
Use these controls to define the Relative Floor Plan Range for construction elements that use this definition.
Show up to: Enter the number of stories you want to display the element above the current story.
Offset by: Optionally, enter a positive or negative elevation value by which to offset the “Show up to” display limit.
Story pop-up: Choose either Current Story or, if you want to display the element on additional stories above the current one, Story(s) above.
Show down to: Enter the number of stories you want to display the element below the current story.
Offset by: Optionally, enter a positive or negative elevation value by which to offset the “Show down to” display limit.
Story pop-up: Choose either Current Story or, if you want to display the element on additional stories below the current one, Story(s) below.
Absolute Display Limit
Use these controls to define the Absolute (lower) Display Limit for construction elements that use this definition. This limit is in effect regardless of the currently active story.
Show down to: Enter the fixed lower limit to which elements will be projected. (By default, this is Project Zero.)
Offset by: Optionally, enter a positive or negative height value by which to offset the “Show down to” absolute display limit.