Use the commands at Document > Creative Imaging > Align 3D Texture to edit the origin and direction of construction element textures in 3D views.
These commands are only available in the 3D Window on selected construction elements whose Surface attribute includes a Texture assignment (Options > Element Attributes > Surfaces).
Notes:
-Not available for Shells.
-Texture realignment on elements with a Complex Profile might produce unexpected results.
For extra texture editing options on Morph faces, see Morph Texture Mapping and Alignment.
See also Default Texture Alignments/Reset Texture
Align Edge Texture (Walls Only)
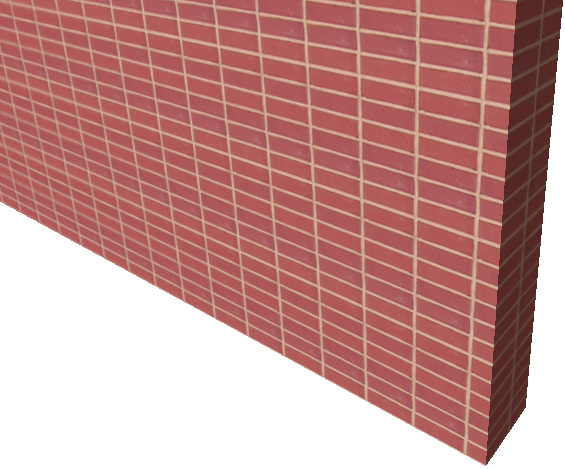
In this example, the brick wall texture originally looks like this:
To reset the texture origin to the corner of the wall - so that the brick pattern starts from the corner - do the following:
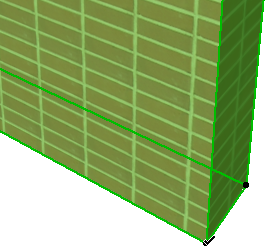
1.Select the wall
2.Use Document > Creative Imaging > Align 3D Texture > Set Origin.
3.Click on the corner and view the result.
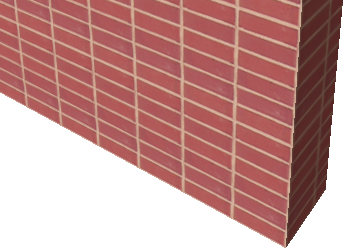
The texture origin will affect all of the elements’ surfaces. You cannot, for example, use a different origin for the inside and outside surfaces of a wall.
1.Select one or several elements.
2.Use Document > Creative Imaging > Align 3D Texture > Set Direction.
3.Click on a surface of a selected element. You must click a “main” surface, not an edge. (For Columns, the editable “main” surface are the top and bottom surfaces.)
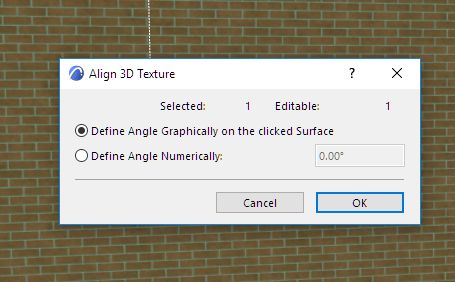
4.In the dialog box that opens, choose to either define the texture’s angle graphically or numerically.
5.Click OK.
6.If you chose to define the angle graphically, draw the desired vector for the texture orientation. You can snap to element hotspots.
7.If you define the angle numerically, it will be applied relative to the default orientation of the Texture and measured counterclockwise.
Note: For Slabs and Roofs, texture direction will change automatically if you edit the element shape.
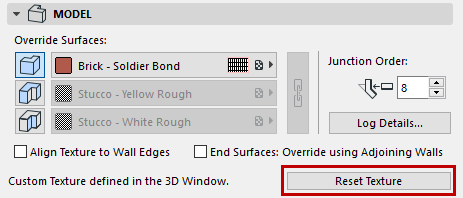
To return to the default Texture settings, select the element, open its Settings dialog box and go to the Model panel. The Custom Texture information text is active. Click the Reset Texture button to discard the customization.
You can also select several elements and choose the Reset command in the Document > Creative Imaging > Align 3D Texture hierarchical menu.
To remove all texture customization of the elements of the 3D Window, do not select any of them and choose Document > Creative Imaging > Align 3D Texture > Reset All.
See also Default Texture Alignments/Reset Texture.
Align Edge Texture (Walls Only)
You can align the texture of a Wall edge only: Use the “Align Texture to Wall Edges” checkbox in the Model panel of Wall Settings.
See Wall Model Panel.
Note: Using the Align Texture command (Document > Creative Imaging) will override any other Wall texture settings, including the Align Texture to Wall Edges checkbox.