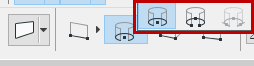
With the Wall Tool selected, choose one of the three Curved Wall Geometry Methods from the Info Box.
•Centerpoint and radius
–Click to define centerpoint.
–Move the cursor to define the radius, then click a second time.
–Move the cursor to draw the length of the Wall, then click to complete.
Note: To draw a full circular Wall, double-click when defining its radius.
•Circumference
–Click on three points of the Wall’s circumference (e.g. other elements or intersections, or special snap points).
–Click a fourth time to define the length of the Wall.
•Tangential: Define a full circular Wall based on three tangential edges or points.
Note: Not available in 3D window.
–Select three initial points: these can be a tangent edge, a node, or a free-floating point.
The next step depends on the geometric situation.
-If there is only one solution, the circular Wall is automatically drawn.
-If there are multiple solutions, the Eyeball cursor appears and the ghost contour of the Wall flips from one position to the other as you move the cursor around. Click when it is at the right place to complete the circular Wall.
-If there is no solution, (for example, if you define three parallel edges for tangency), no circle will be made.
Note: Since Walls need to have two endpoints, the fully closed circular Wall that you draw will in fact consist of two half-circles. Walls in the forms of full ellipses, elliptic arcs or splines cannot be created directly, but you can trace the shapes of plain drawing elements with the Magic Wand.