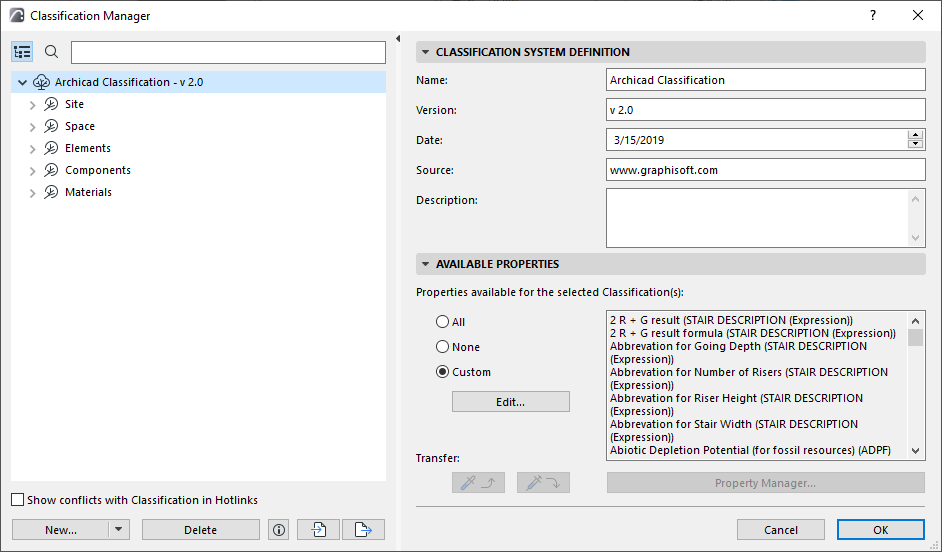
Use Classification Manager (Options > Classification Manager)
•To create and manage the Classification Systems and Classifications for this project
•To customize the set of properties available to each Classification
Classification Manager is also available from Property Manager.

The left side of the Classification Manager lists all the Classifications available in the project.
Search List
Click the Search icon, then start typing text into the search field. All classifications containing the search term are shown.

To view the full list again, delete the text from the Search field, or click the tree hierarchy icon.
1.Open the Classification Manager dialog box at Options > Classification Manager, or from Property Manager.
2.Select an item in the Classification list: the new classification will be created subordinate to the selected item.
3.Do one of the following:
–Click anywhere in the Classification list and use the context menu

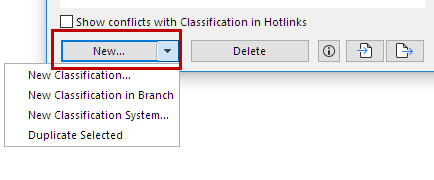
–Click the New button at the bottom of the dialog box

–Choose the hierarchical level of the new Classification, relative to what is selected in the tree:
-New Classification adds it to the bottom of the tree list within the current System
-New Classification in Branch adds it to the currently selected level of the tree
-New Classification System adds the new System to the bottom of the tree
4.In the New Classification dialog box:
–Define an ID, Name, and optional Description for the new Classification.

5.Click OK to create the new Classification.
Duplicate Classification or System
Select a Classification (or System) from the list in Classification Manager.
From the context menu or drop-down list under the New button, click Duplicate to create a duplicate, then adjust its settings.
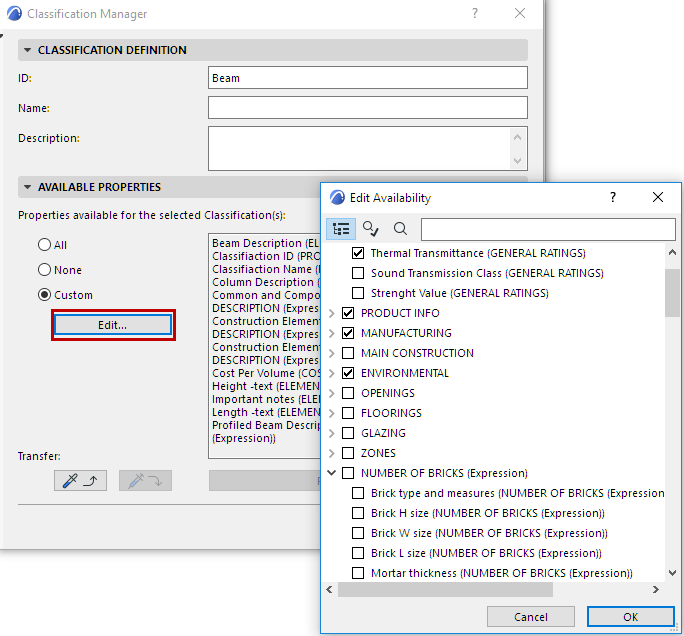
Use these controls to define which properties should be available for a given Classification.
•Select one or more Classifications from the list on the left.

•All: All properties in the project are available for the selected classification(s).
•None: No properties are available for the selected classification(s).
•Custom: Click Custom, then click Edit to select the Properties to be available for the selected classification(s).

See also Transfer Availability.
Import/Export Classifications
Use the buttons at the bottom of Options > Classification Manager to export and import a project’s set of Classifications (either all classifications or just selected ones) between Archicad Projects, from either an XML file or an Archicad file.
The process and options are analogous to Import/Export Properties.
See Export/Import Properties Between Projects.
Import BIM Content
Classifications, with associated Property and IFC Mapping definitions, are also imported to your project if you use the Import BIM Content or Download BIM Content commands.
See Import BIM Content.