Introduction
This section describes how to use the Area List Add-on for Archicad - specifically, to create area and volume calculations in conformity with the DIN 277 standard.
Calculation Basics
The Zone Tool
In order to use the Area List add-on, you must create Zones in the project, using the Zone Tool. Net areas and volumes will be calculated based on these Zones. Make sure that Zones are placed correctly. Usually, the Zone should extend from the top of the floor Slab to the bottom of the floor Slab of the story above. Zones below the Roof are trimmed by Roof planes.
The Morph Tool
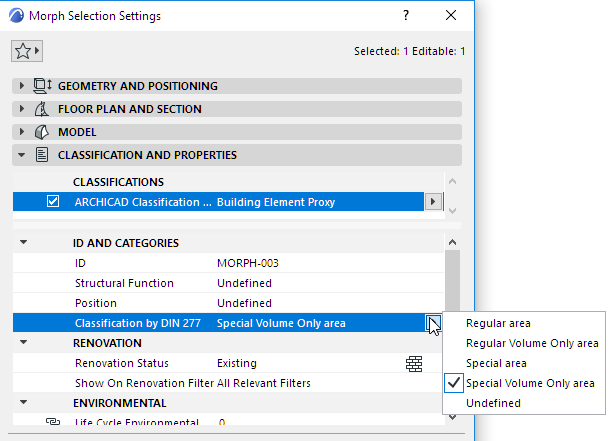
Morph bodies are used to calculate gross volumes and gross areas. In order to conform to DIN 277, the Morphs should extend to the outside surfaces of the building. For these Morphs, set their “Classification by DIN” value to one of the Regular or Special values.
When modeling Morphs, make sure:
•Morphs should be placed on every story
•Use separate Morphs for Regular and Special calculations
Relation between Zones and Morphs
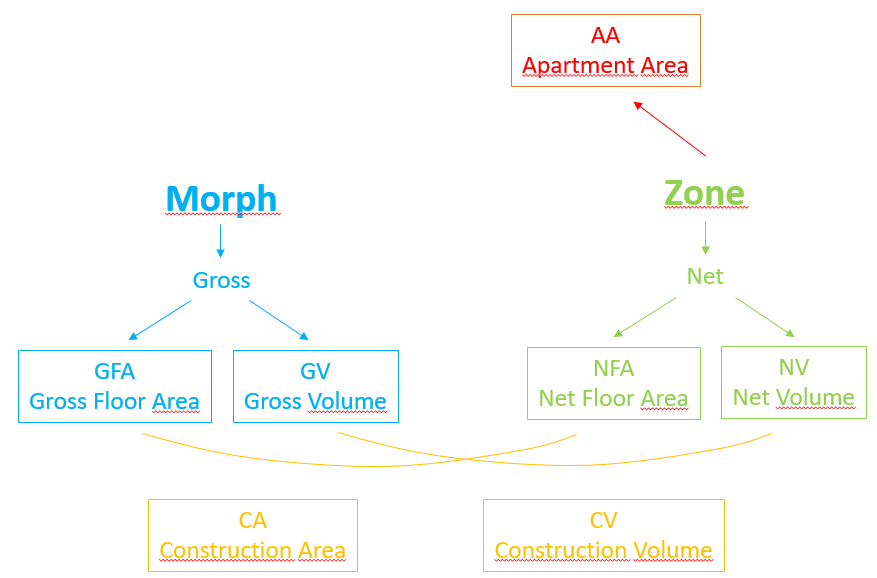
The following chart illustrates the relationship between Zones and Morphs. You will need both in order to produce complete calculations for Areas and Volumes.
Area and Volume Calculation Options
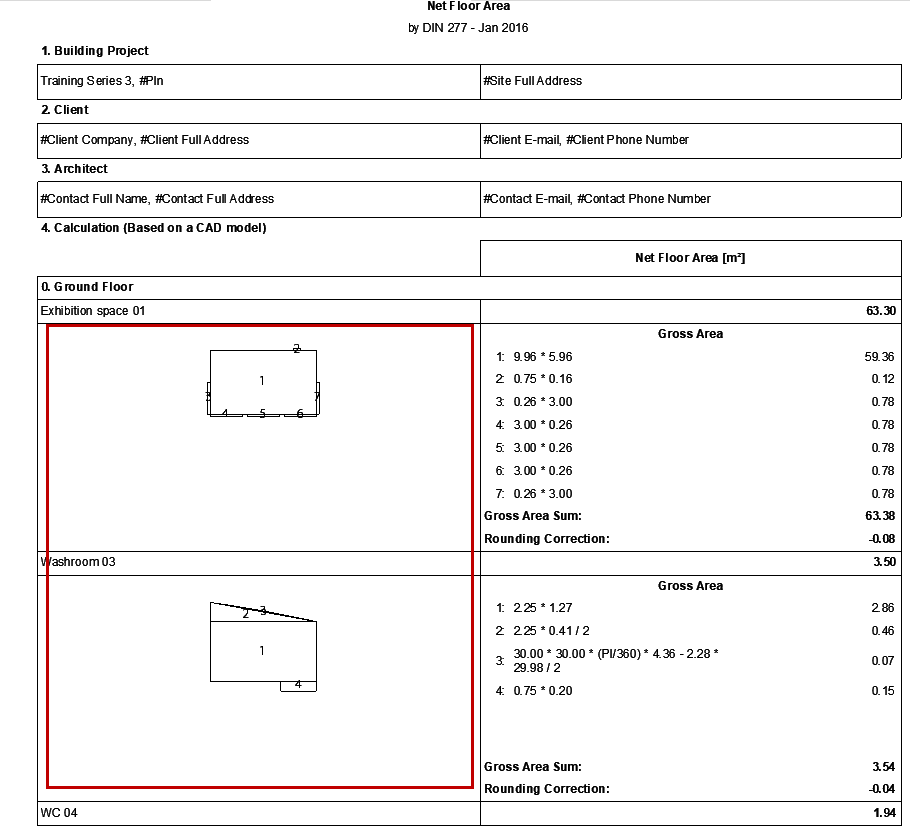
Net Floor Area
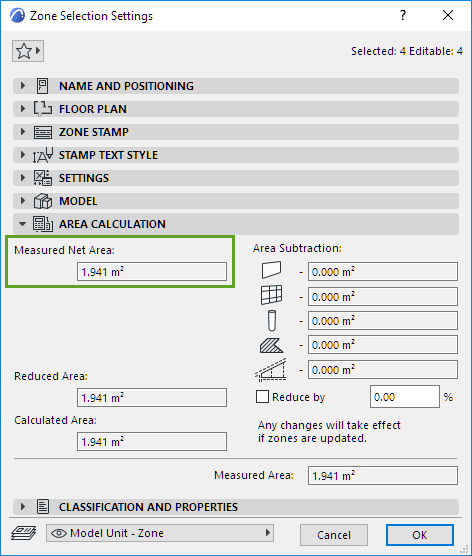
The Net Floor Area is the Measured Net Area of the Zone, as shown in Zone Settings. Subtractions due to Fills, Walls, Roofs etc. are not considered. Sums are calculated by stories.
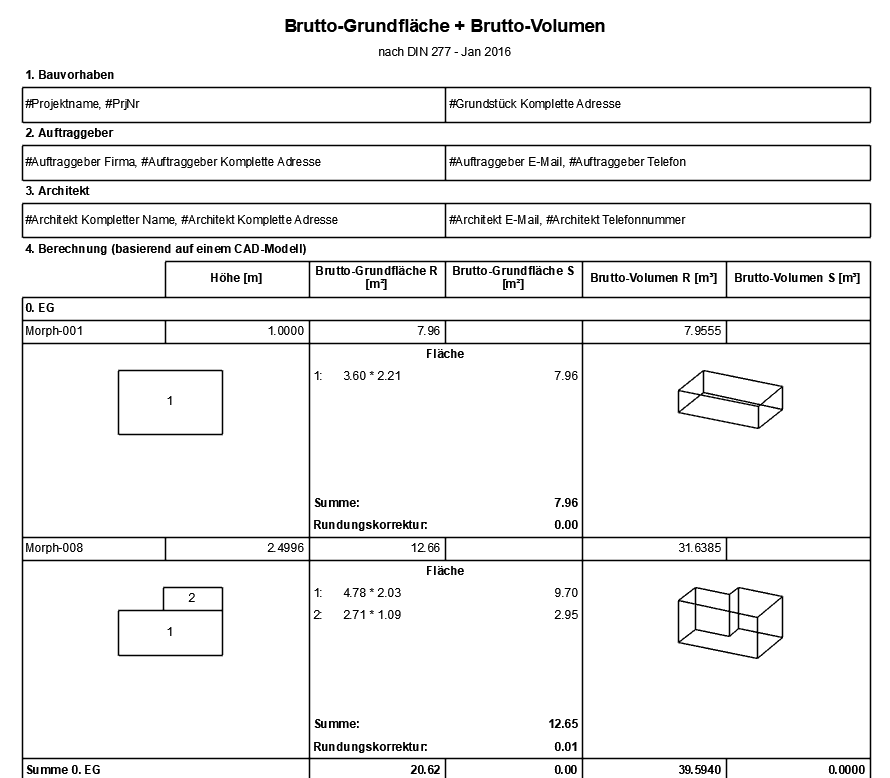
Gross Floor Area
This is equal to top projected surface of Morphs that are classified as Regular or Special. Morphs classified as “Volume only” are not considered. Sums are calculated by stories.
Construction Area
The Gross Floor Area minus the Net Floor Area.
Net Volume
Volume of Zones, calculated by stories.
Gross Volume
Volume of Morphs that are classified for DIN.
Construction Volume
Gross Volume minus Net Volume.
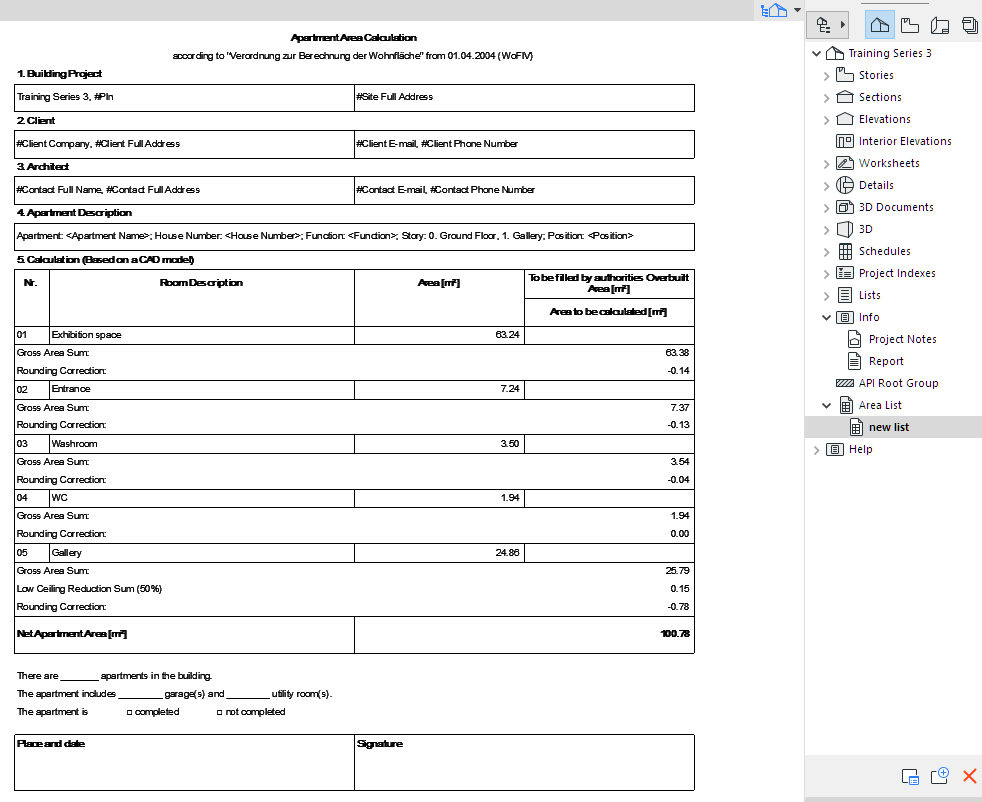
Apartment Area
Archicad allows you to produce area calculation based on living area rather than by story. Here, subtractions due to Roof crops etc. are considered. It is equal to the Calculated Area as shown in Zone Settings.
Where to Find the Lists
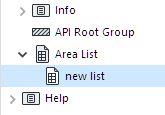
Generated lists can be found
•under the Area List item in the Navigator
•or at Document > Listing Extras > Area Lists, from Area List Settings
Click on a list to open it.
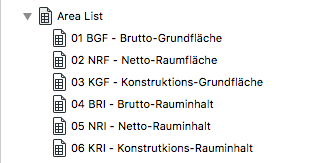
The following predefined Lists are available in the Archicad 22 Template, but you can create any custom list at any time.
Create New Area List
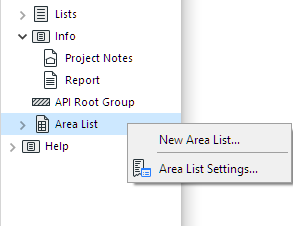
In the Navigator, right-click on the Area List item to access the context menu and the New Area List command.
Another way: in Area List Settings, click New at bottom left.
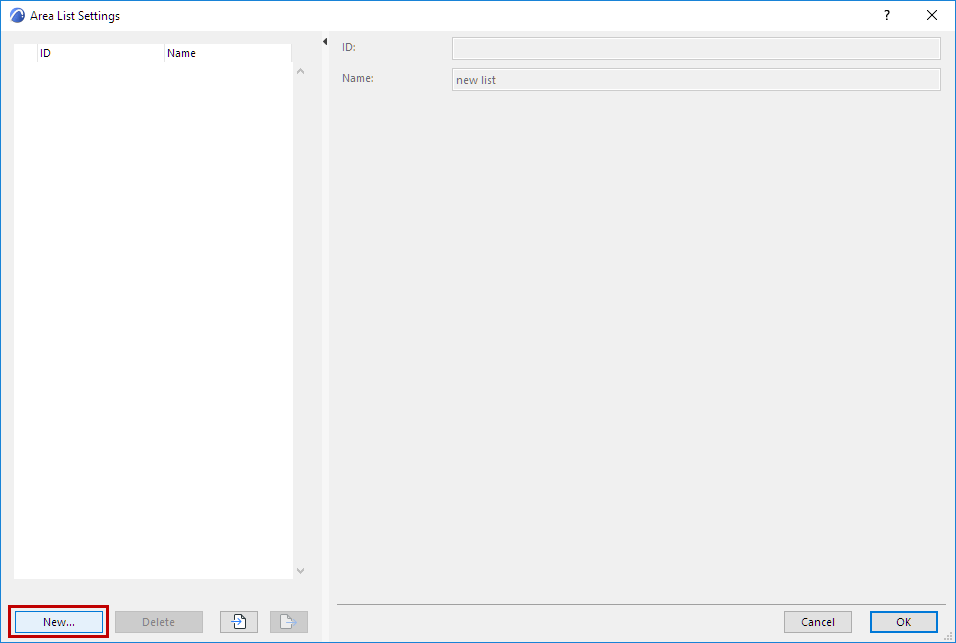
Enter a name and ID for the new List.
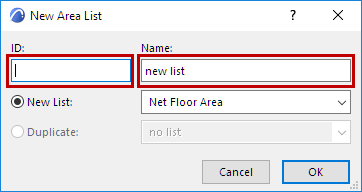
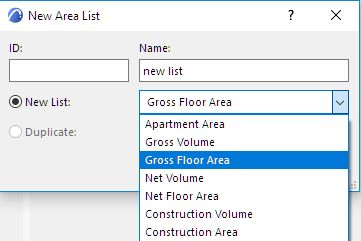
From dropdown menu, choose the List type.
In the Area List Settings dialog, set the options as needed. Click OK.

The new List is now available in the Navigator.
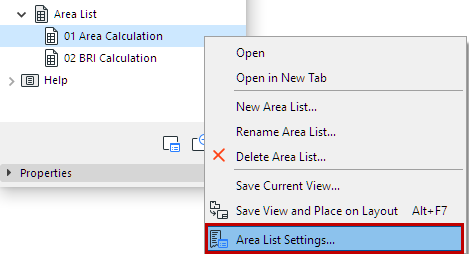
Edit Area List
To edit the settings of a list, select it in the Navigator and right-click to access Area List Settings.
In the upcoming dialog, the Settings are divided into groups:
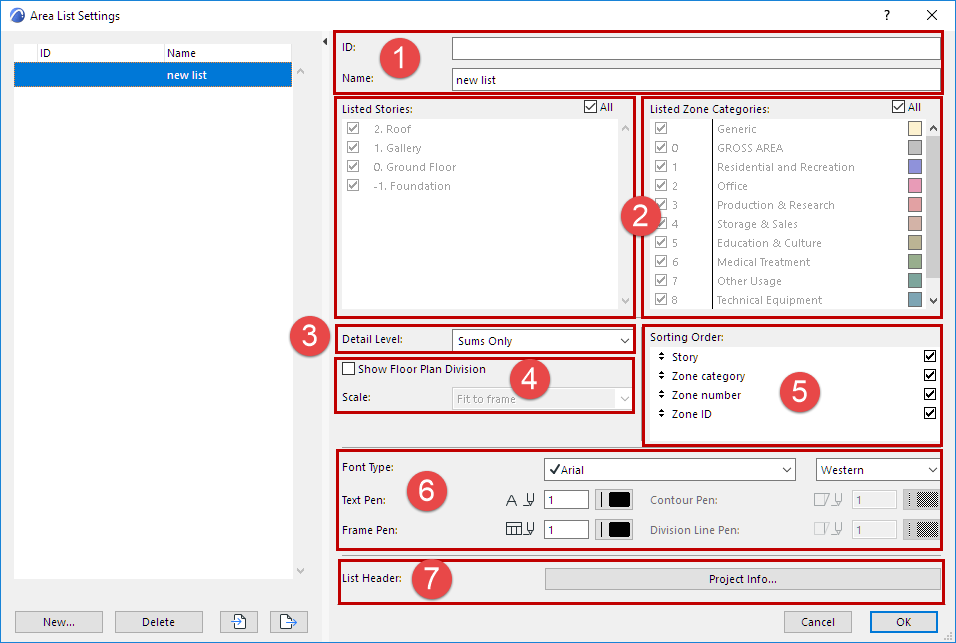
1.Here, enter the ID and Name of the list.

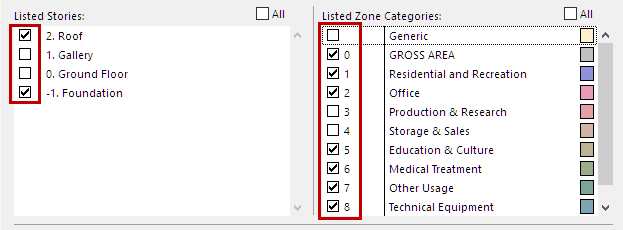
2.Here, decide which Stories and Zone Categories should be considered in the calculation. To limit the calculation to certain stories/categories, first uncheck the All checkbox.
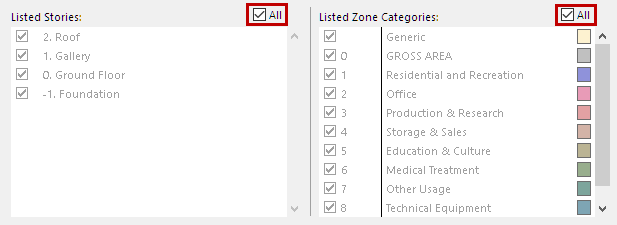
Now you can mark specific Stories and Zone Categories.
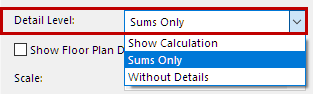
3.In the Detail Level section of the dialog, set how you want to display the calculation result:
–only the sums
–the complete calculation
–or no details (just the final result)
4.Show Floor Plan Division: Check this to create 2D illustrations of the Zones/Morphs used to calculate the list.
Choose how to Scale the resulting illustrations: either Fit to Frame or Proportional, to make the area lists easier to understand.
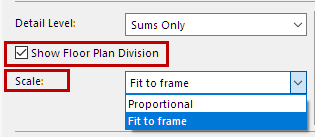
Morphs can also be displayed in 3D: check Show 3D Illustration.
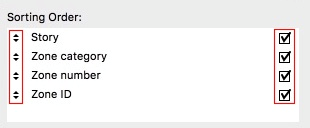
5.For certain list types, you can define the sorting order. Check the items which the sort order should consider (all items will be shown in any case). To change the order, click on an item and drag it up or down to a new position.
6.Use the text and frame settings controls at the bottom of the dialog to customize the list appearance (font and pens).

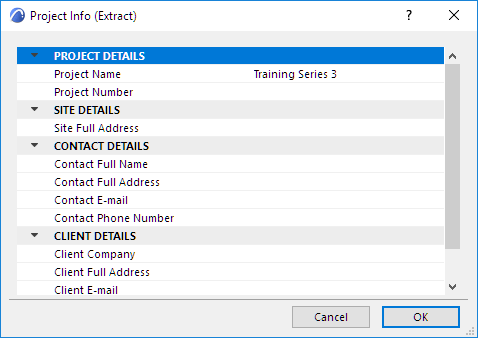
7.Certain Project Info items can be included in the List Header. Click Project Info to open this dialog, where you can enter or edit these data.

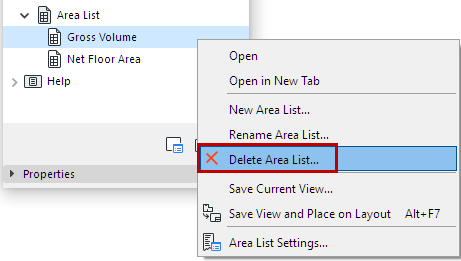
Rename, Delete or Export Area List
Area lists can be renamed, deleted and imported/exported.
Some of these commands are available from the Navigator item’s context menu.
In Area List Settings, commands are available to Delete lists (1) and to Import or Export lists (2) in XML format.
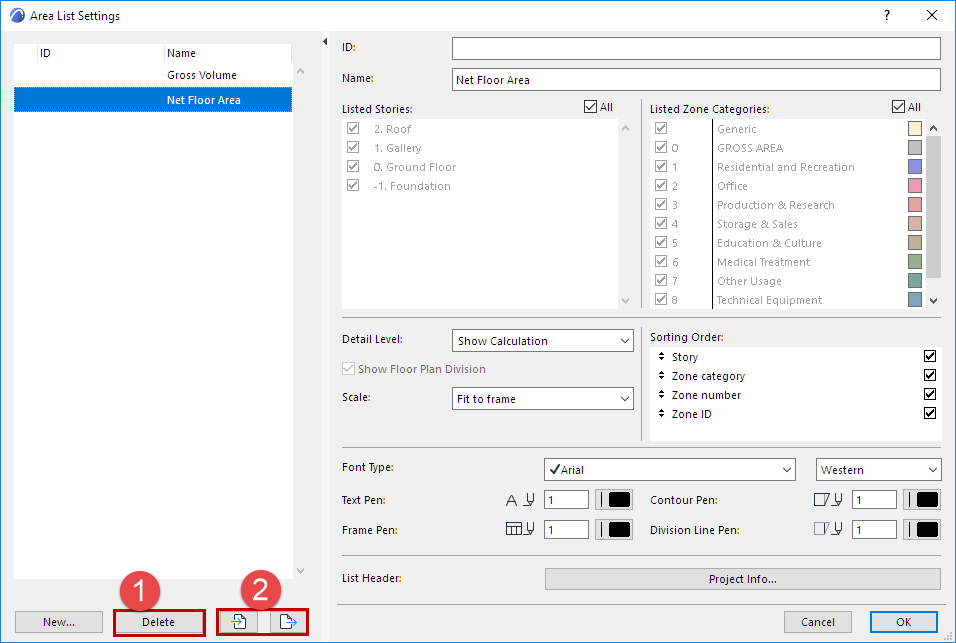
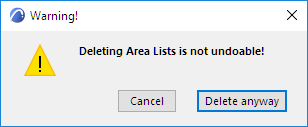
Note: Deleting a list is not undoable.