
Create a symbol fill based on a sketch drawn in any 2D window, with the following steps:
1.Draw a pattern using Lines, Arcs and Hotspots.
2.Select all the components of the pattern and choose Edit > Copy.
3.Go to Options > Element Attributes > Fills.
4.Click New.
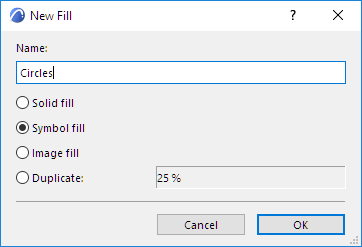
5.Enter a name for the new fill.
6.Choose the Symbol fill radio button, then click OK.
7.In the Appearance panel, click Paste. Your copied pattern appears in the Pattern window.
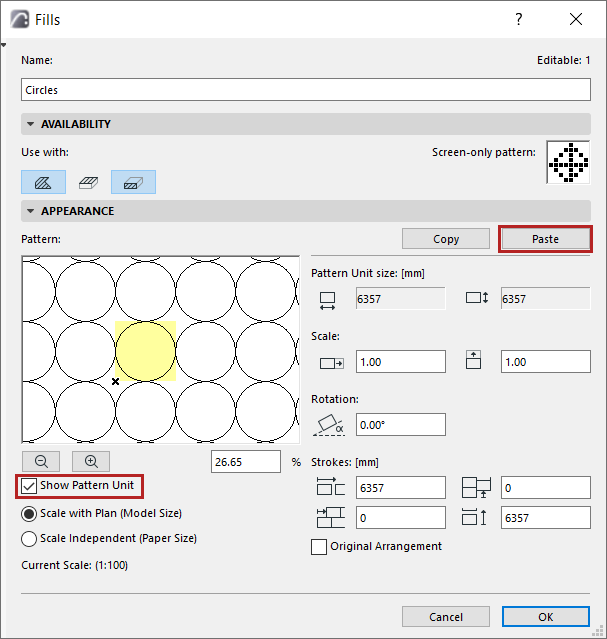
Note: The pasted selection can include only Lines, Arcs and Hotspots.
8.Check Show Pattern Unit to highlight a single unit of the pattern in the preview window of this dialog box.
9.Use the controls under Edit Symbol Pattern to set the size, pattern and rotation angle for the symbol fill.
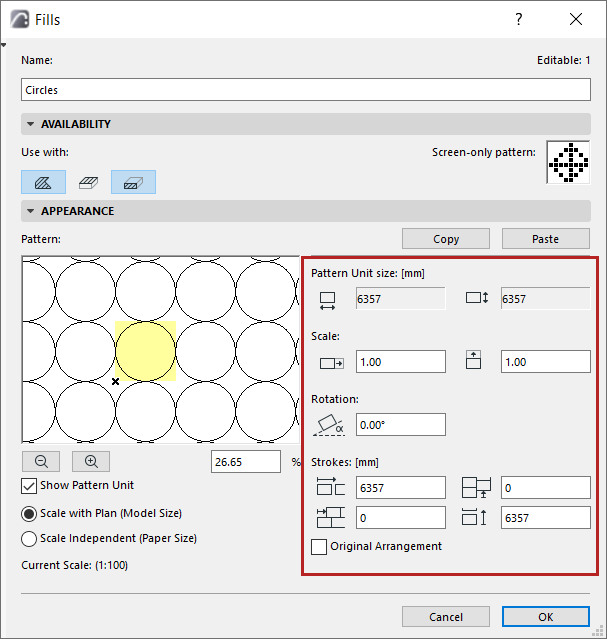
Pattern unit size
This is the absolute size of the Symbol unit on the Floor Plan.
Use these four fields to set the vectors of rows which compose the symbol pattern.
Scale
Enter scale factors by which to “stretch” the Symbol unit both horizontally and vertically. (By default, this factor is 1.0, that is, the symbol unit is not stretched.)
The percentage field and the zoom buttons below the preview window refer to the image in the preview window only. The preview displays the symbol pattern at the given percentage as compared to its appearance on the Floor Plan.
Rotation
Enter an angle in degrees if you wish to skew the fill pattern.
Strokes
To change the pattern distribution, enter values for horizontal and vertical spacing between the pattern vectors.
You can also enter offsets, to create gaps in the pattern.
Check Original Arrangement to return to the saved values.
To determine the relationship between fills and project scale, use the two radio buttons.
See also Scale of Fills.