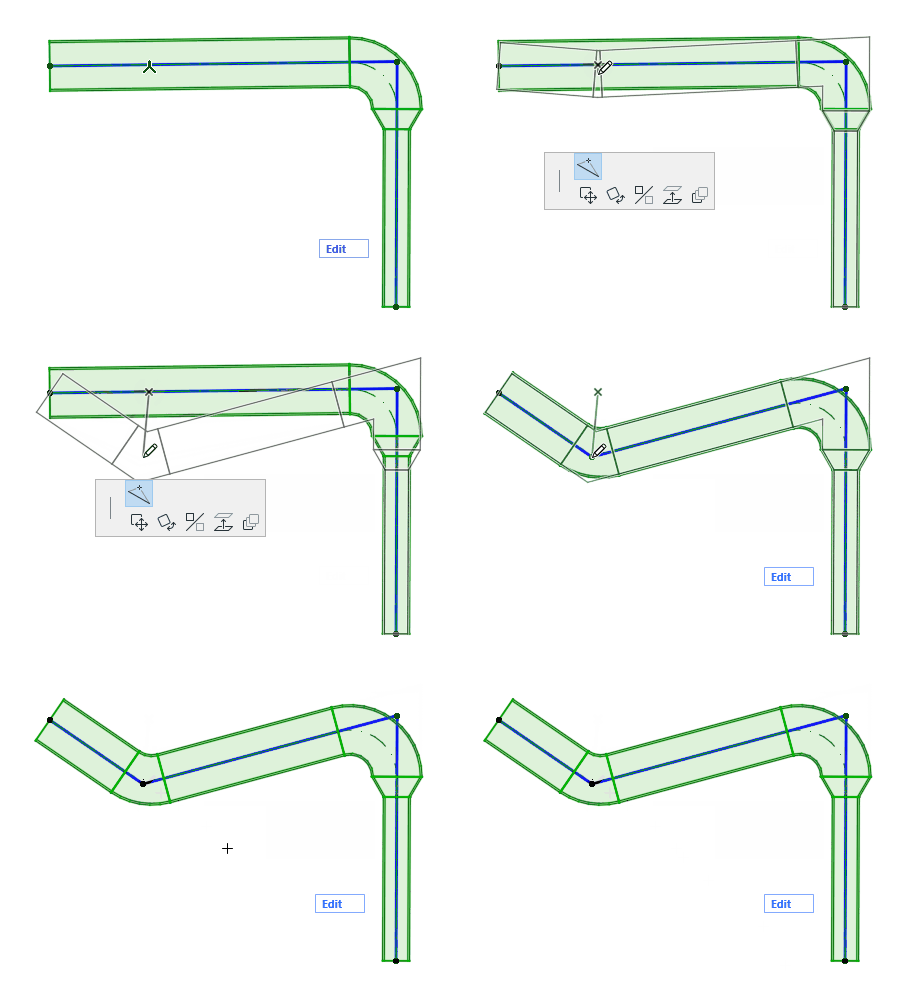
For any selected Route element: click an edge, node, or reference line to access pet palette commands.
Insert new node

From the reference line:
1.Choose Insert new node.
2.Drag to create a new node and change the Route shape.
Move Node
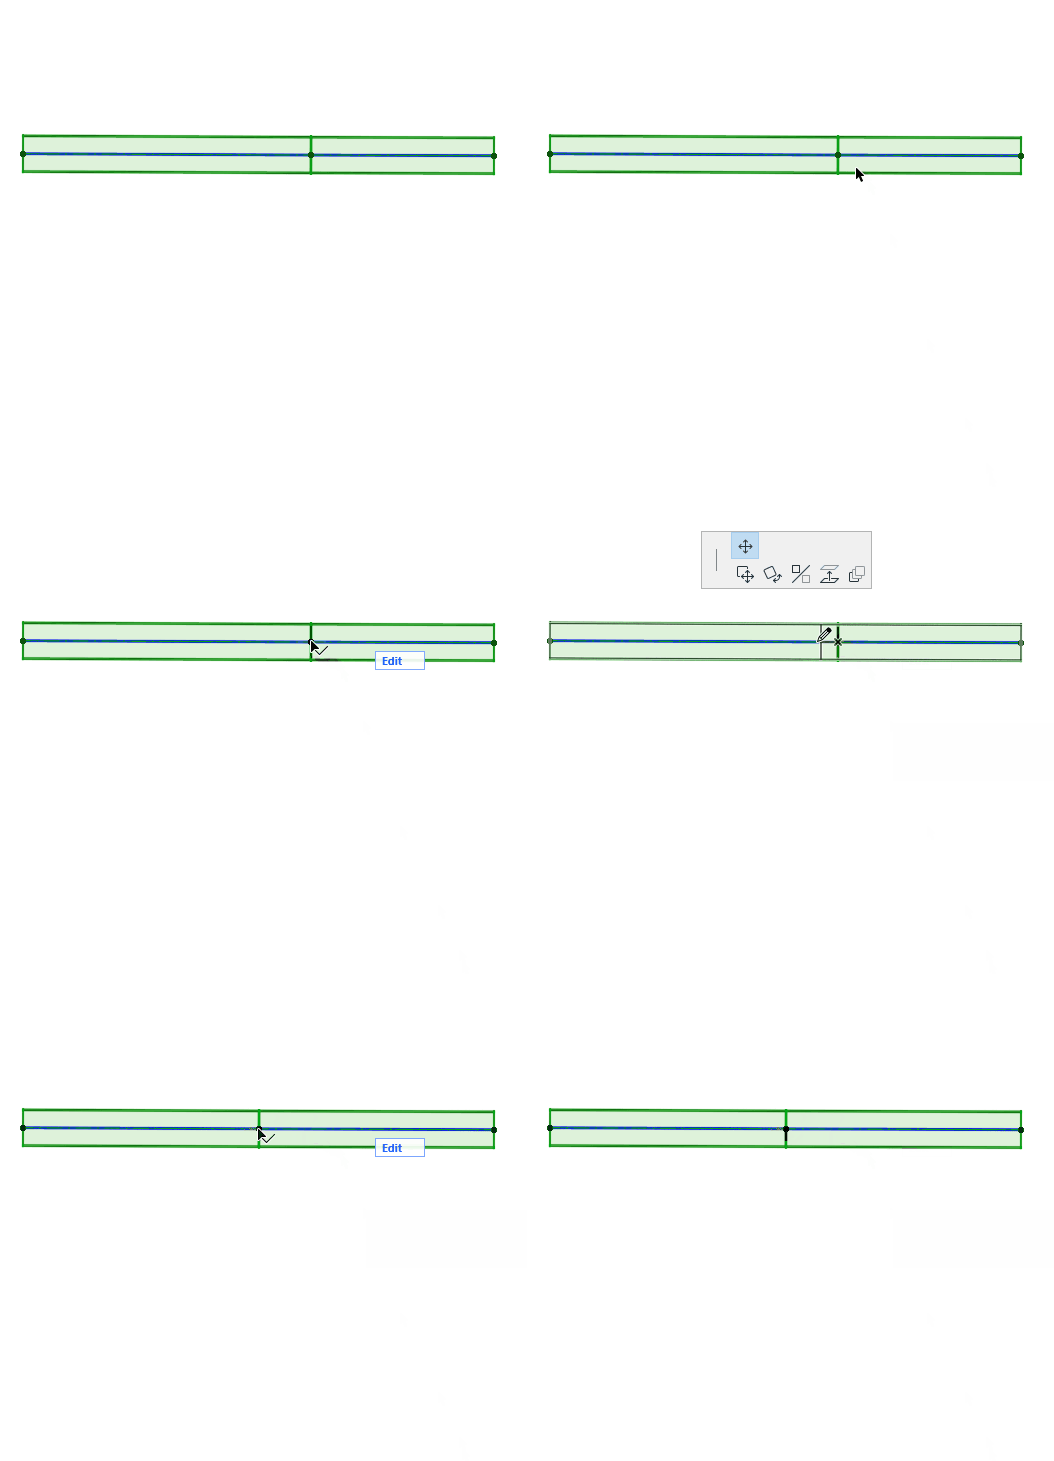
Available for a node between two adjacent straight segments.
Drag the connection node, or enter values in the Tracker. This modifies the segment length.
Elevate Route (Floor Plan)
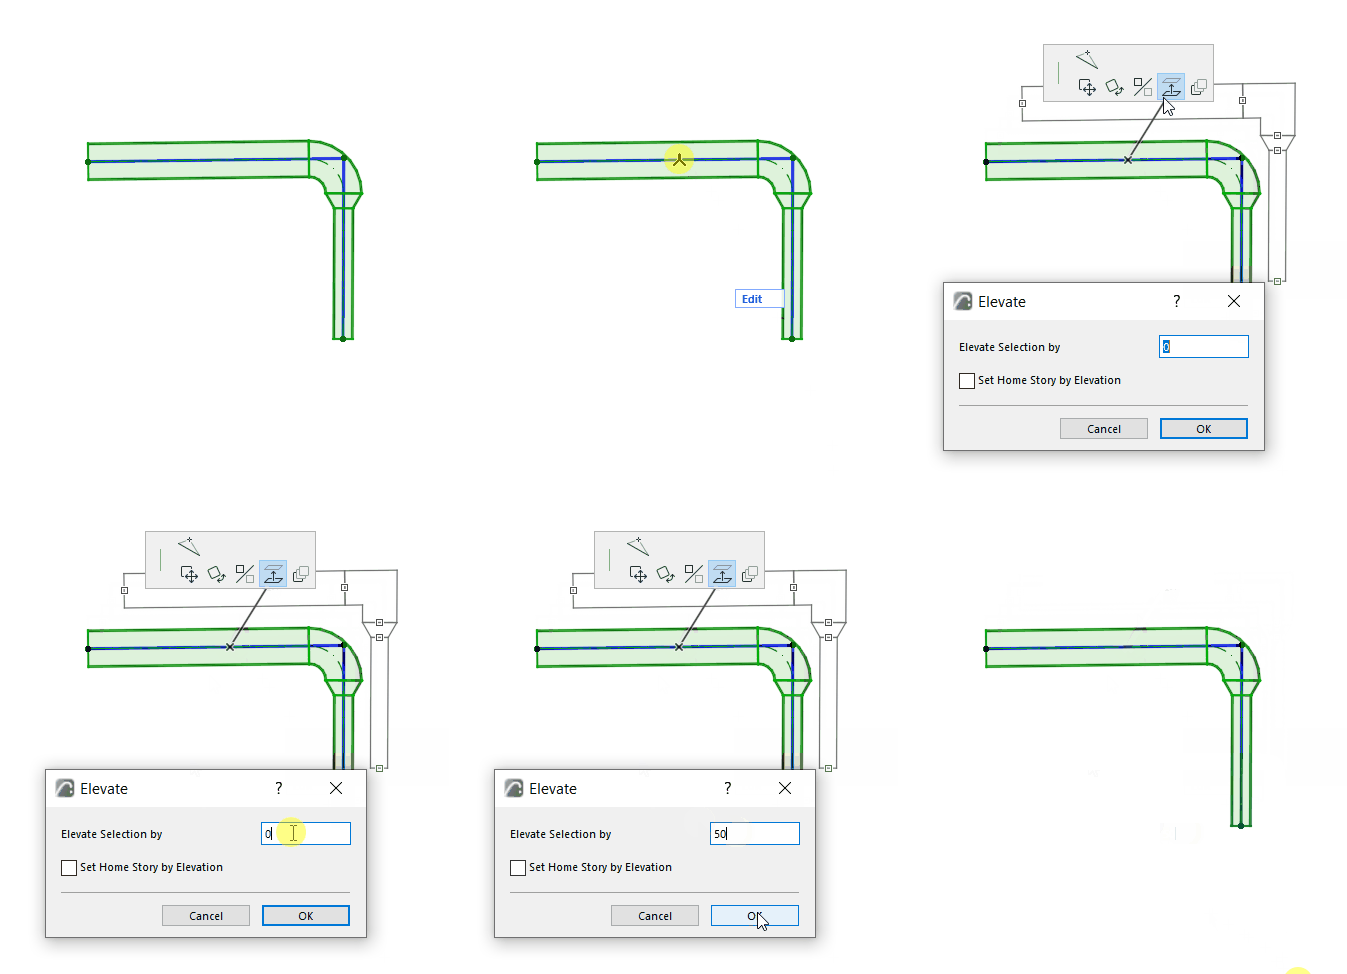
Enter the value by which you wish to elevate the Route.
Elevate Route (3D)
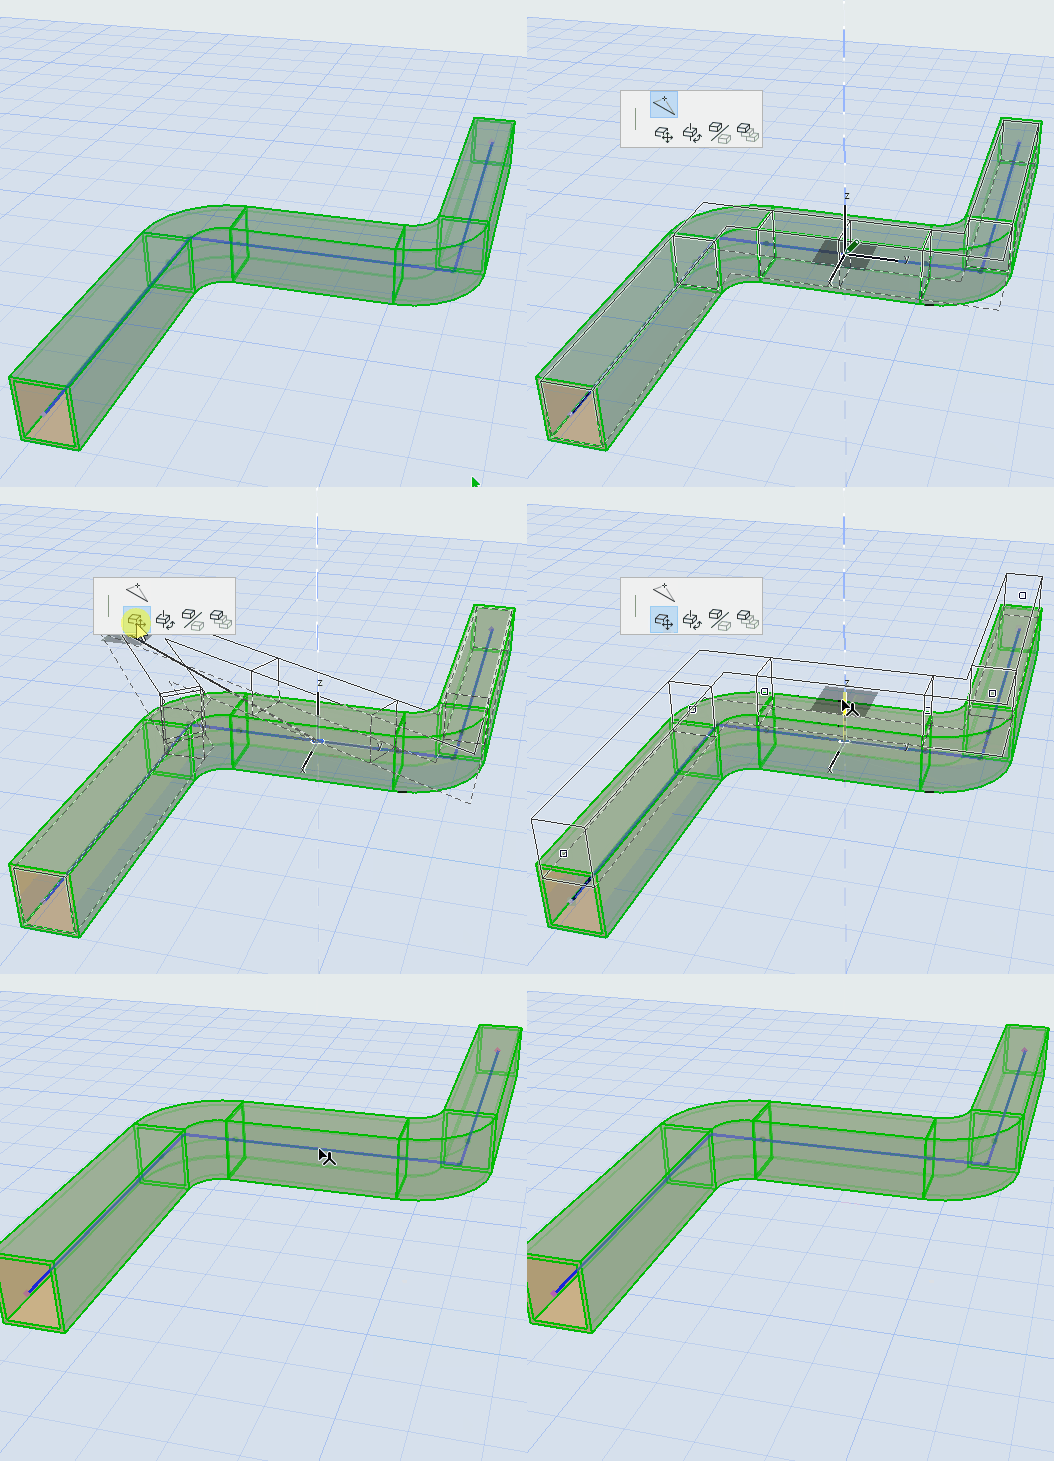
Use the Drag command to change Route elevation on the Z axis.
Continue Route
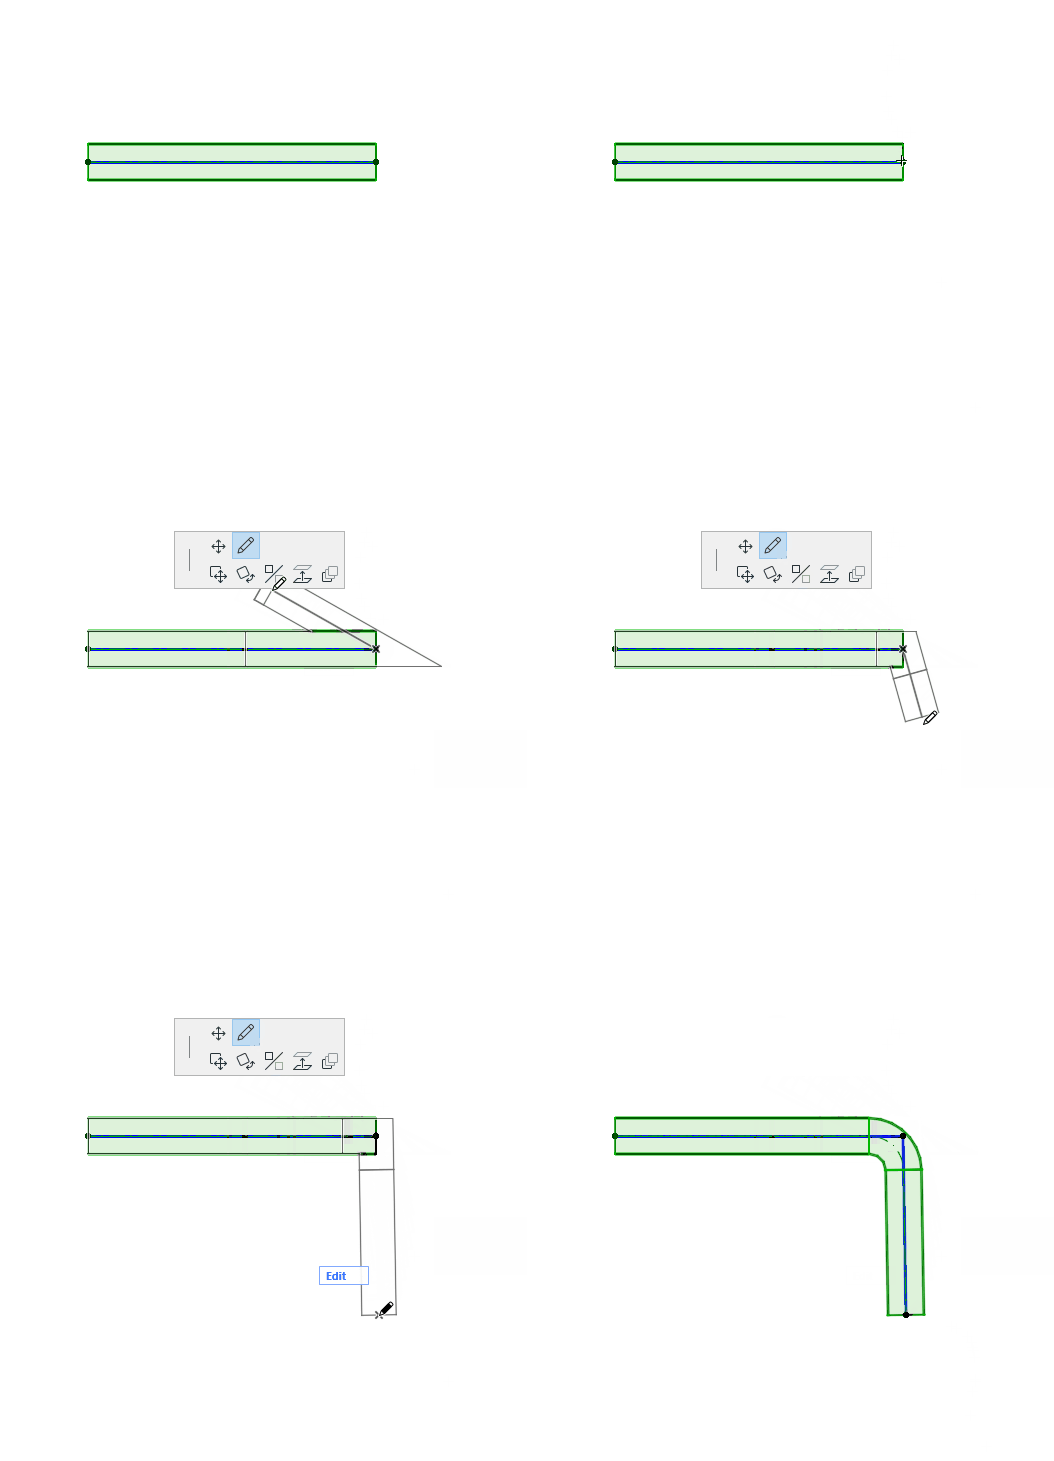
Available at the end of an unconnected straight segment.
Flexible Duct: Move node
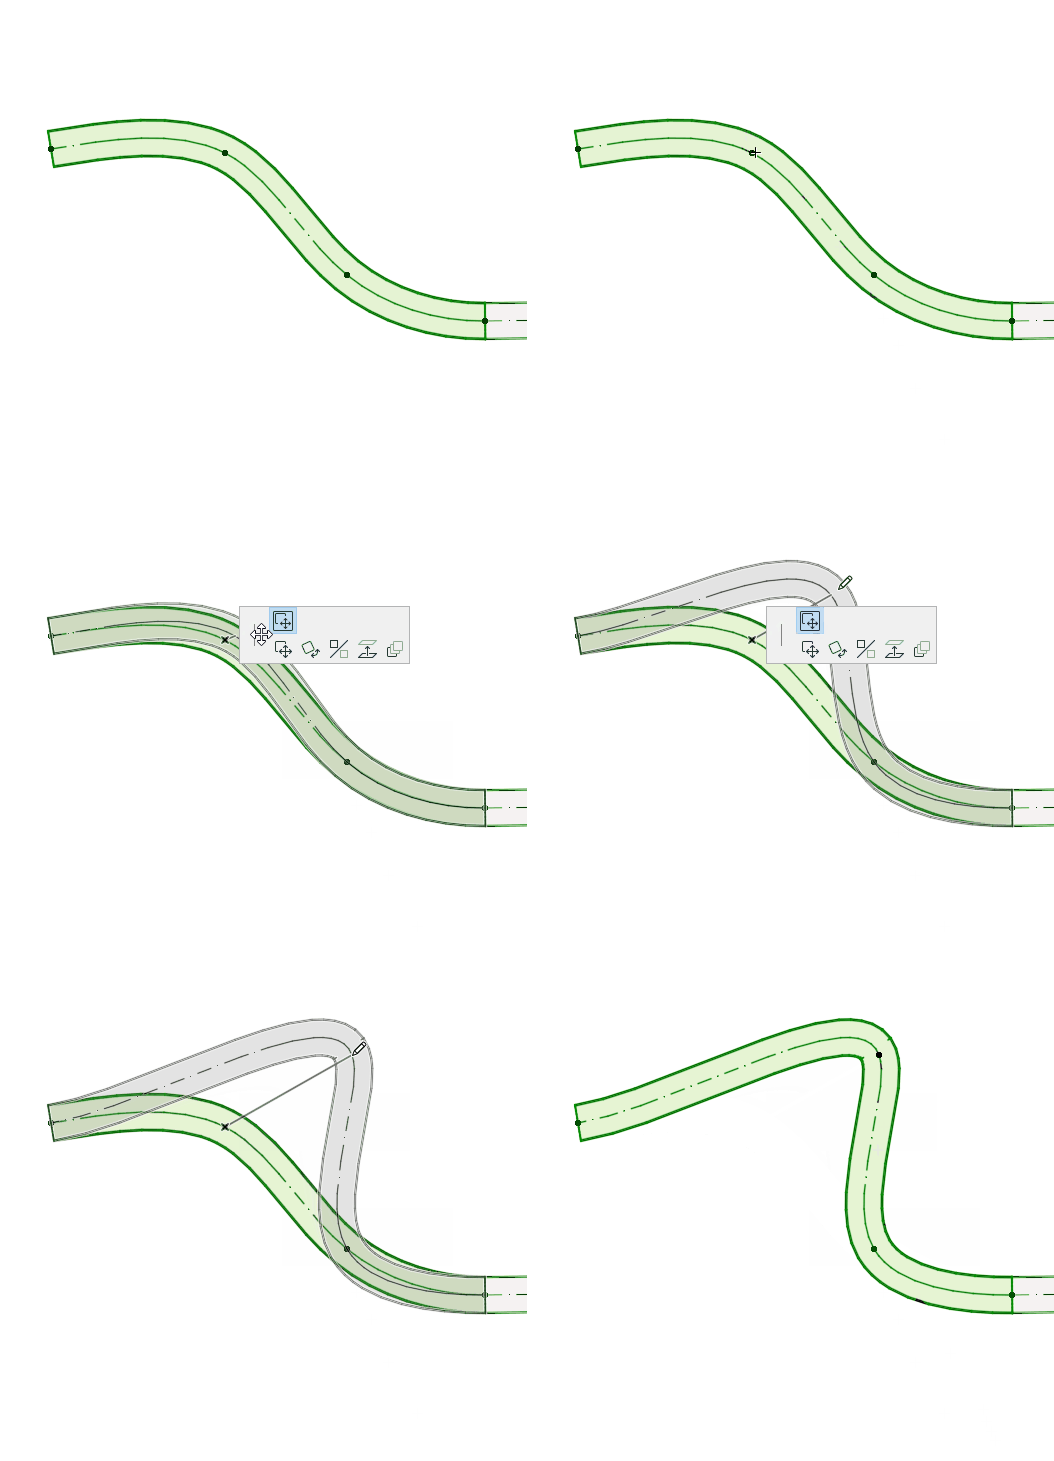
Click a node of the Flexible Duct.
Choose Move Sub-element, then drag the node.
Flexible Duct: Insert new node
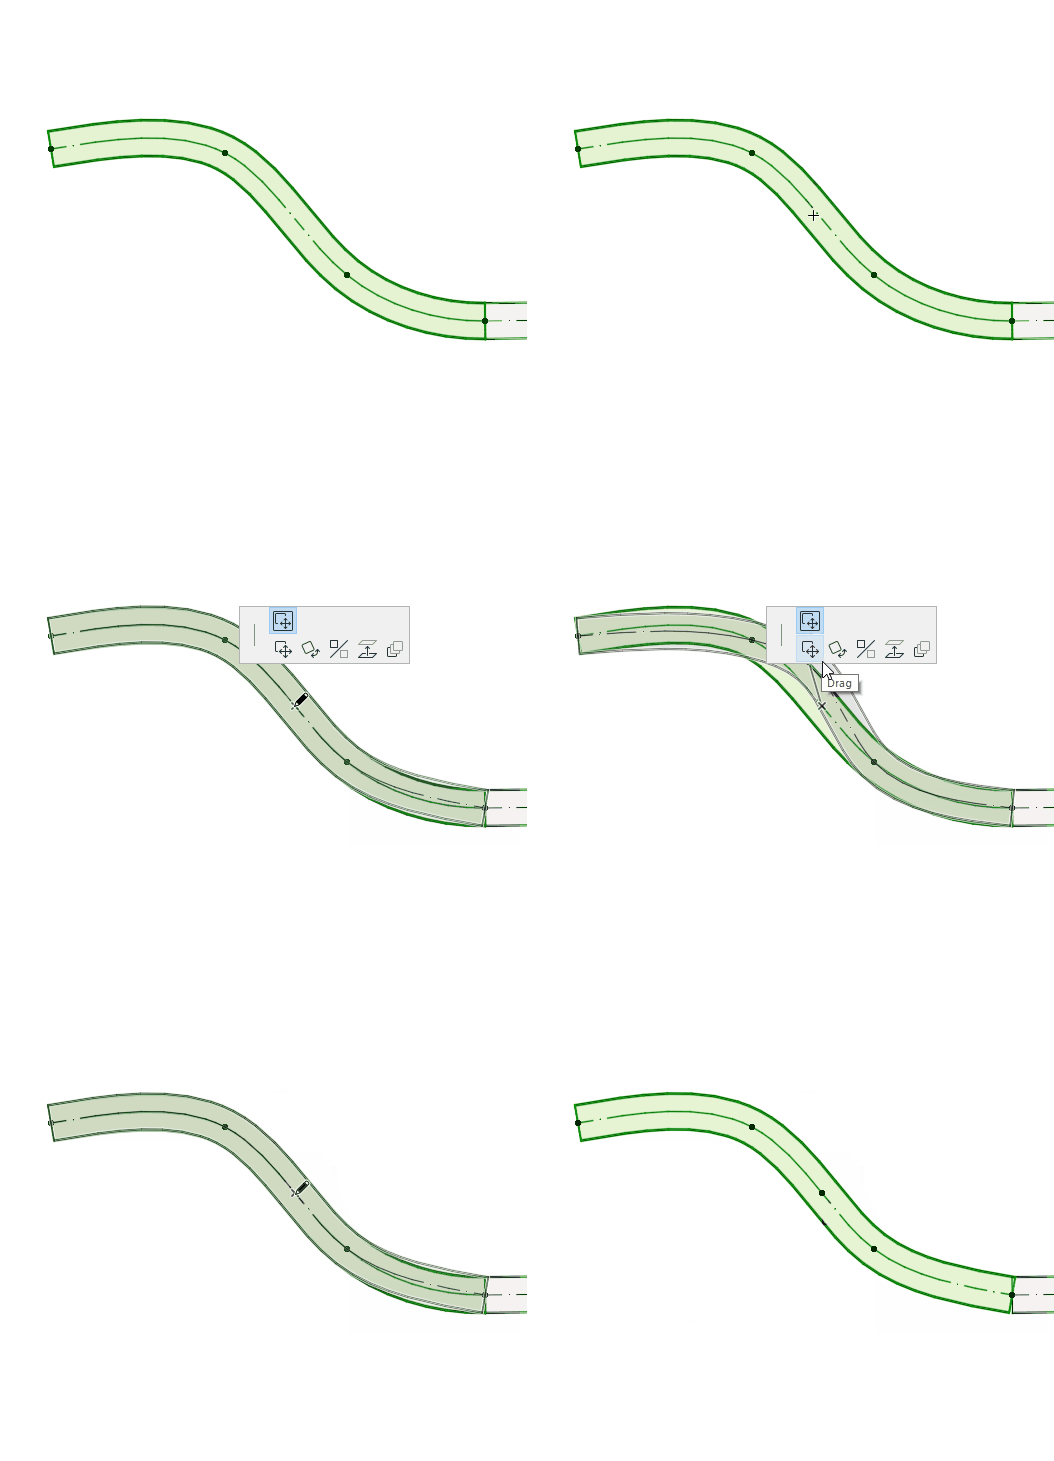
Click on the centerline of the Flexible Duct.
Choose Move Sub-element, then click the centerline to create a new node.
Offset Segment
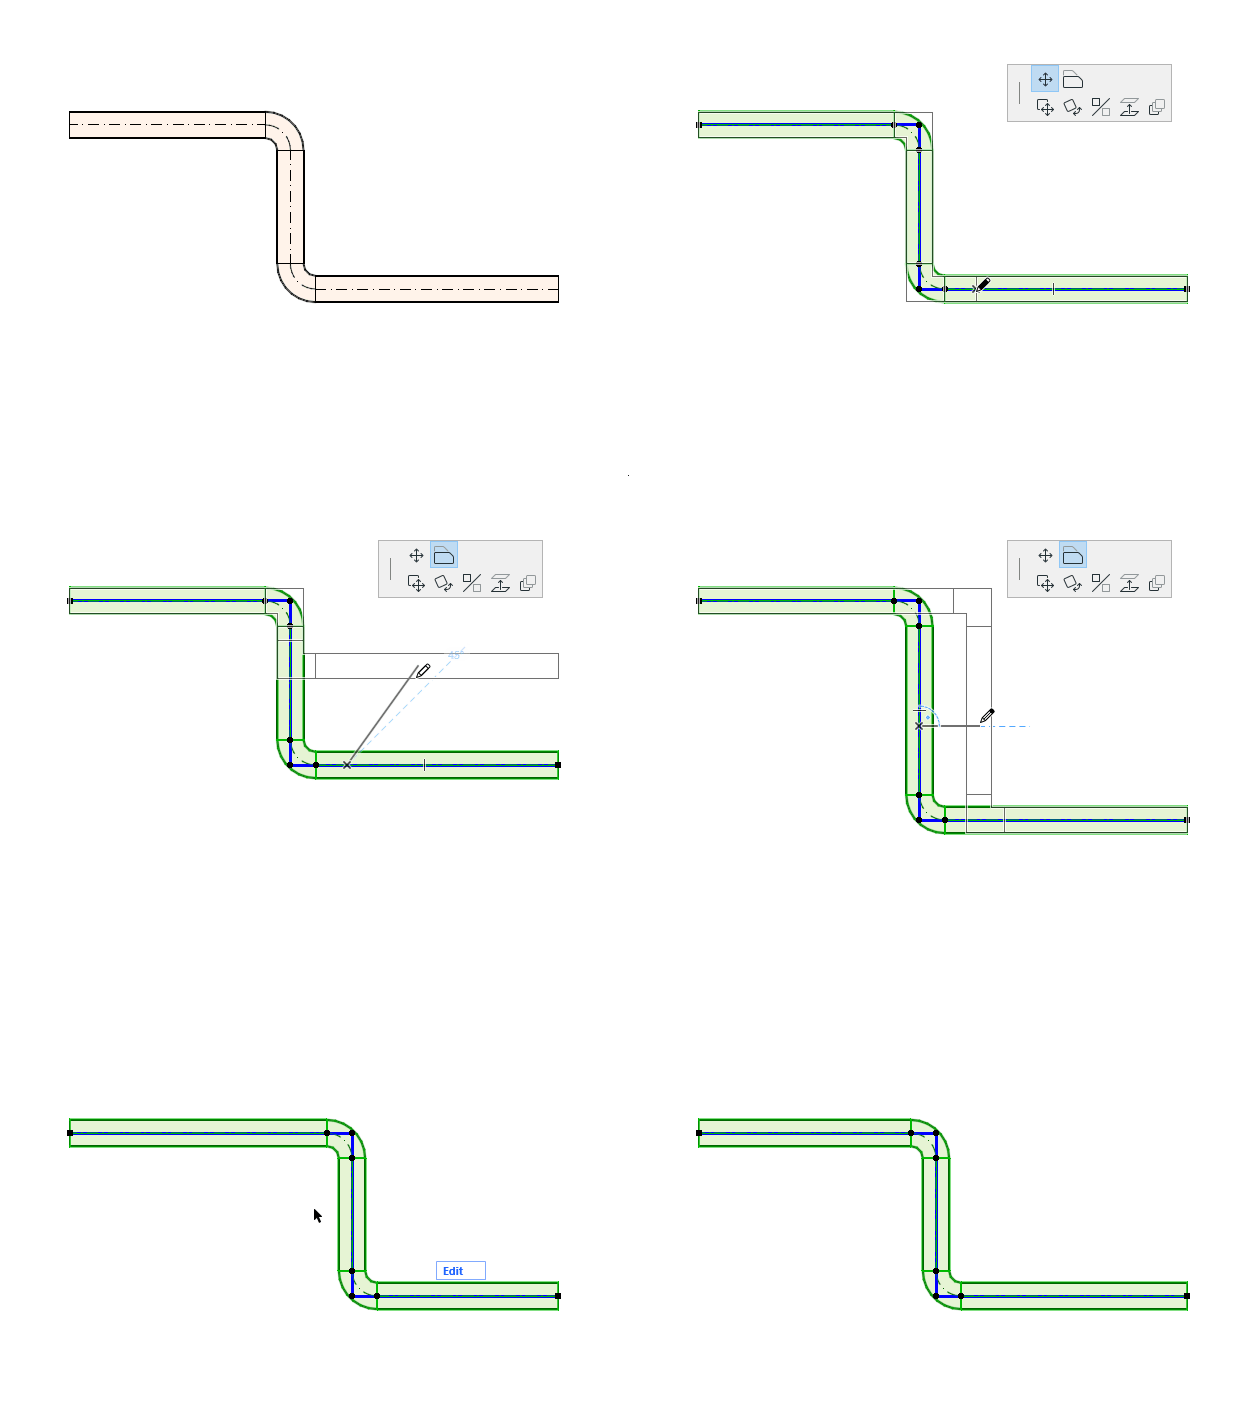
1.Select the element.
2.Click the centerline/axis.
3.From the pet palette, select “Offset segment” to move it.
Note: Not available for routes connected with branches.
Split MEP Route
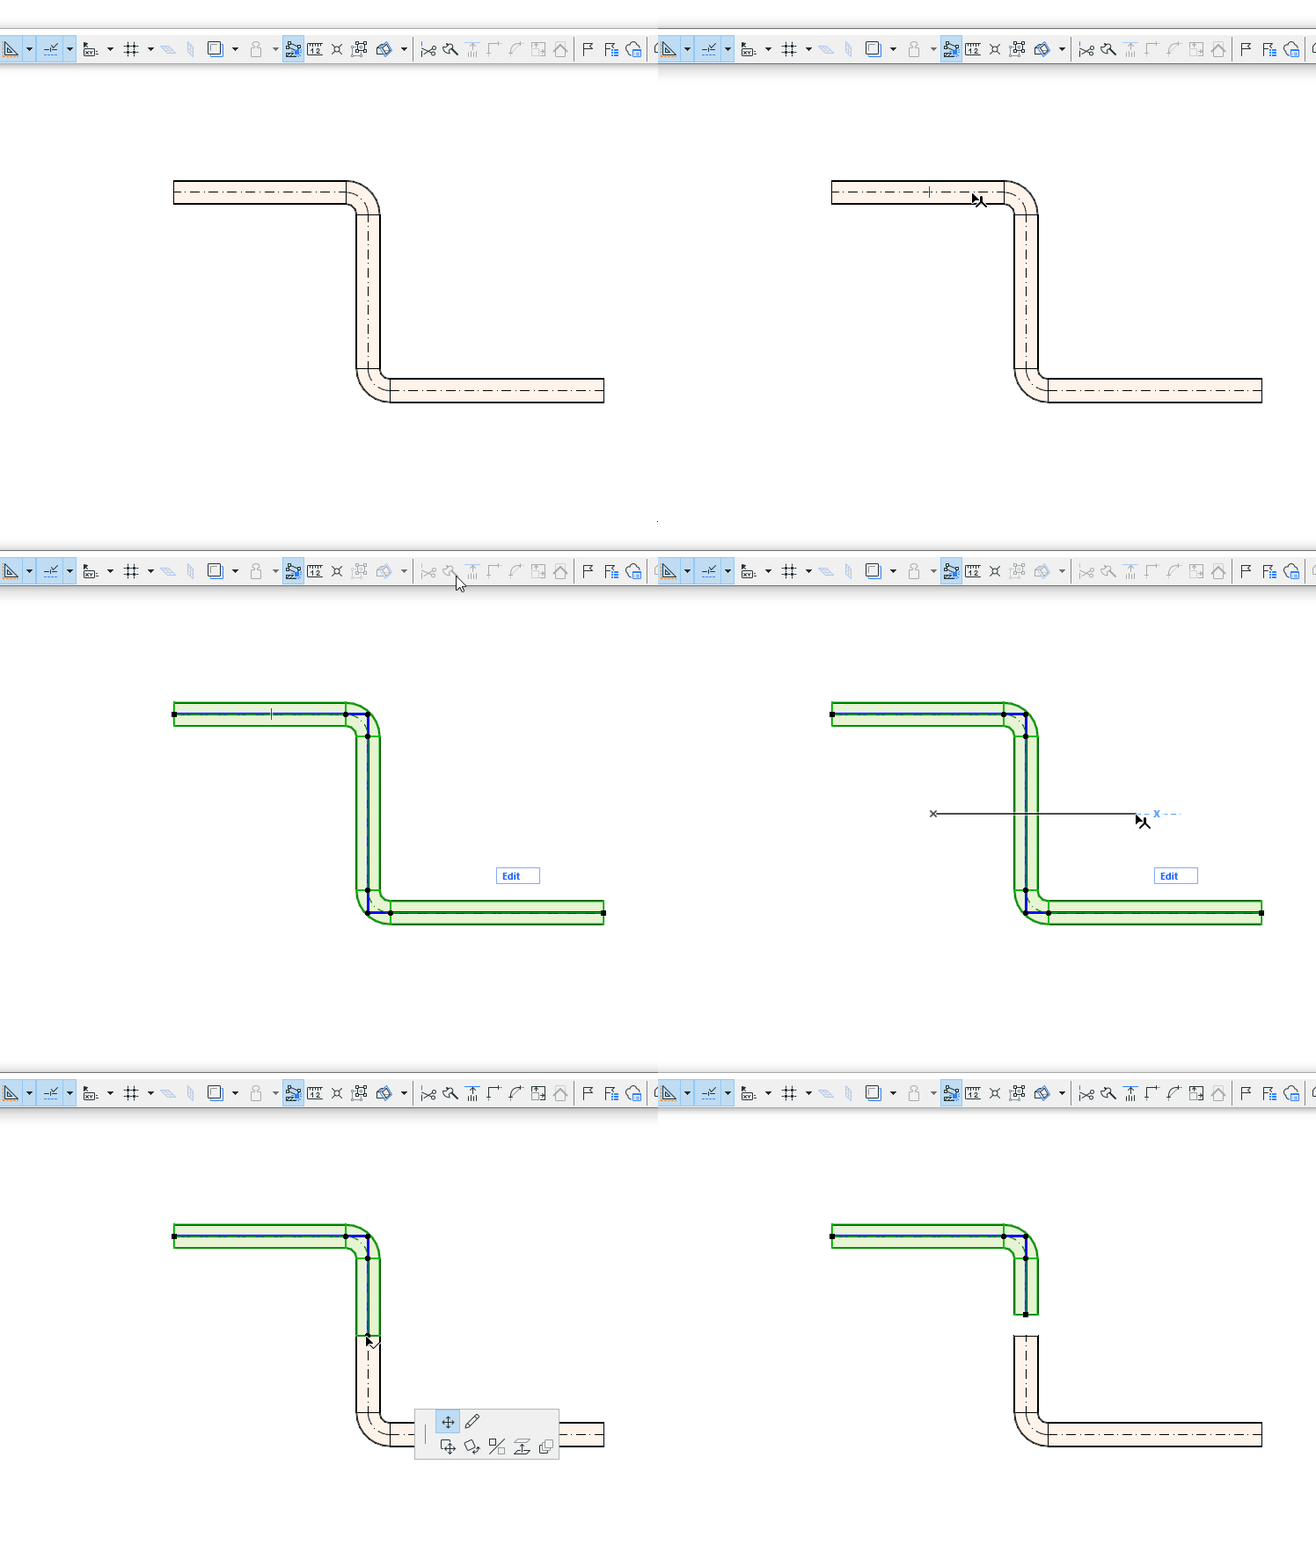
1.Select the route you wish to split.
2.Choose Edit > Reshape > Split command, or the hatchet icon from the toolbar.
3.Draw a temporary splitting line.
Note: In the 3D window, a red splitting plane is shown as feedback.
4.Click on either side of the splitting line/arc with the Eyeball cursor.
5.Elements on the clicked side will remain selected, while elements on the other side will be deselected.