Use this feature to find drafting errors on the Floor Plan - specifically, Zone and Fill polygons that overlap a little, or hang out a little, or have small gaps between them. This way you can easily find/fix modeling problems. Each identified area conflict is added to Issue Organizer.
This function works on Floor Plan only.
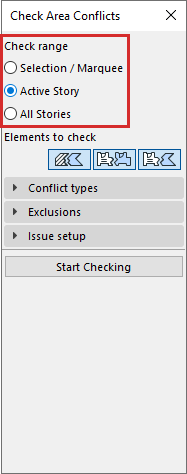
1.Open the Check Area Conflicts palette:
–Edit > Check Area Conflicts, or
–Window > Palettes > Check Area Conflicts
2.Check range: Choose which part of the model to check:
•Selection/Marquee: Only elements that are currently selected or Marqueed.
–If you activate the Selection/Marquee option, but nothing is selected in the project, the check will consider the Active Story.
•Active Story: All visible elements on the currently active Story.
•All Stories: All visible elements on all Stories.
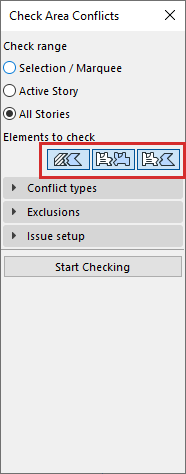
3.Elements to check: Click tool icons of the element pairs to check. Choose at least one pair:
•Fills vs Fills
•Zones vs Zones
•Zones vs Fills
4.Conflict types: Choose one or more conflict types to find:

•Uncovered areas: Find areas that should be covered by another polygon, but they are not covered - because one polygon edge extends past the other.
–For example: a Zone covers a Fill almost entirely, but the Fill edge hangs out, due to a drafting error.
–How it works: The check signals a conflict only if the larger area covers at least 50% of the smaller area.
•Overlaps: Find small overlapping areas between Zones and/or Fills
–How it works: The check signals a conflict only if one area overlaps the other by less than 50%.
•Minor gaps: Find small gaps between Zones and/or Fills.
–Enter the maximum allowable gap (length). Any gap smaller than this is considered a conflict.
Exclusions
Use these options to ignore certain area conflicts. These are holes or gaps based on intentional modeling - so they should not be handled as errors.

Ignore holes with area
Activate this checkbox to exclude intentional holes (such as chimney hole) from the check.
Enter the area of holes to exclude. Holes smaller than this limit are ignored, and no issue is created.
Ignore rectangular gaps
Activate this checkbox to exclude intentional gaps between Zones and/or Fills (e.g. thick walls that are not part of the Zone/Fill area).
Enter the thickness of gaps to exclude (e.g. Wall thickness). Gaps of this size are ignored, and no issue is created.
Issue Setup
Choose how to name the Issues resulting from the check: Automatic naming, or custom naming.

Automatic naming
Names are created based on conflict type and element type.
For example:
•Overlap (Zone-Zone)
•Uncovered area (Fill)
•Minor gap (Zone-Fill)
Issue numbers are added incrementally as a suffix.
Custom naming
Create single, default custom name for all created Issues. Each Issue will have a unique number.
If needed, you can modify the Issue names manually in Issue Organizer.
Highlights
Define how to highlight the conflicting elements or areas. Choose one or both of the options:
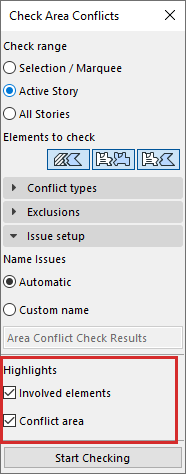
Involved Elements
Add the conflicting elements as highlights to the Issue.
Highlight the involved Zone and Fill elements, add elements to Issue
Conflict area
For each conflict area, create a new fill element as part of the Issue. The fill is placed over the conflict area in the floor plan, so you can see it easily.

Highlight the conflict area: highlight is added to issue as a Fill element
Note: This fill is added to the Issue and is not part of the model. It is visible only as long as the Issue is visible.
5.Click Start Checking
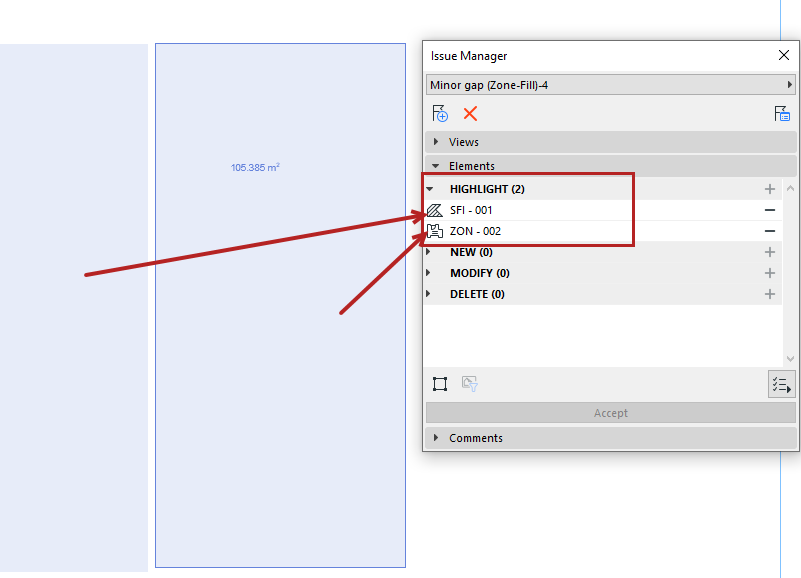
6.To see the results, open Issue Organizer (Window > Palettes > Issue Organizer).
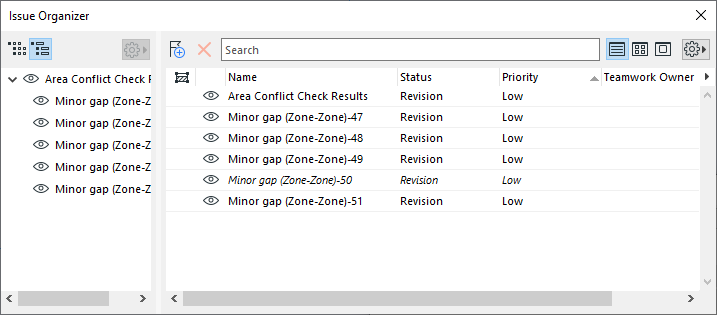
•Area Check results belong to a single thread in Issue Organizer. The parent issue is called “Area Conflict Check Results”.
•After the check, you can click “Undo” to undo all the results in one step.
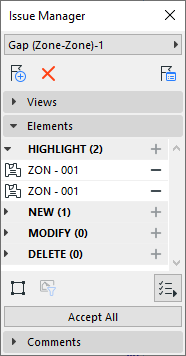
7.Double-click any Issue to see it in Issue Manager. Zoom to the highlighted elements or areas and adjust the model as needed.
8.Click ‘Start Checking’ again if needed. After each check, previously resolved Issues are removed from Issue Manager.
Notes for Teamwork users
Permissions required to use the Check Area Conflicts feature:
•Issue - Create/Modify
•Issue- Delete
Permission required to activate the Conflict area highlight:
•Document tool elements
If you need these permissions, please contact your administrator .