Format Options (Interactive Schedule)
Use the formatting controls at the left side of the Schedule Window to format the current schedule.
Important:
Use the Undo/Redo Format Change to revoke or redo format changes in the Schedule.

Adjust Zoom/Fit to Current Window
Use the Undo/Redo Format Change to revoke or redo format changes in the Schedule.
Scheduled Elements on Locked or Hidden Layer
Select Schedule Items on Floor Plan/3D
Do one of the following:
•To adjust Schedule Cell Size, click the icon at the top of the schedule and use the dialog box.
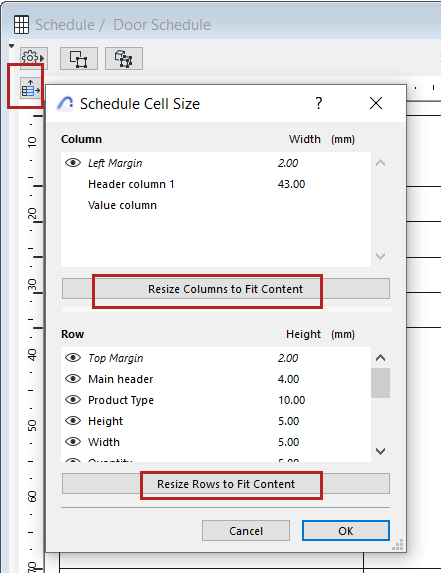
Use the Resize buttons to automatically adjust rows and columns to fit the content, or enter width/height values as needed (multi-select available for the listed items).
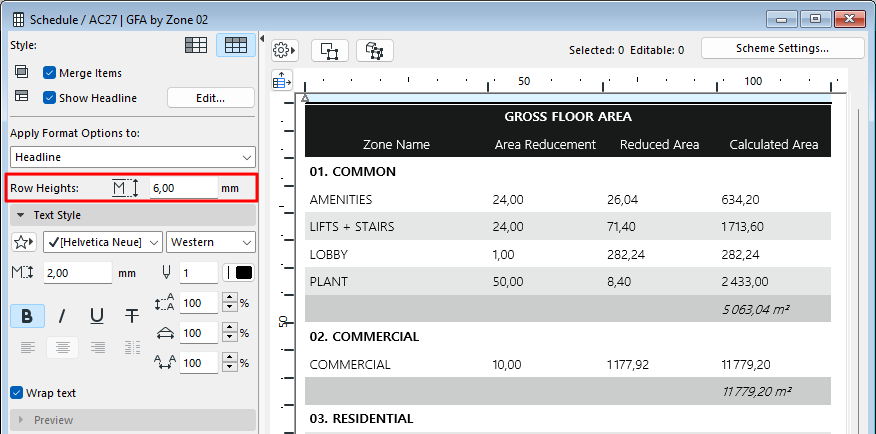
•Set the Row Heights field
•To adjust individual row or column heights, manually drag the cell boundaries on the top and left side of the schedule.
•Double-click the row or column edge to fit its contents.
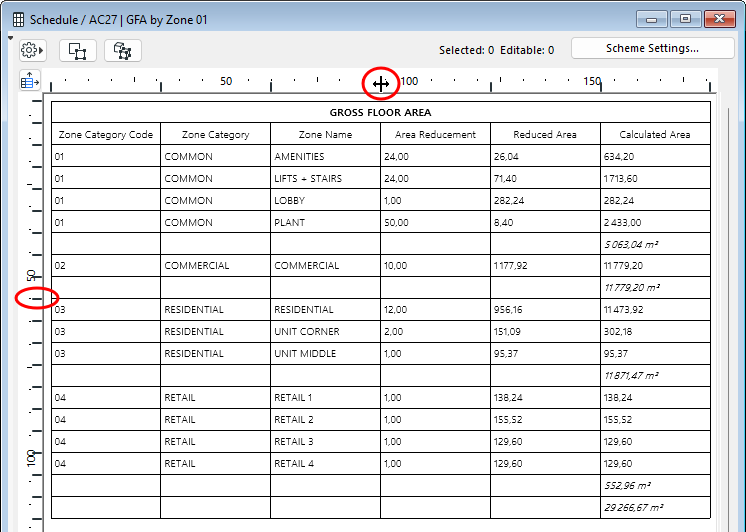
Double-Click: Fit Width to Cell Contents
In Schedule Cell Size dialog, do one of the following:
•Use the eye icon to show or hide the Row or Column
•Set Row height or Column width to zero

An arrow appears in the schedule to mark a hidden column or row. Double-click to unhide.
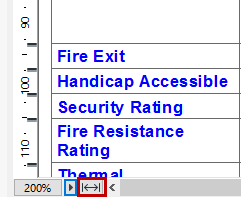
Adjust Zoom/Fit to Current Window
•Adjust the Zoom using the pop-up from the bottom scrollbar
•To fit the schedule to the current window size, click the Fit to Width icon
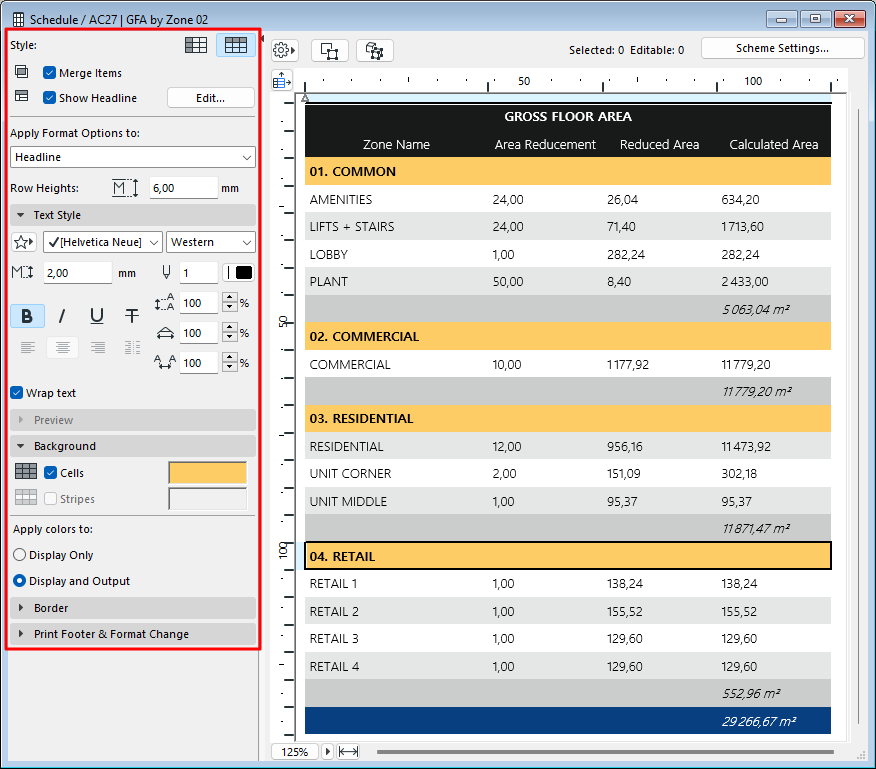
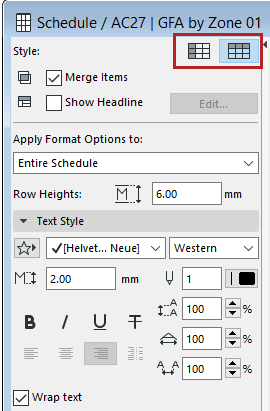
From the two Style buttons, choose to display the Schedule fields by either rows or by columns.
Choose the items that you will format using the controls below.
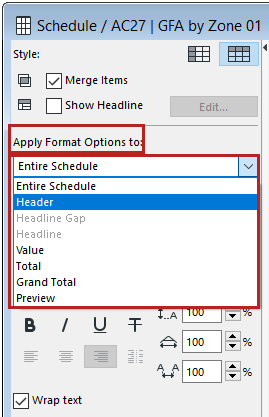
The Preview refers to the element Preview pictures, if any, in the Schedule. (See Format Preview Picture.)
This option lets you display data from one or more schedule fields in a separate row, above (or to the left) of the rest of the element data.
Click Edit to open Headline Settings, to define the content and appearance of the headline data:
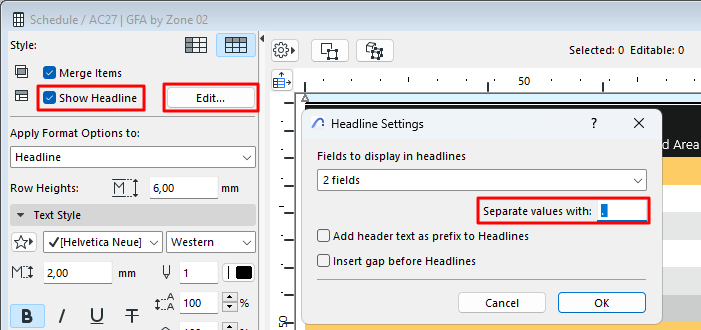
•Fields to display: Choose how many schedule fields to display in the headline.
•Separator: Choose any character to separate the headline fields (such as comma, period, vertical line). Add a space if needed.
•Add header text as prefix to headlines: Adds the Column/Row header name as a prefix to its value in the headline row.
•Insert gap before headlines: Inserts an empty row before each headline row.
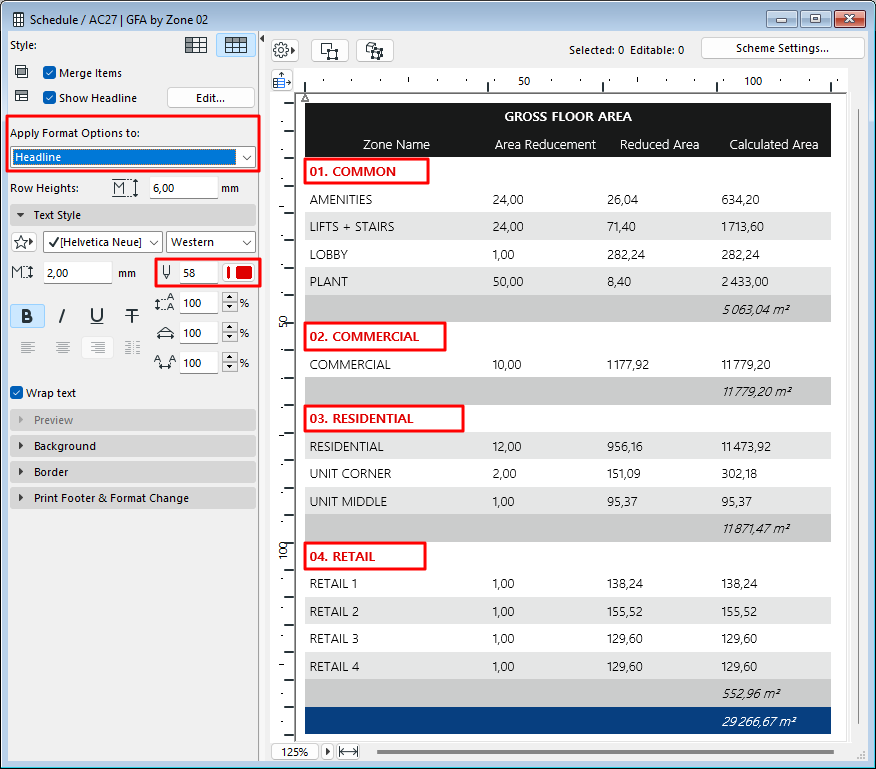
•Customize the text format of Headline data, as needed: at Apply Format Options to, choose the Headline item.
See also Schedule Headers, below.
Set text format options for the item type selected at Apply Format Options to:
Note: Not available if you have selected “Preview”.
Text Favorite: Click the pop-up to apply Favorites saved with the Text Tool.
See also Apply a Favorite.
Leading: This control modifies the leading value (vertical line spacing), as a percentage. Enter a number or use the up-and-down arrows to change the value in increments of 25 percent.
Wrap text: Check this option to automatically wrap text so that it fits into the column width.
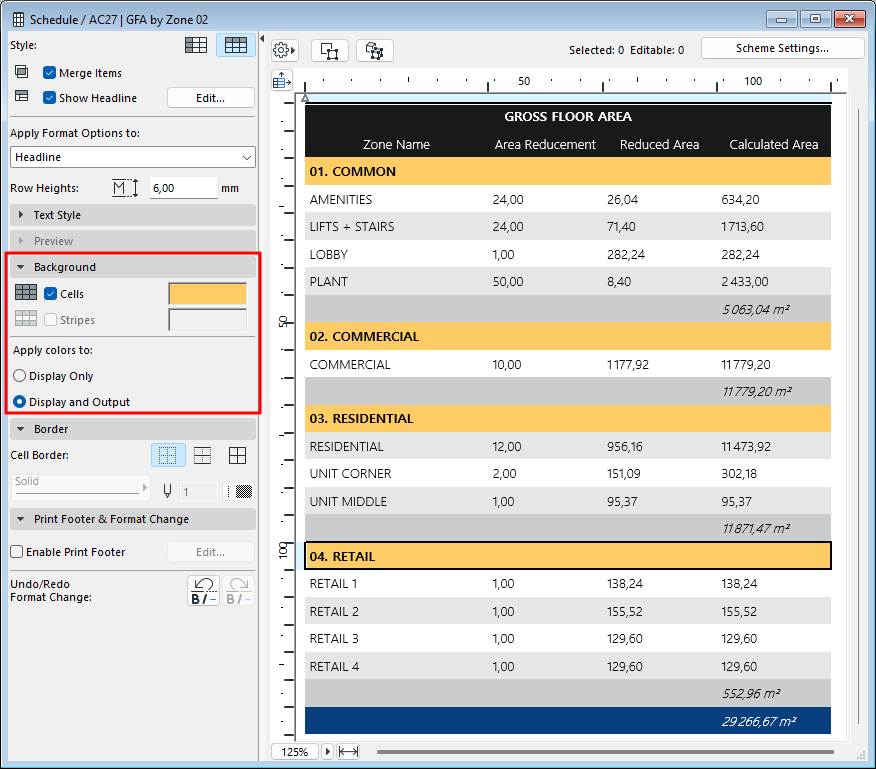
1.From “Apply Format Options,” choose the item (such as Headline or Grand Total) whose cell color you want to set. Or click in a cell.
2.Click Cells.
3.Choose a background color.
To apply stripes to alternating rows of values:
1.From “Apply Format Options,” choose Values. Or click in a row.
2.Click Stripes.
3.Choose a stripe color.
Set cell border options for the item type selected at Apply Format Options to.

See Previews and Pictures in the Interactive Schedule.
1.Check Enable Print Footer to add a print-only footer to the Schedule.
2.Click Edit to open Footer Settings and define the Footer.
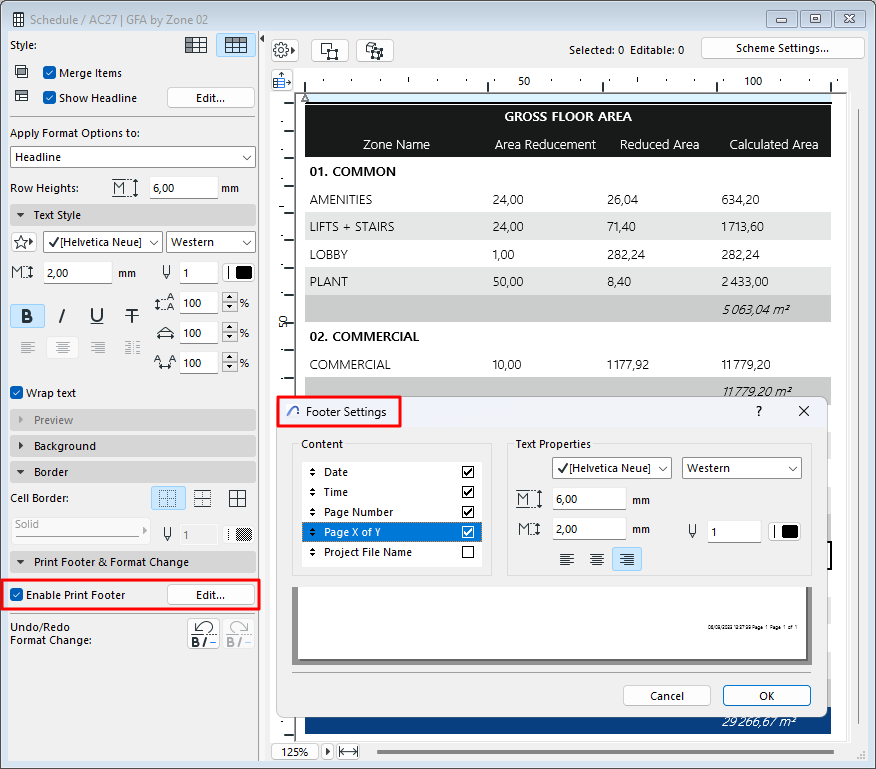
–Content: Check the items that should appear in the print footer. Drag them up and down to modify the order.
–Set text format options for the printable footer. Use the preview at the bottom as a guide.
3.Click OK.