The Duct Size Optimizer changes duct dimensions as needed, based on user-defined target limits and dimension preferences.
Use this dialog after you have defined systems and checked calculations in the System Browser. However, you can also resize dimensions at any time (irrespective of data in the System Browser).
1.Open Duct Size Optimizer from the MEP toolbar, or Window > Palettes
![]()
2.Select one or more duct routes for resizing. The dialog tells you the number of selected and editable elements.
Note: A route may be non-editable if its layer or element is locked.
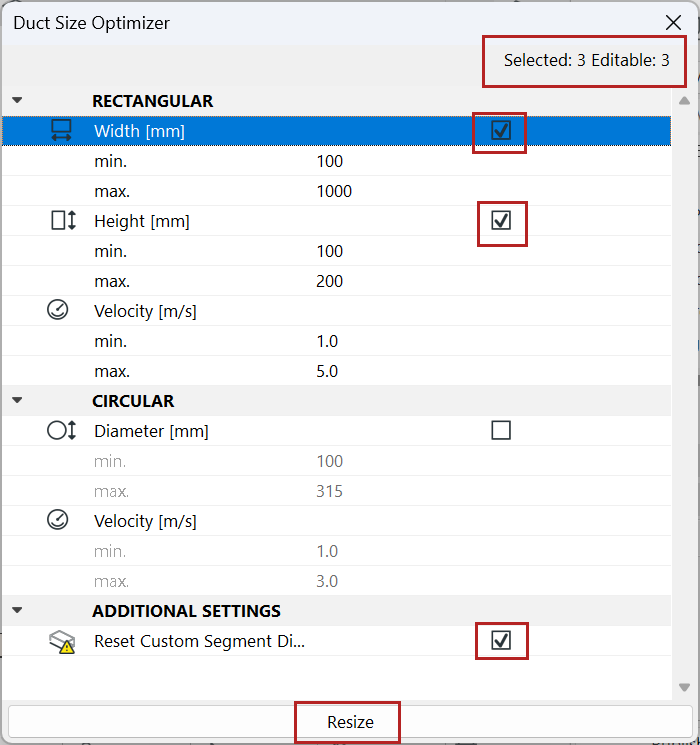
3.Check the dimension types that you want to resize (Rectangular width and/or height, Circular diameter).
4.Check whether to include any custom segments in resize operation, too.
5.Uncheck the dimensions you want to leave as-is. For example, to leave your circular ducts unchanged, uncheck the Circular diameter.
6.Define value range for shape and velocity based on their specific requirements for minimum and maximum values.
Note: To set a fixed value instead of a range, enter identical values for min. and max.
7.Click Resize.
•Check the feedback for results - if it says that nothing was resized, then your routes already fit in the limits set in the Duct Size Optimizer
•If the Resize button is grey, you have no selected or no editable routes