Use this workflow to import 3D model elements from Revit RVT files, placing them as a Hotlink in your project. The resulting GDL objects use the precise geometries and properties, including true surface colors, of the imported elements. The “Discipline” view filter set in Revit is also correctly recognized.
Use the same workflow to place an RVT Hotlink as any other hotlink.
1.In the Floor Plan: Use File > External Content > Place Hotlink.
2.In the appearing Place Hotlink dialog box, click Select Module.
3.From the New Module pop-up button, click From File or From BIMcloud
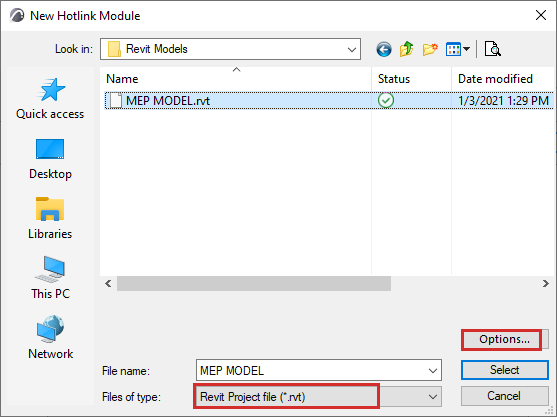
4.The New Hotlink Module dialog appears: Browse for an RVT type file.
6.The RVT 3D Geometry Hotlink Options dialog appears. Here, customize the import options:
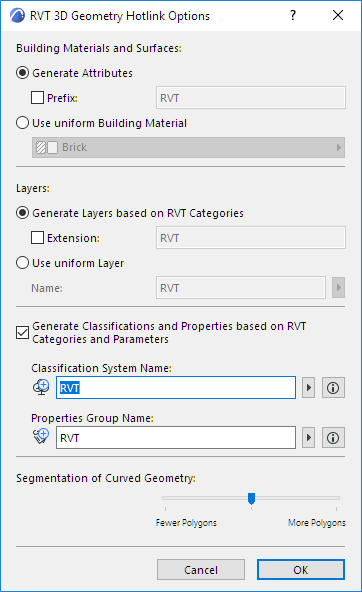
Building Materials and Surfaces
Choose one of these two options for handling imported Revit Building Materials and Surfaces.
•Generate Attributes: Adds each Revit surface and material to your project as Surface and Building Material attributes, with an optional prefix to distinguish them in the project attribute lists.
•Use uniform Building Material: Converts all Revit surfaces and materials to a single Building Material. In this case, click the pop-up to choose a Building Material from the Archicad project. All generated Library Parts will use the selected Building Material. (Choose this if you want to avoid increasing the number of project attributes.)
Choose one of these options for creating Layers for imported Revit Objects:
•Generate Layers based on RVT Categories: Places Objects onto Layers that correspond to Revit Categories. Use an optional extension to distinguish these Layers in the project’s Layer list.
•Use uniform Layer: Places all imported Objects onto a single Layer. Enter a Layer name in the field. (If such a Layer already exists in your project, that Layer will be used; otherwise, a new Layer is created.)
Classifications and Properties
Check the box if you want to Generate Classifications and Properties based on RVT Categories and Parameters.
Revit Parameters (textual, numeric, and True/False only) are imported as Properties, in a Property Group using the name you define below.
•Classification System Name: Revit Categories are imported as a Classification System, using the name you define here. (All Categories of the Revit project are recreated in your project - not just the ones assigned to the hotlinked content.)
The Classification System name will also use the Properties Group name you define below (e.g. RVT). Its Version is the version number of the RVT file format you have placed. (After import, you can see this data in Classification Manager.)
•Properties Group Name: The imported parameters will be added to your project as a Property Group, using the Properties Group name you enter here (e.g. RVT). (After import, you can see this data in Property Manager.)
Note: After hotlink, it is recommended to merge (copy) the newly added Classification System and its Properties into the host file, in Classification Manager and Property Manager.
Segmentation of Curved Geometry
Use the slider to set the level of geometric detail (polygon segmentation) at one of three levels. The more polygons, the larger the resulting object. It is recommended to keep this setting in the middle. If the object is too large, use Fewer Polygons. If the result is too segmented and rough, use More Polygons.
7.Click OK to return to the New Hotlink Module, then click Select.
8.The RVT 3D Geometry View dialog appears.
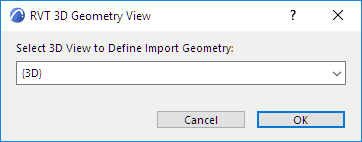
Choose a Revit 3D view (if there is more than one) from which to import the model elements. GDL objects are created based on the content of the selected view. Only Revit objects created in a 3D view of Revit can be imported.
9.Click Select to return to the Place Hotlink dialog. The RVT file you selected is shown as the module to be placed.
10.For the Elements’ Elevation option, make sure you choose Keep Elevation as in Story Structure of Hotlink Source (as shown below). Otherwise, the imported model may “fall apart” when its elements are placed in a different story structure.
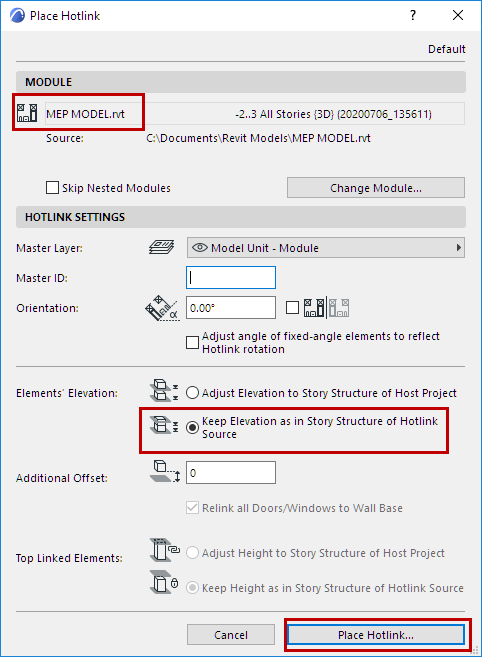
11.Click Place Hotlink.
–Elements of the imported Revit 3D view are converted to GDL Objects.
–The objects are placed into the project’s Embedded Library.
Hint: To view the RVT model file on its own, hotlink the file into an empty project.
For general information on managing Hotlinks, see Hotlink Module Manager.