Use the controls in the View Settings dialog box to adjust the settings of the currently selected view.
Open View Settings from any of the following:
•The tab context menu of the opened view
•The view item’s context menu in the Navigator (or Navigator Palette/Organizer)
•The “Settings” button at the bottom of the Navigator View Map
Get Current Window’s Settings: Click this button to overwrite the settings in this dialog box to correspond to the view currently in effect in the active (frontmost) window.
Note: To redefine only camera and visibility settings: Use the “Get Current Camera and Visibility Settings” in the 3D only panel (see View Settings 3D Only Panel)
View Settings also opens whenever you use the Save View or Save as View commands.
For more information, see Navigator View Map.
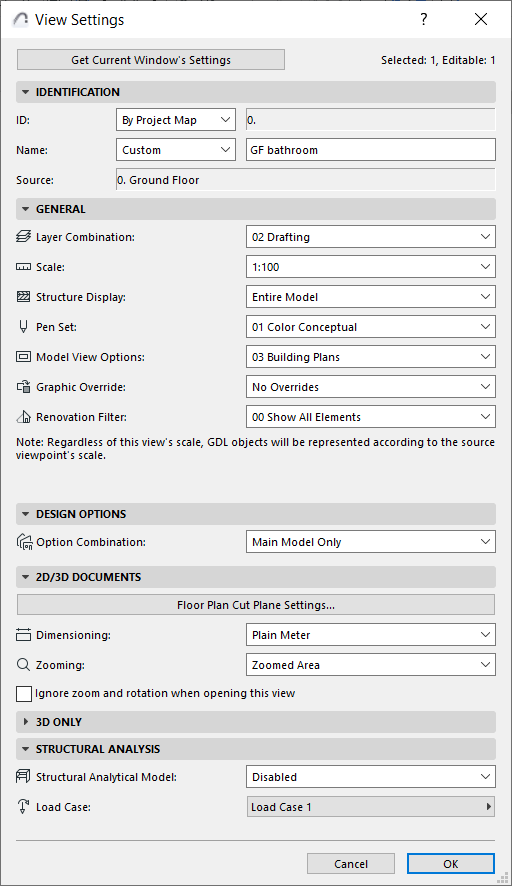
View Settings Identification Panel
•ID: Choose a method for assigning an ID to this view: None, Custom (enter desired ID in adjoining text field), or By Project Map.
“By Project Map” means that the view will inherit the ID from its corresponding Viewpoint in the Project Map.
•Name: Choose a method for assigning a name to this view: either Custom (enter desired name in adjoining text field), or By Project Map.
“By Project Map” means that the view will inherit its Name from its corresponding Viewpoint in the Project map.
•Source: This field provides feedback on the view’s source viewpoint, or the file path of its source file.
•Layer Combination: Choose a Layer Combination to be applied to this view.
For more information, see Layer Combinations.
•Scale: Choose a Scale to be applied to this view.
For more information, see Scale.
•Structure Display: Choose a Partial Structure Display setting for this view.
For more information, see Partial Structure Display.
If this pop-up is gray: This means that the original viewpoint is either Manual Update or Drawing, so you can’t edit the Partial Structure Display of this view. You can change the viewpoint to Auto Update, or else create a new view using the Partial Structure Display setting you need.
•Pen Set: Choose a Pen Set to be used with this view.
For more information, see Pen Sets.
•Model View Options: Choose a Model View Option Combination to be applied to this view.
For more information, see Model View Options.
•Graphic Override: Choose a Graphic Override Combination to be applied to this view.
For more information, see Graphic Override Combinations.
If this pop-up is gray: This means that the original viewpoint is either Manual Update or Drawing, so you can’t edit the Graphic Overrides of this view. You can change the viewpoint to Auto Update, or else create a new view using the Graphic Override setting you need.
•Renovation Filter: Choose a Renovation Filter to be applied to this view.
For more information, see Renovation.
If this pop-up is gray: This means that the original viewpoint is either Manual Update or Drawing, so you can’t edit the Renovation Filter of this view. You can change the viewpoint to Auto Update, or else create a new view using the Renovation Filter you need.
View Settings Design Options Panel
Choose a Design Option Combination for this view.
See Working with Design Option Combinations
View Settings 2D/3D Documents Panel
Floor Plan Cut Plane Settings
Click this button to access the Floor Plan Cut Plane Settings dialog box. Any adjustments to these settings will be applied to this view only, not to the project as a whole.
For more information, see Floor Plan Cut Plane (Global Setting).
Dimensions
Choose a Dimensioning standard from this pop-up menu. The standard you choose here will be applied to this view only, not to the project as a whole.
For more information, see Dimensions Preferences.
Zooming
Choose a zoom to save with this view:
Note: A view’s saved Zoom value includes the Pan and the Oriented View (rotation), if any.
• Current Zoom: The view will save the current zoom as part of its settings.
Note: Once a view is saved at “Current Zoom,” that setting is henceforth called Zoomed Area in this pop-up list.
•Fit in Window: Whenever you open this view, or whenever drawings from this view are updated or published, they will be displayed to include the project window’s entire contents, subject to Layer status
•any custom-named Zoom you have saved earlier.
See Save Zooms.
For more information, see Zoom.
Ignore zoom when opening this view
If this box is checked, then whenever you open this view, it will be displayed using the zoom value of the last opened window (not the saved zoom of this view). However, the saved zoom level of this view will still be applied when you place this view as a Drawing, or publish it.
Note: A view’s saved Zoom value includes the Oriented View (rotation), if any.
Use this panel to set the view’s 3D-related data: image type and size, camera settings, and visibility settings.
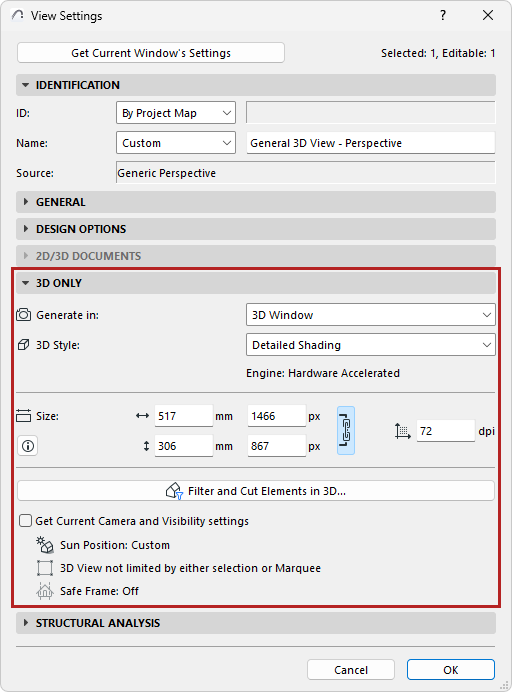
Generate in: Generate in the 3D window or the PhotoRendering window.
•For 3D window: Choose a 3D Style (see 3D Styles). The engine used by the selected 3D Style is also shown here.
•For Photorendering: Choose a Rendering Scene (see Select and Manage Rendering Scenes). The current PhotoRendering engine is also shown here.
Size: View or edit the size of a rendered view. You can lock the aspect ratio to edit sizes without affecting the proportions.
Notes:
–Print size units use the Layout Units selected at: Working Units
–Maximum pixel size is 32.000 in either direction
Resolution: Adjust the view resolution in DPI as needed.
Filter and Cut Elements in 3D...
See Filter and Cut Elements in 3D Dialog Box
Get Current Camera and Visibility settings
This section provides feedback on the saved sun position and visibility settings of this 3D view:
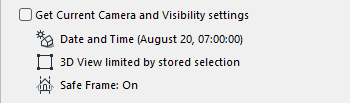
•What are the view’s camera and sun positions? (see 3D Projection Settings)
•Is the 3D view filtered or limited by a marquee?
•Is Render Safe Frame applied? (see Render Safe Frame)
If needed, check the box to “Get Current Camera and Visibility settings”. This will:
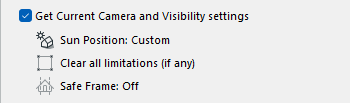
•Overwrite the saved camera position, sun position, and visibility settings
•Replace the settings with the settings of the current (frontmost) window.
Image size is not affected.
View Settings Structural Analysis Panel
•Structural Analytical Model: Enable or disable the Structural Analytical Model for this view.
•Load Case: Choose the visible Load Case for this view.