Automatic Exterior Dimensioning
Use this function to add automatic associative linear Dimensions to selected Walls or Curtain Walls on the Floor Plan.
- On the Floor Plan, select the Walls or Curtain Walls to be dimensioned.
Go to Document > Annotation > Automatic Dimensioning > Exterior Dimensioning. Set the desired options.
- Define the direction of the dimension lines. Do this in one of two ways:
- Click with the hammer cursor to place the dimension line(s).
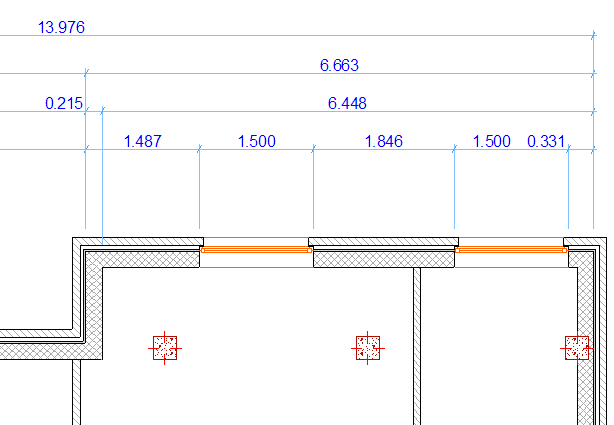
Automatic Dimensioning will automatically place the dimension lines (up to four types) depending on the options you have chosen in the dialog box. If any of these dimension lines are unnecessary (e.g., there are no openings, or the facade is straight), it is ignored.
The display of automatic dimensions depends on the options chosen in Dimension Tool Settings.
Automatic Exterior Dimensioning Dialog Box
Open the dialog box from Document > Annotation > Automatic Dimensioning > Exterior Dimensioning.
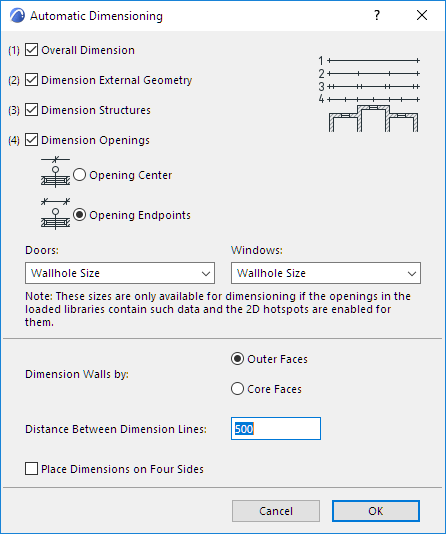
Check one or more Dimension options to use:
Overall Dimension
A single dimension line that runs the length of the selected element set.
Dimension External Geometry
The linear dimensions of extruding elements, such as a facade.
Dimension Structures
The linear dimension of the element itself, such as wall thickness
Dimension Openings
Check this box to include the dimensions of openings (doors and windows).
Choose where to place the dimension for openings:
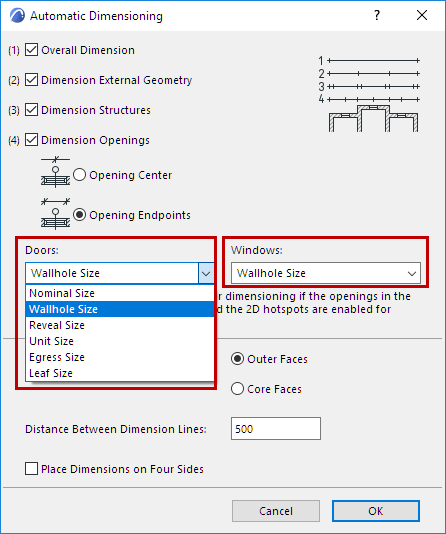
Choose separate dimensioning preference for doors and for windows.
Dimension Walls by
Choose a preference for dimensioning composite Walls.
Distance Between Dimension Lines
Enter a distance using the working units currently set in Archicad.
Place Dimensions on Four Sides
Check this box to automatically place dimension lines on all four sides of the bounding box of the selected elements.