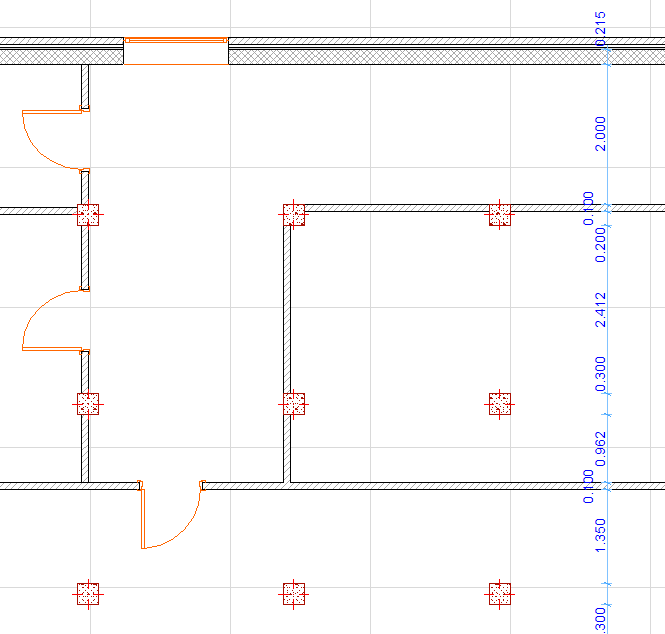
Automatic Interior Dimensioning
Use this function to quickly dimension a set of selected Columns and composite or profile (complex) elements on the Floor Plan.
- Select one or more Columns or Composite/Profile elements to be dimensioned.
- Open the dialog box from Document > Annotation > Automatic Dimensioning > Interior Dimensioning.
- Choose preferred dimensioning options.
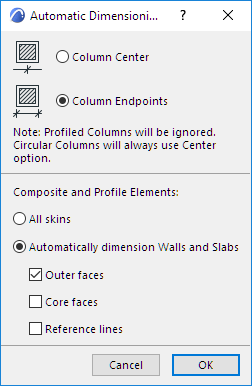
Column Dimension Preference
- Column Center: Dimension the axis of the column
- Column Endpoints: Dimension the endpoints of the column.
Composite and Profile Elements
Choose an option:
- All Skins: Each skin of the composite/profile element is dimensioned separately. (If this is unchecked, a single dimension is applied to the total width of all the skins.)
- Automatically dimension Walls and Slabs: Dimension points are placed at the faces and/or reference lines depending on the options checked below (at least one category must be checked):
- Outer faces
- Core faces
- Reference lines
- Drag the cursor to draw a temporary line across the selected elements to be dimensioned.
- Double-click to finish drawing the line.
- Click to place the dimension chain.