Edit route graphically
For any selected route element: Click an edge, node, or reference line to access pet palette commands.
Adjust Route elements to each other
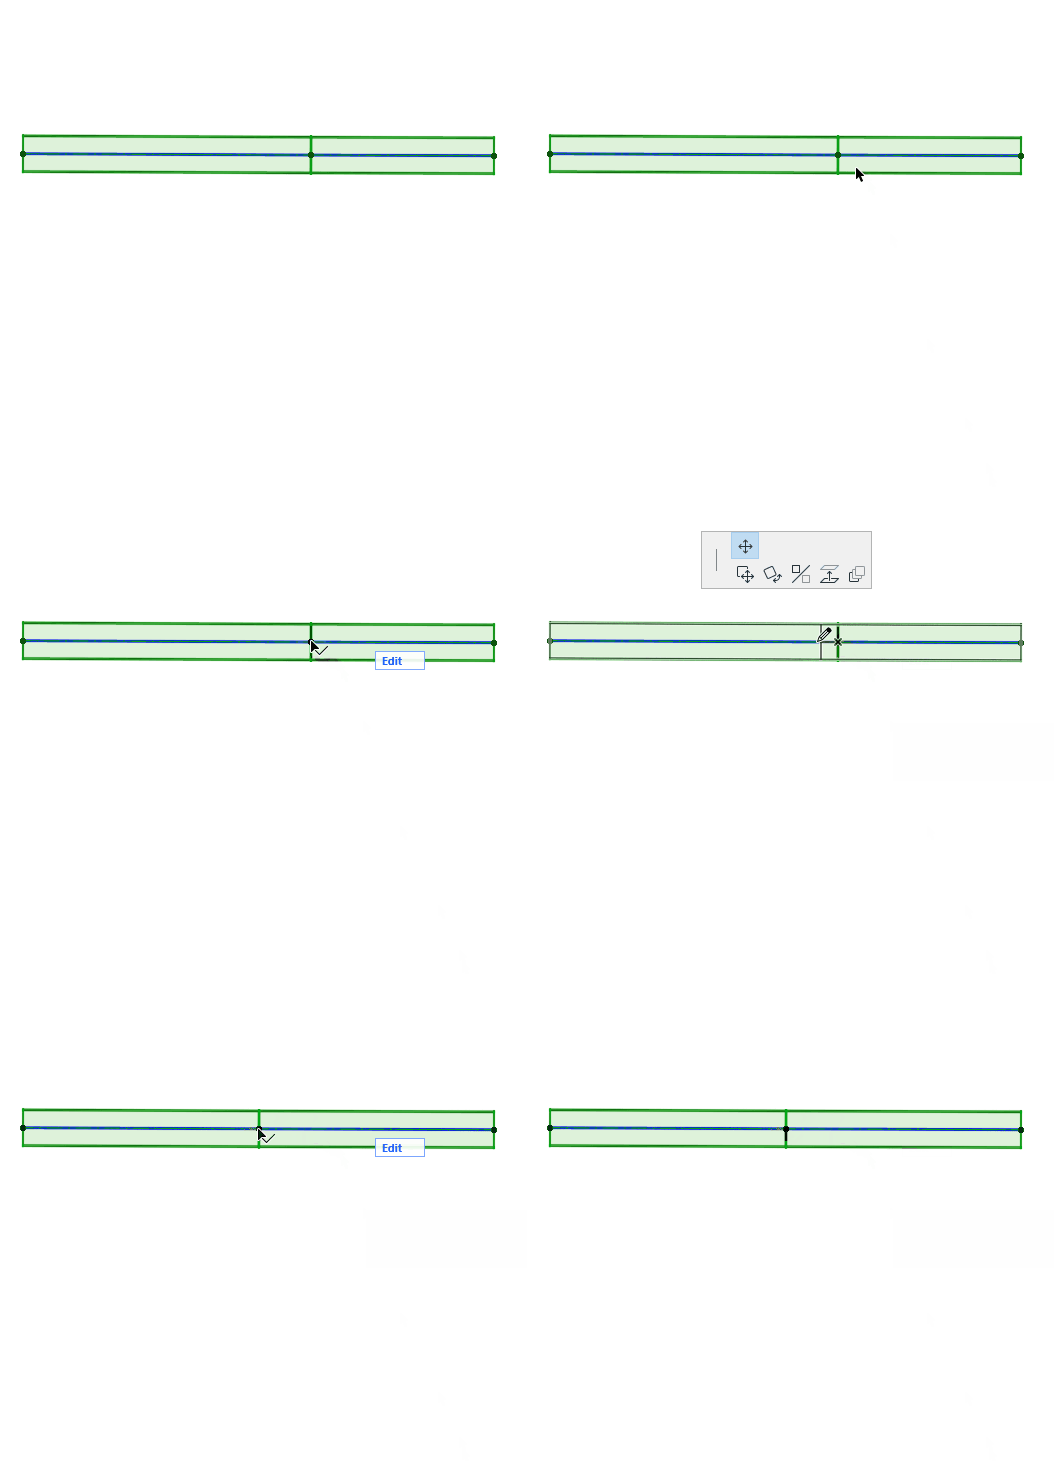
Insert new node
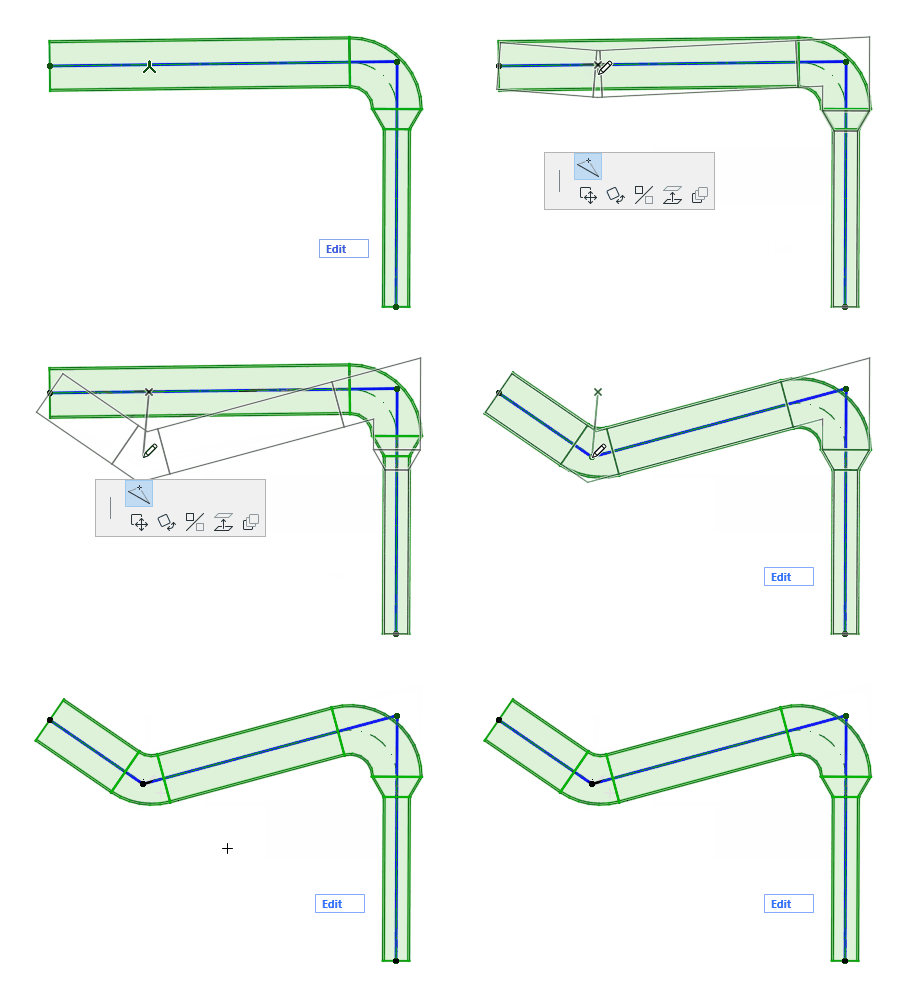
From the reference line:
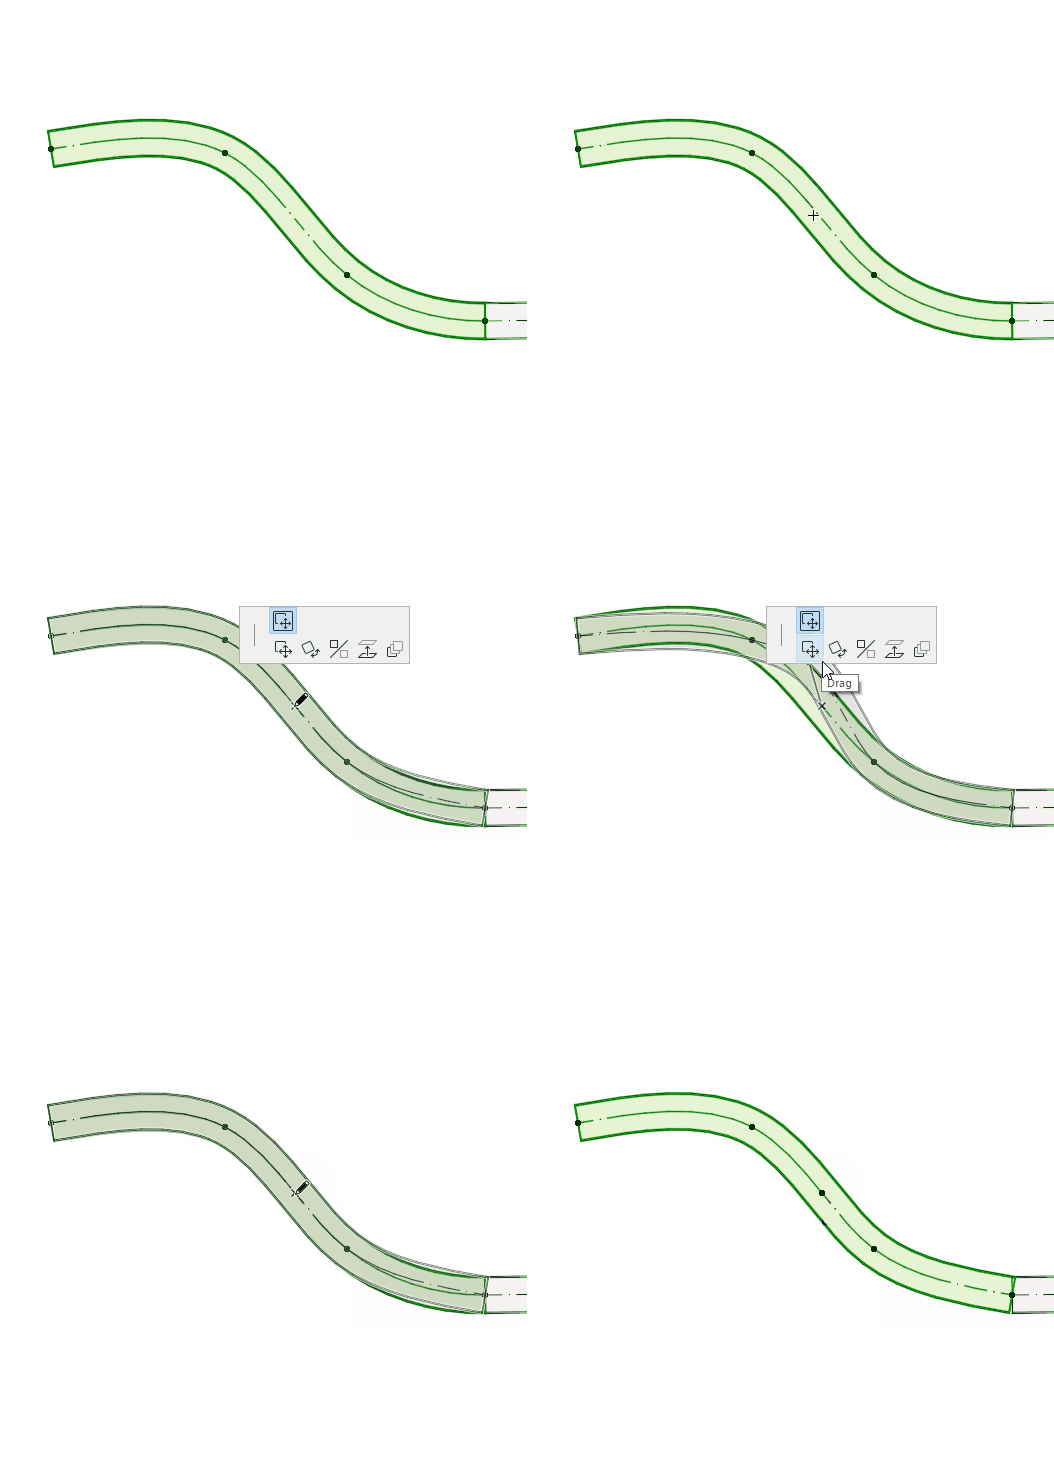
Move node
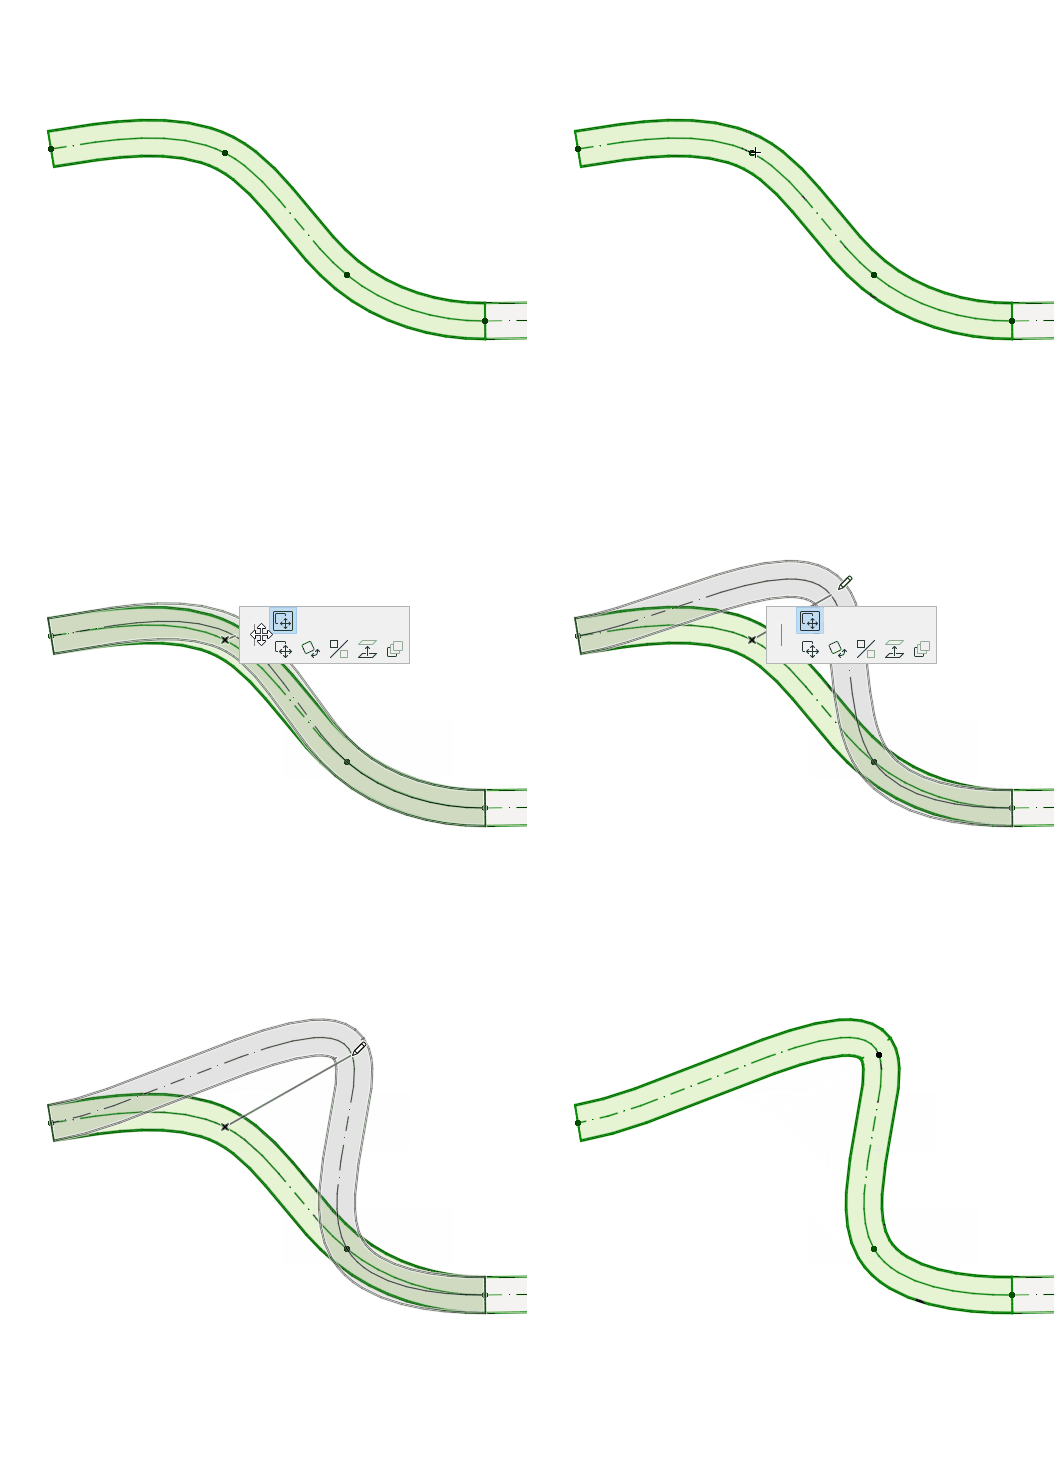
Drag the connection node, or enter values in the Tracker. This modifies the segment length.
Purge unused nodes
- Select one or more MEP routes.
- From the MEP Toolbar, Design menu, or context menu: Click Purge
Unused MEP Nodes.
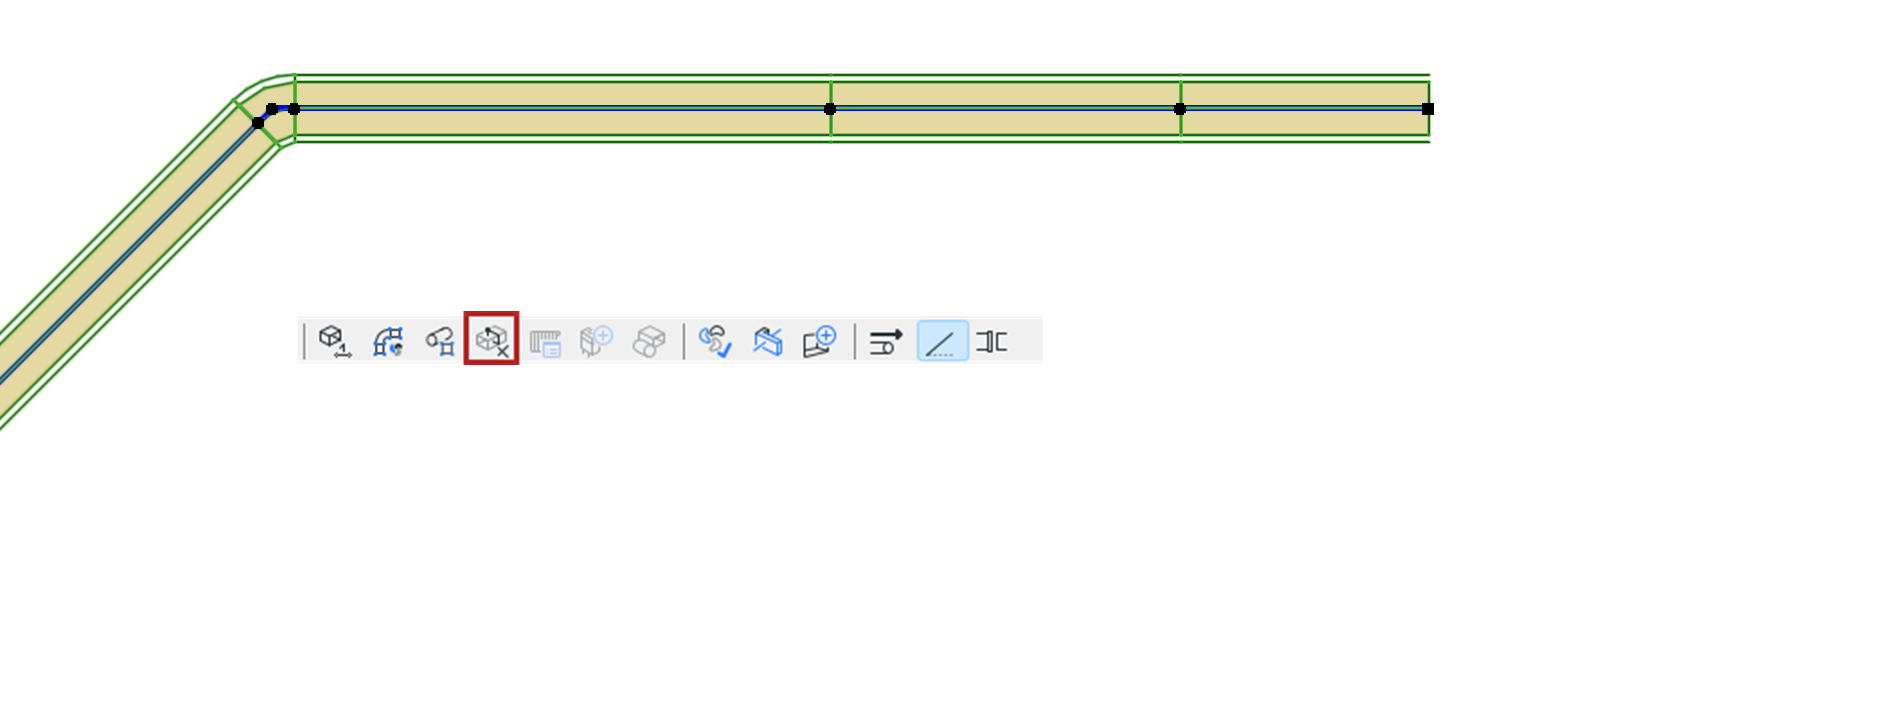
This command deletes all unused nodes in the selected routes - that is, nodes that fall between two segments with the same geometry, which are not used to connect another element.
Elevate Route (Floor Plan)
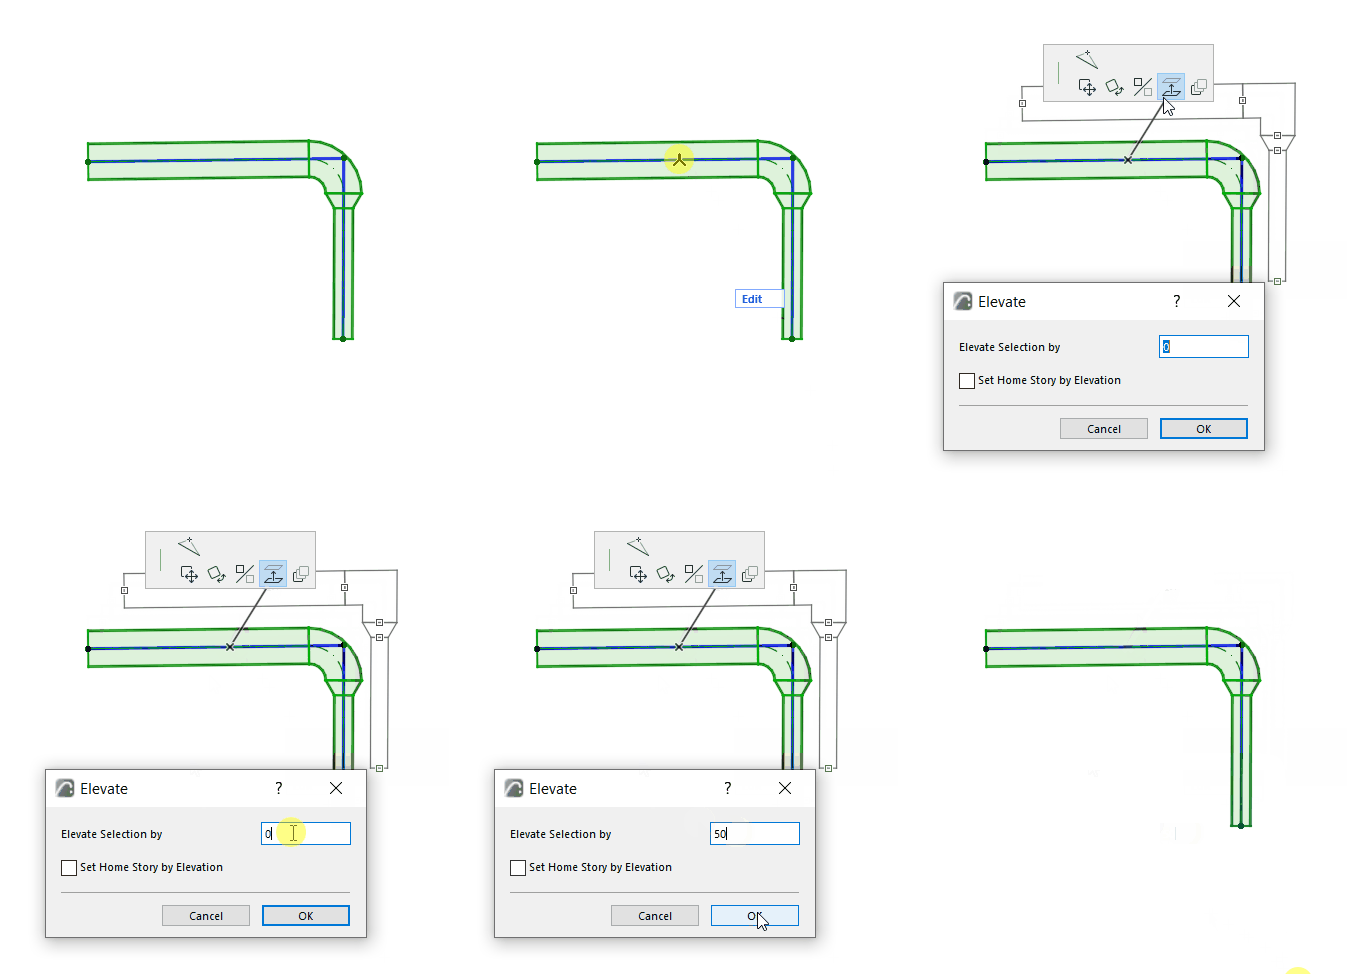
Enter the value by which you wish to elevate the Route.
Elevate Route (3D)
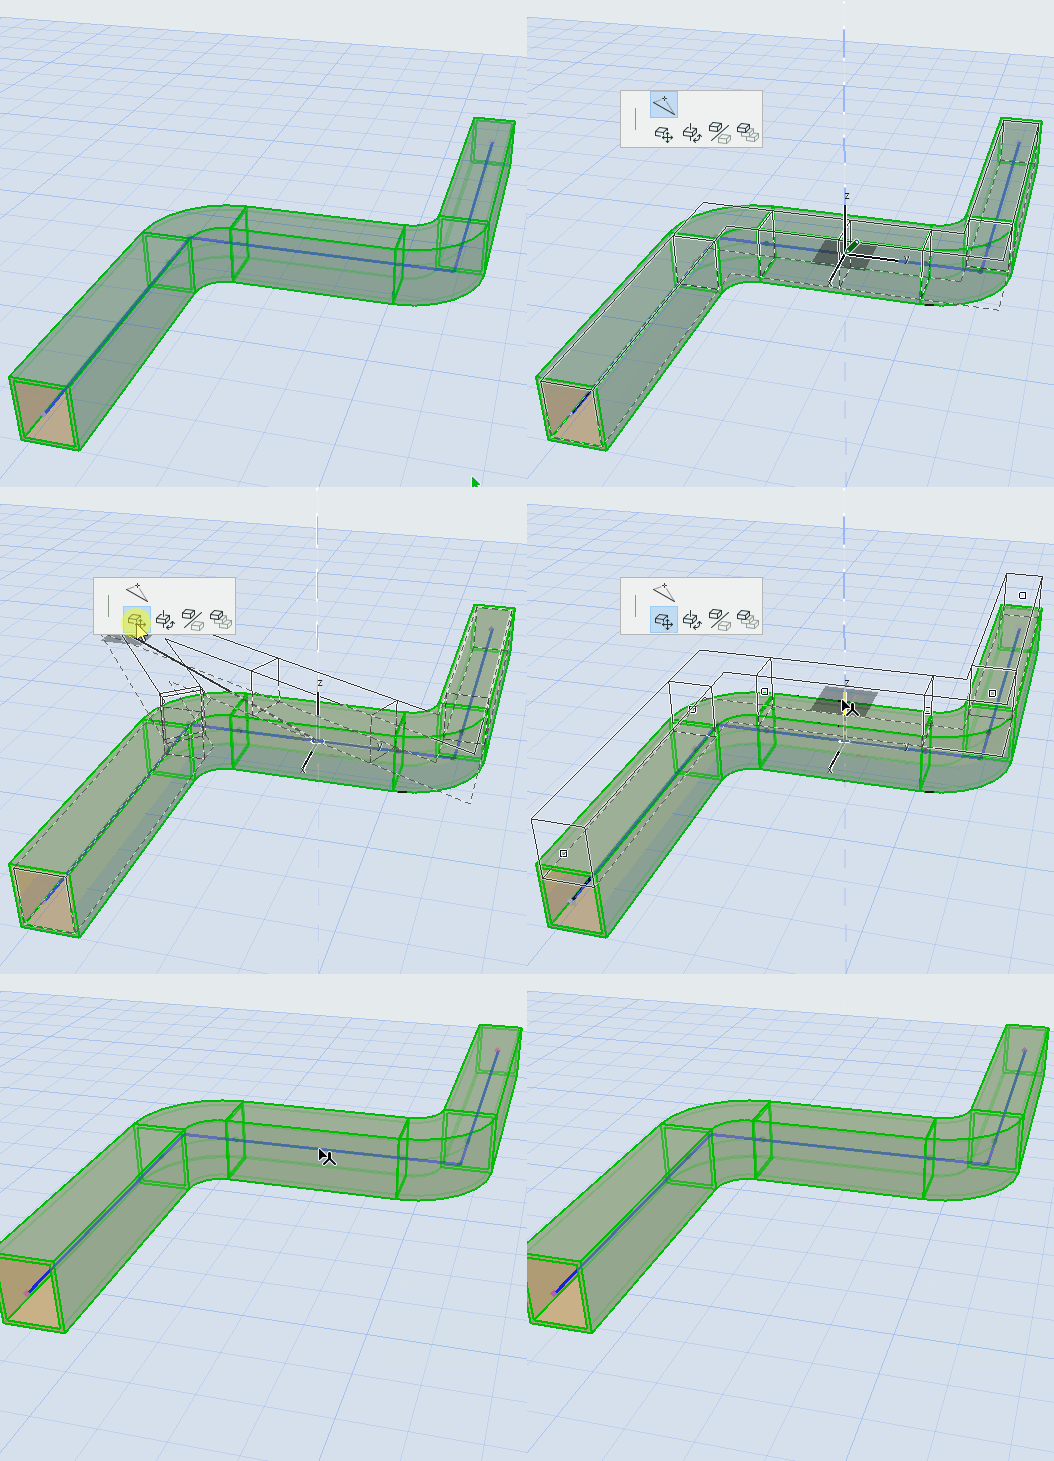
Use the Drag command to change Route elevation on the Z axis.
Continue Route
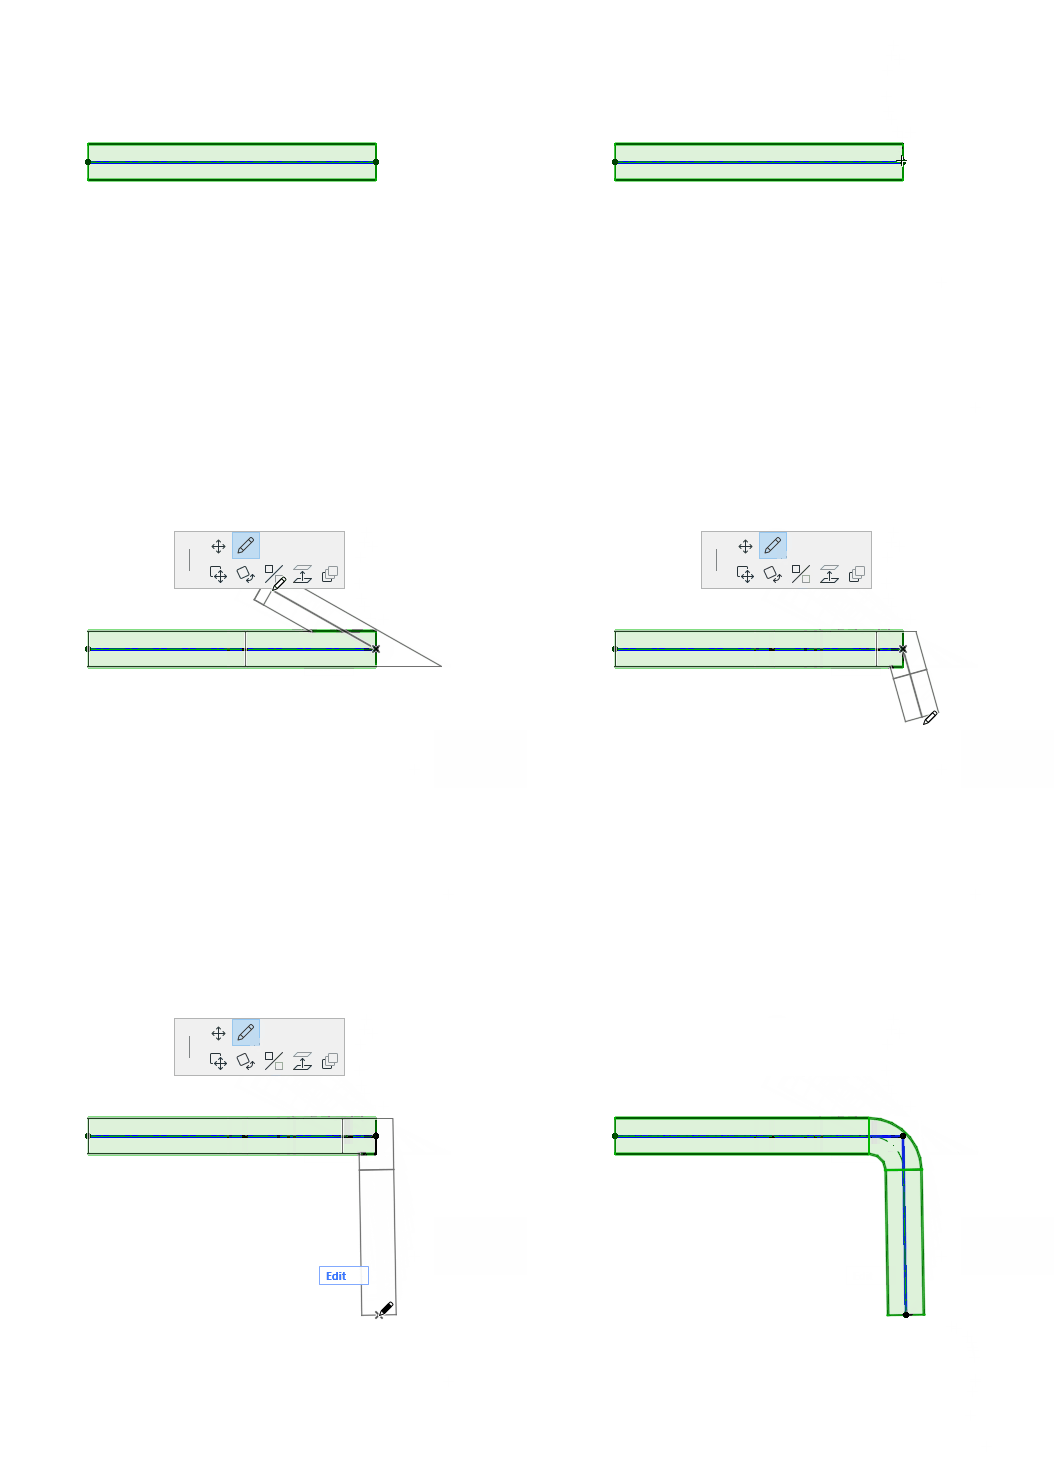
Available at the end of an unconnected straight segment.
Offset Segment
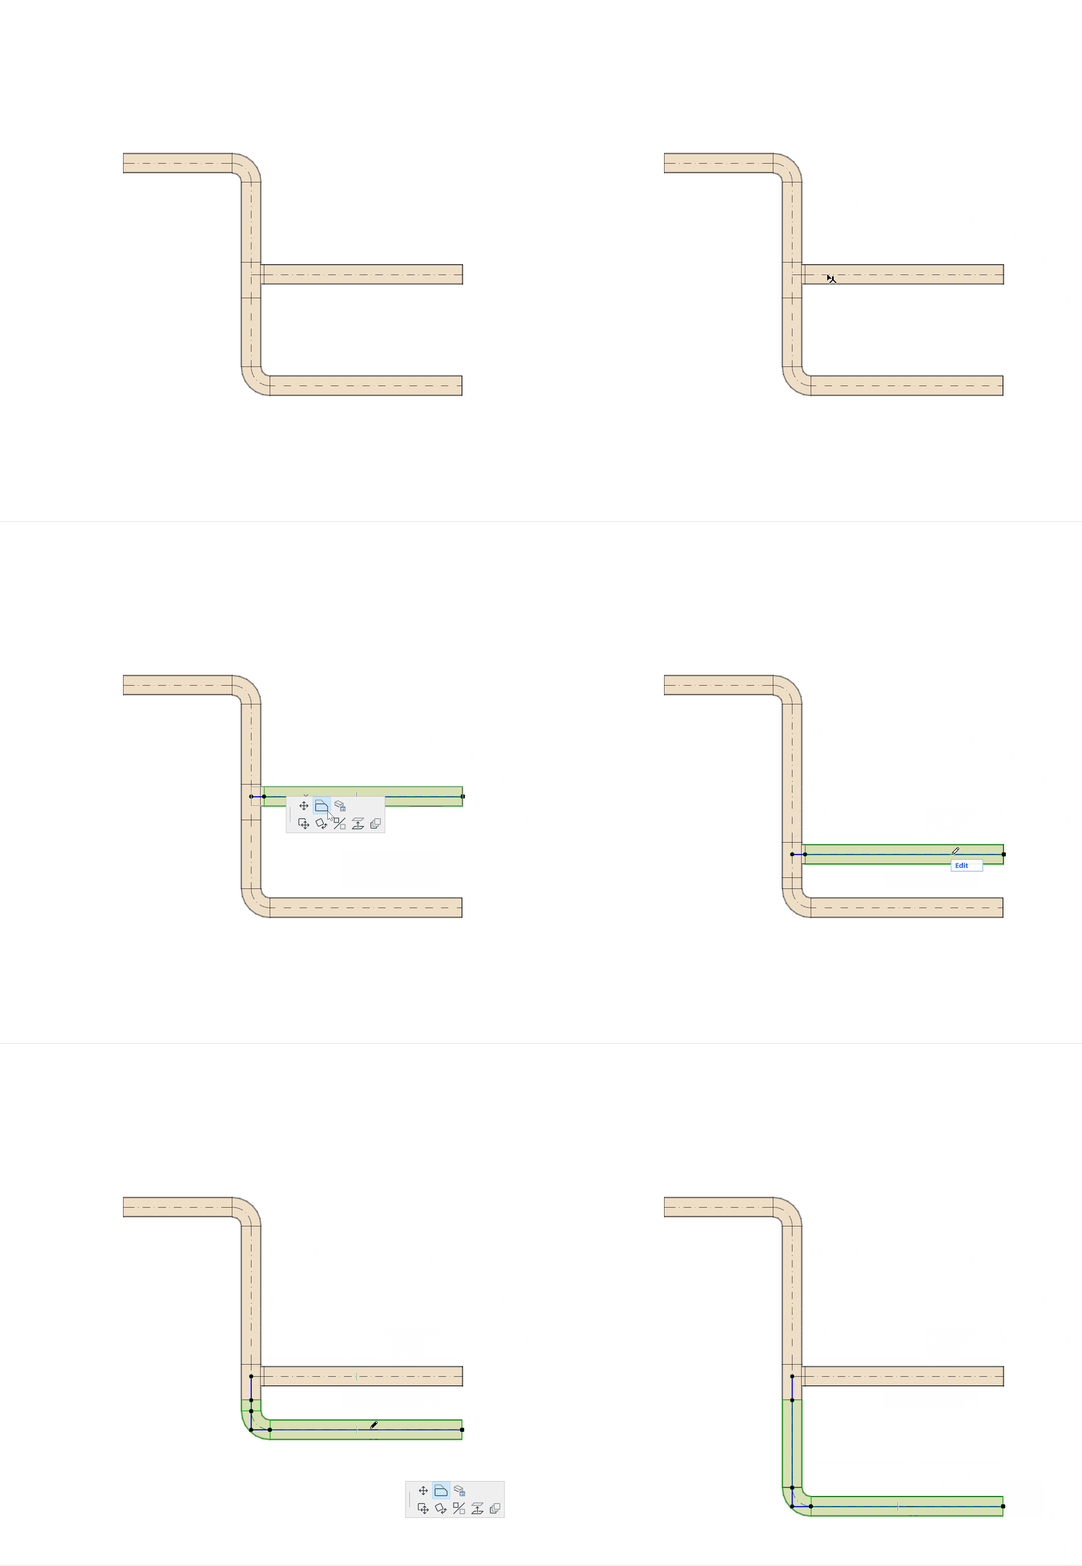
- Select the element.
- Click the reference line.
- From the pet palette, select “Offset segment” to move it.
Any connected elements move together with the segment, and connections are maintained. See also: Move connected routes and elements (Floor Plan)
Split MEP Route
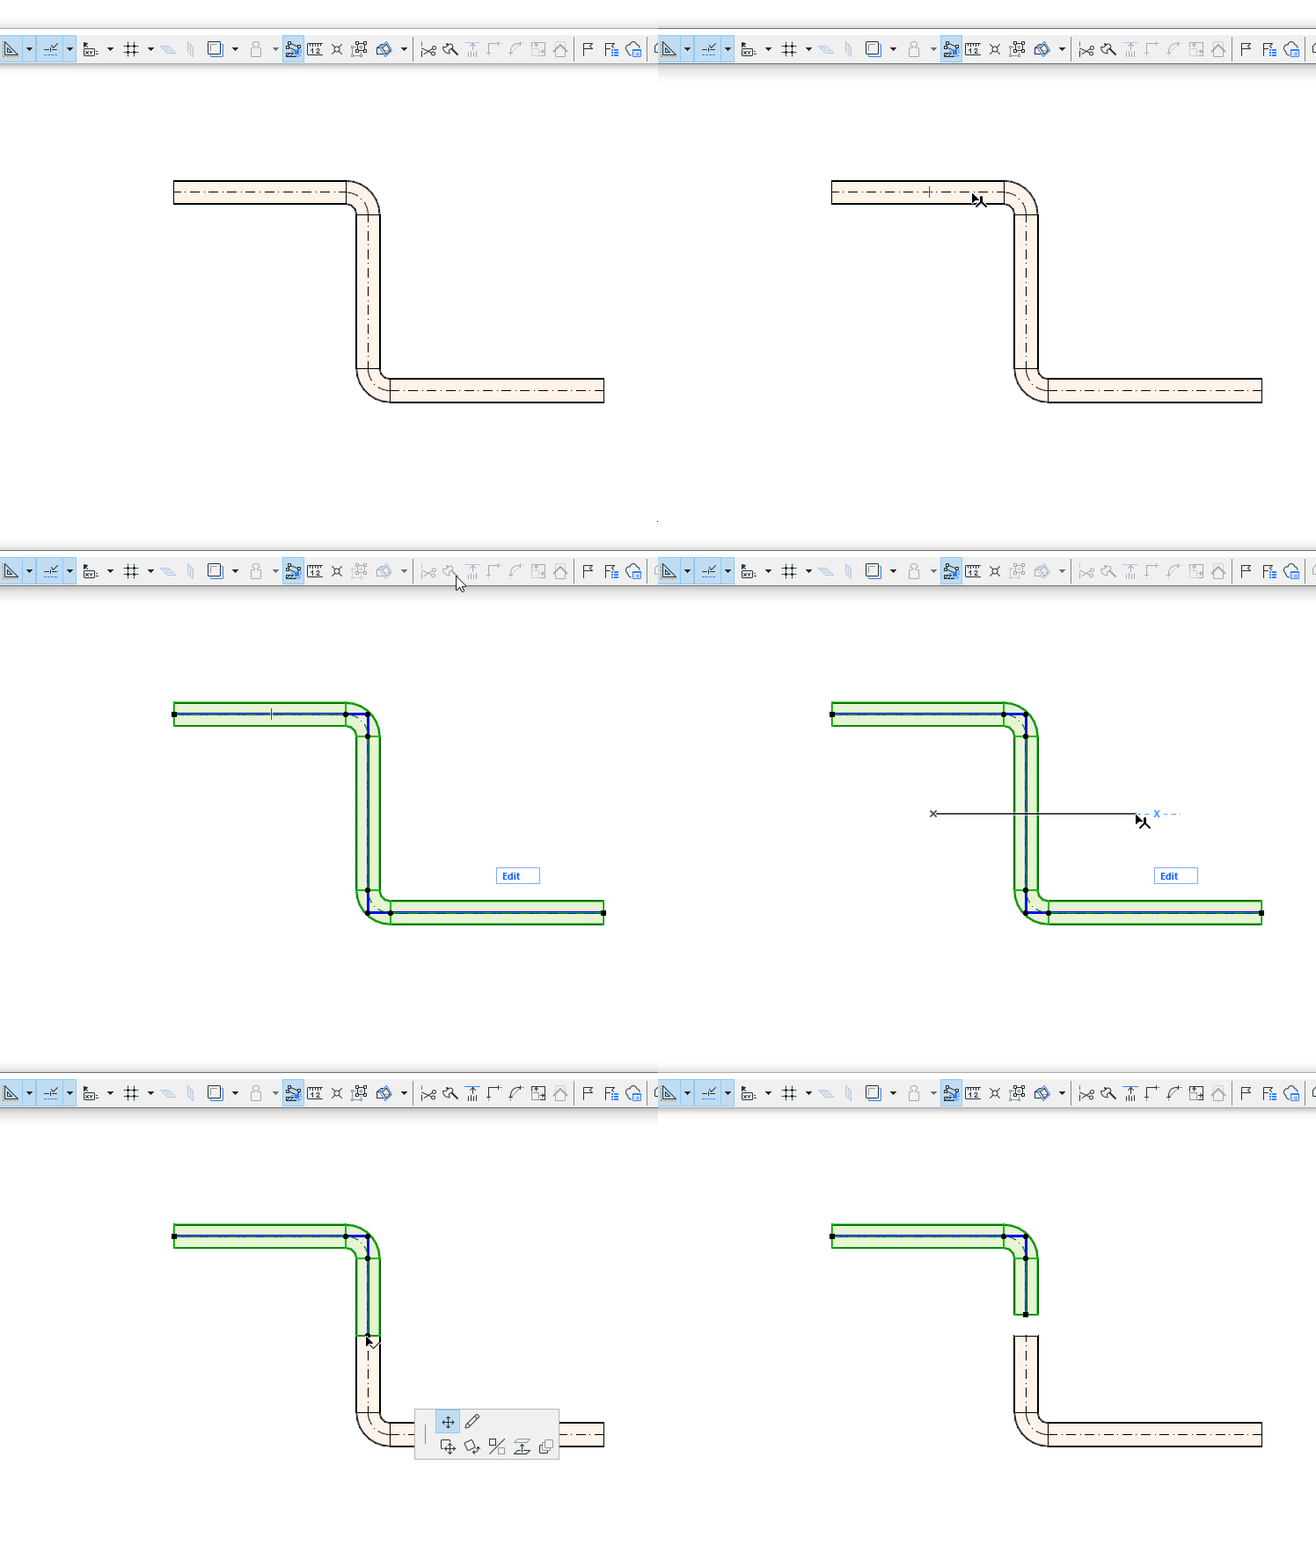
- Select the route you wish to split.
- Choose Edit > Reshape > Split command, or the hatchet icon from the toolbar.
- Draw a temporary splitting line.
- Click on either side of the splitting line/arc with the Eyeball cursor.
- Elements on the clicked side will remain selected, while elements on the other side will be deselected.
Adjust Route elements to each other
You can use the Edit > Reshape > Adjust command to extend or trim MEP route elements to each other.
Or use the Adjust command to generate a branch connection: If or more route elements are adjusted to another of the same type, where a valid connection could form, it will.

See also Adjusting Elements.
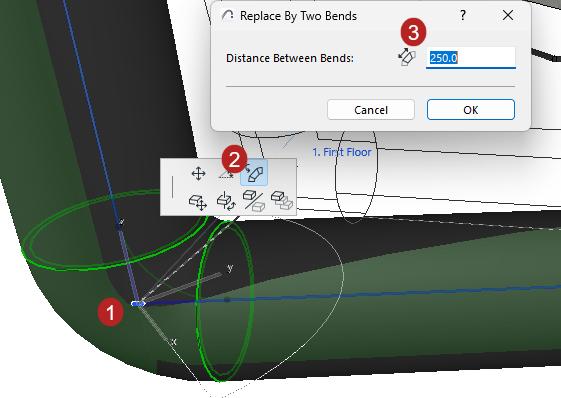
Replace by two bends
Convert an elbow into two separate elbows: