Set an optional Project Preview image to help identify the project
- at File > Open
- in the Start Archicad dialog box
- when browsing for a project in file systems
- Create an image or view to be the Project Preview. Do any of the following:
- Copy any image to your clipboard
- Set up the desired project view
- Create a Rendered view of your project and save the image
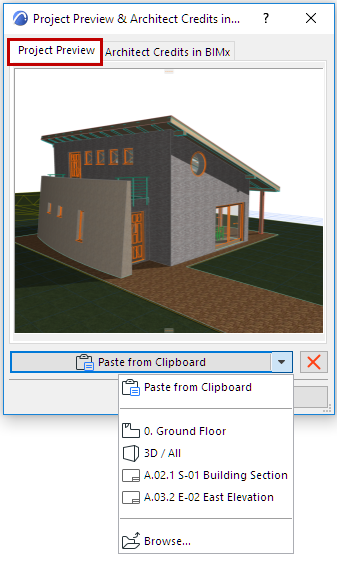
- Go to File > Info > Project Preview & Architect Credits in BIMx.
- Click on the Project Preview tab.
- Use one of these commands to create the desired preview:
- Paste from Clipboard
- From the dropdown list of project tabs, click to select a view
- From the dropdown, click Browse and select a saved image
- Drag & Drop a saved image file
- Any size and resolution image can be used.
- If you drag and drop, make sure the image is in JPEG format.
On Windows:
Project Preview image serves as the icon for the project file in Windows Explorer, replacing the standard Archicad icon.
On Mac:
The model’s preview picture is visible in the Finder in the following locations:
- Finder window (Icon view)
- Finder window (Cover Flow view)
- Get Info window preview
- Quick Look window appearing for multiple selected elements (Thumbnail view)
Related Topic:
Architect Credits in BIMx
Read more